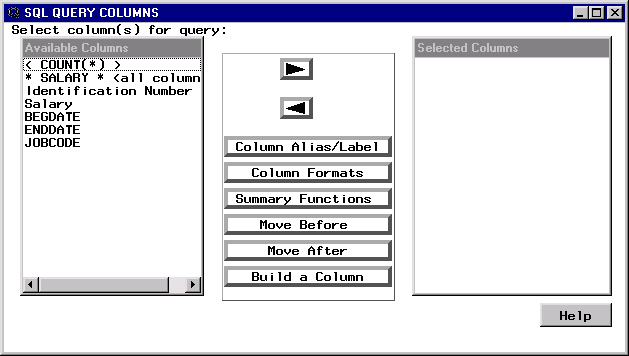
Performing Simple Queries
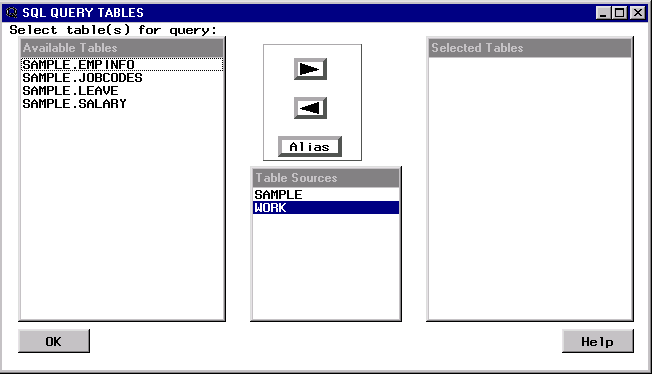
Selecting a Table
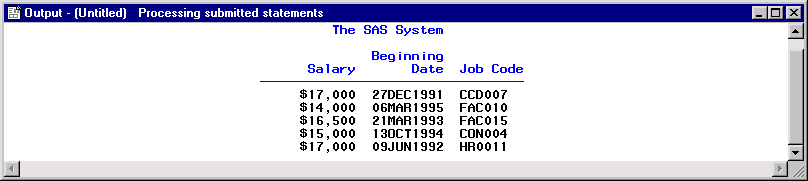
First, you will analyze the relation between salary
level, position, and hire date. Select SAMPLE.SALARY from the Available Tables list.
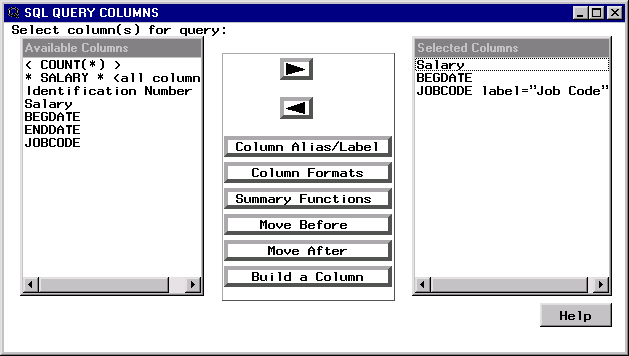
Alias Names and Labels
To create more descriptive labels for JOBCODE and BEGDATE,
select JOBCODE from the Selected Columns
list. Select Column Alias/Label to assign
a new label to the JOBCODE column.

Column Format
To modify the format of the BEGDATE column, select BEGDATE from the Selected Columns list. Select Column Formats to specify the format in which the beginning
dates are presented.
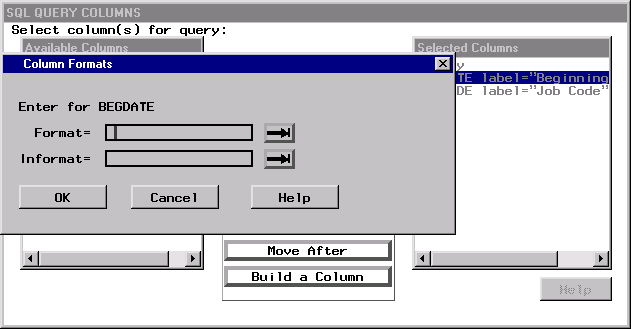
specifies the form
in which the column data is displayed. You can enter a format, or
select the right arrow to see a list of valid formats. When you select
a format, a formatted example appears, along with its width range,
default width, default decimal, and name. You can either accept the
default width and decimal values, or you can specify your own values
in the Width field.
specifies the form
in which the column data is read by other SAS procedures if you create
a table or view from the query. You can enter an informat, or you
can select the right arrow to see a list of valid informats. When
you select an informat, a formatted example appears, along with its
width range, default width, default decimal, and name. You can either
accept the default width and decimal values, or specify your own values.

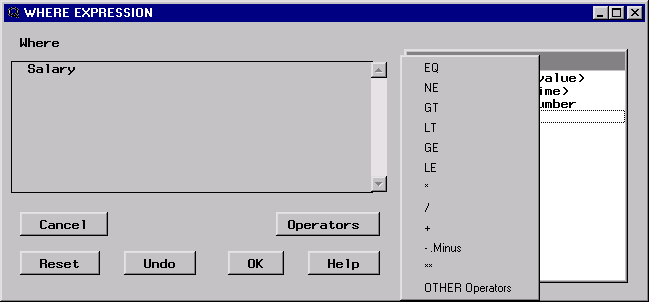
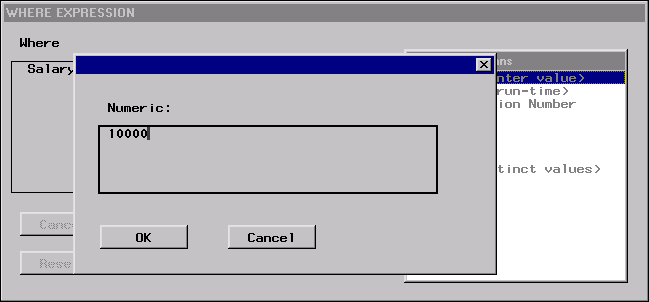
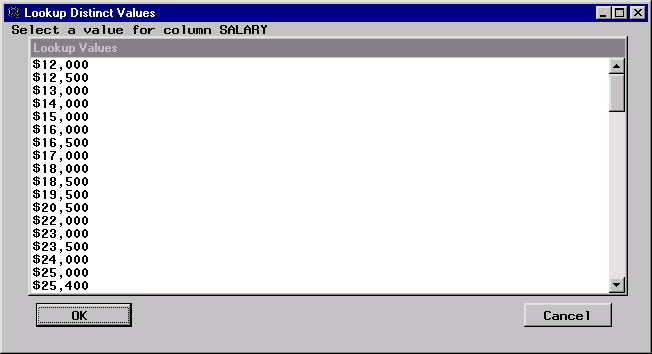
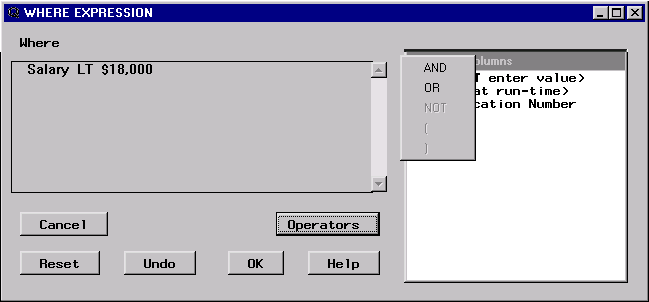
Creating a WHERE Expression
Overview of Creating a WHERE Expression
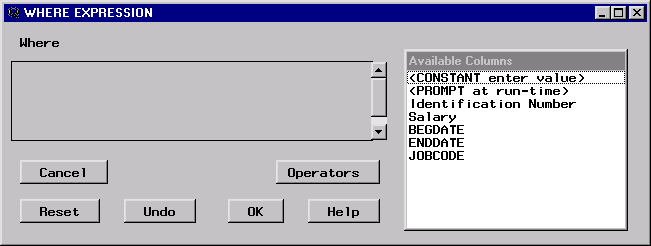
Available Columns
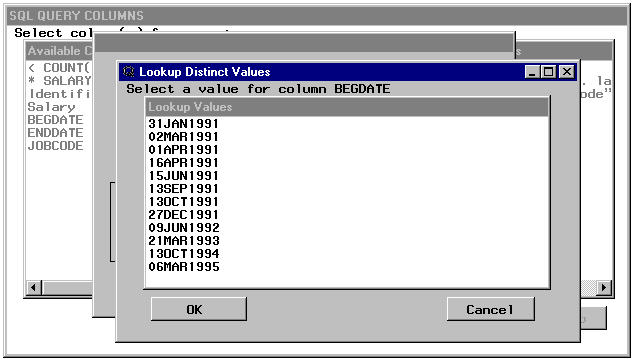
Run-Time Prompt
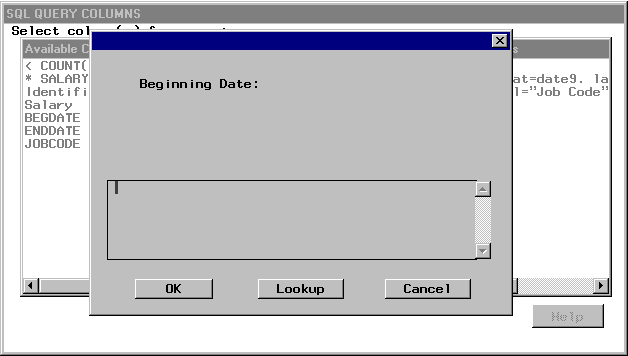
Running Your Query
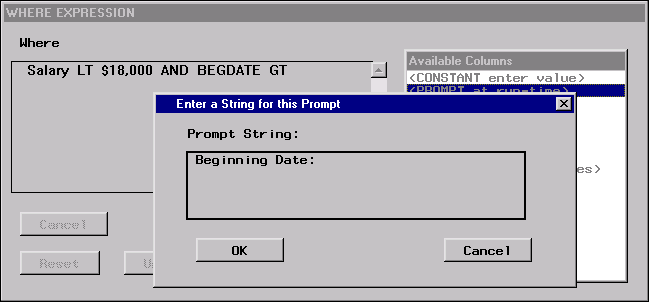
The Prompt at Run Time
window appears, with the
Beginning Date: prompt
that you specified in the WHERE expression.