Tunnels
Usually when you create a compound block you have some specific functionality you want your group of blocks to perform, and you connect them in a very specific manner. You also know which blocks require inputs from outside of the compound block and which blocks pass output from the compound block. That is, you know which ports you are going to use as input ports and which ports you are going to use as output ports for the compound block to make it function as designed. Additional connections could potentially alter the desired functionality of your compound block in unpredictable ways.
Simulation Studio provides a feature called a tunnel to facilitate input and output for a compound block. You can think of tunnels as special ports for a compound block. Blocks (and their ports) located outside the compound block that need to send information to the compound block connect to input tunnels defined on the compound block. Similarly, blocks expecting information from the compound block connect to its output tunnels. Blocks internal to the compound block that need connections outside the compound block also connect through tunnels. You add or remove tunnels for a compound block using the Add/Remove Tunnels dialog box (Figure 7.3) available through the pop-up menu on a compound block. This dialog box provides options for creating various types of ports on a compound block. You can also edit the default name given to a tunnel to something more meaningful for your compound block. The name cannot contain spaces.
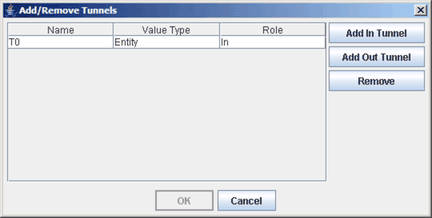
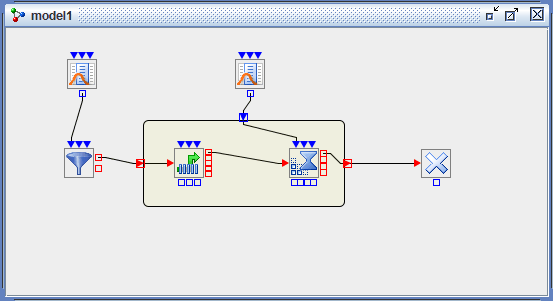
Figure 7.4 depicts a compound block with an input entity tunnel, an output entity tunnel, and an input value tunnel. The placement of the various tunnel types around the compound block is automatic and is analogous to that of ports on basic blocks. The graphic used to depict a tunnel is a combination of the graphics used for an input port and output port because the tunnel serves both functions depending on whether your perspective is from inside the compound block or outside it.
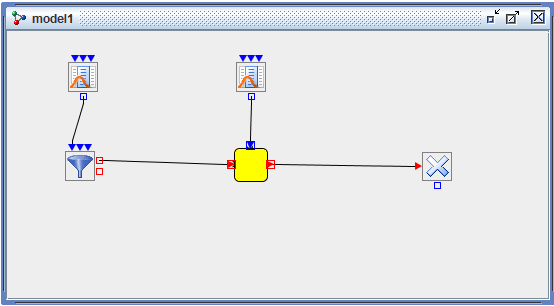
If you collapse the compound block, as shown in Figure 7.5, the compound block appears much the same as a basic block. A compound block can be treated essentially as a "black box" in terms of functionality.
If a compound block is disassembled, the tunnels turn into Connector blocks so that no functionality is lost in the simulation model. Figure 7.6 shows the result of disassembling the compound block in Figure 7.5.