The PM Procedure

In the Gantt View, activity schedules are depicted by horizontal bars. There is one bar for each of the early, resource, actual, and baseline schedules. For the Early Schedule bar, critical activities are marked in different colors from the noncritical activities. Weekends are marked by shaded vertical rectangles running through the chart. Supertasks are differentiated from leaf activities by anchoring vertical cones at the ends of their Early Schedule bars.
The Gantt View is displayed with a rectangular grid that can be turned on or off by selecting from the pop-up menu (see Figure 5.12) that is displayed by right-clicking anywhere outside of the schedule bars in the Gantt View.

The pop-up menu in the Gantt View also enables you to toggle the display of the Actual, Resource, or Baseline Schedule bars. Note that these bars can be displayed in the Gantt View only if the project data contain the actual, resource-constrained, or baseline schedules, respectively.
In addition to displaying the activity schedules in an easy-to-view format, the Gantt View in the PM window can also be used to change the durations of the activities, add or delete precedence constraints, set activity alignment constraints, set progress information, and provide access to calendar, precedence, and resource information.
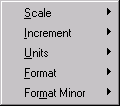
You can also change several of the display attributes of the Gantt View by using the Time Axis pop-up menu (see Figure 5.13) to set the scale of the axis, format the time axis labels, set the units of display, and so forth. All of these tasks are described in the following sections.
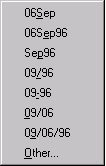
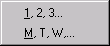
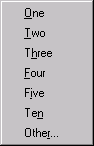
The format of the major axis can be changed by right-clicking on the header row of the Gantt View and selecting for the major axis. For the minor axis, select Some example selections available for the formats are shown in Figure 5.14 and Figure 5.15. In addition to the formats explicitly listed for the major axis, you can specify any valid numeric format by selecting and filling in the appropriate fields in the dialog box that is opened as a result.
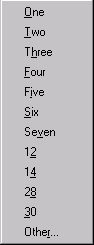
Increments in the Gantt View define the number of tick marks on the minor axis per tick mark on the major axis. They can be changed by right-clicking on the header area and selecting from the pop-up menu. The available selections are shown in Figure 5.16.
Move the pointer to a tick mark on the major axis in Gantt View. The pointer changes to a double arrow. Drag the tick mark horizontally to change the scale. You can also change the scale by using the Scale pop-up menu (see Figure 5.17) from the Time Axis pop-up menu.
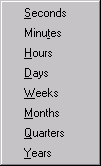
The Time Axis Units in the Gantt View can be changed by right-clicking on the header bar in the Gantt View and selecting (see Figure 5.18). The default value of the units used for display is based on the specification of the INTERVAL= parameter in the invocation of the PM procedure.
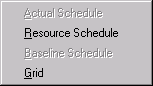
A display/hide switch for a given schedule can be toggled by right-clicking in the main panel of the Gantt View and selecting the desired schedule (see Figure 5.19).
You can display detailed information for an activity by right-clicking any of its schedule bars and selecting from the resulting pop-up menu (see Figure 5.20).

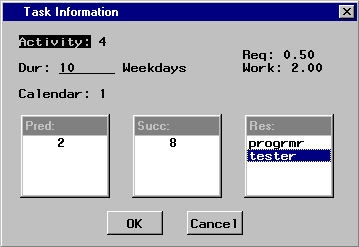
The ensuing Task Information dialog box (see Figure 5.21) displays the job number, duration, duration units, a list of predecessor activities, and a list of successor activities, as well as applicable calendar and resource information for the selected activity. You can also edit the activity duration from the Task Information dialog box.
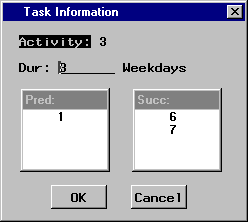
If any calendars have been defined to the project, the activity calendar is also displayed. If the project utilizes any resources, there is a list box that lists the resources required by the activity (see Figure 5.22). Selecting a resource from this list box displays the quantity required by the activity in the Req field. Furthermore, if the selected resource drives the duration of the activity, then the appropriate work value is also displayed in the Work field.
An activity’s Early Schedule bar can be moved using the left mouse button. When the pointer is positioned over the activity bar, it changes to a cross-hair type. You can then drag the bar horizontally to a new position. This sets an alignment constraint of type 'SGE' for the selected activity with the align date corresponding to the one at the left edge of the bar’s new position. Other types of alignment constraints can be entered by editing the Target Date and Target Type columns as described in Edit Alignment Constraints.
You can modify the duration of an activity in several ways. In the Gantt View, you can enter it directly by using the Task Information dialog box as described in Display Task Information, or change it indirectly by altering the width of the schedule bar. To change the duration of an activity, point to the right edge of the activity’s Early Schedule bar, and drag to the left or the right depending on whether you want to decrease or increase the duration. You can also edit activity durations in the Table View .
You can add precedence constraints by depressing the left mouse button at either end of the predecessor activity bar and releasing it at either end of the successor activity bar. The type of constraint (FS, FF, SS, or SF) depends on which end of the bars the constraints are drawn from.
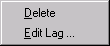
You can delete precedence constraints by right-clicking on the arc and selecting (see Figure 5.23).
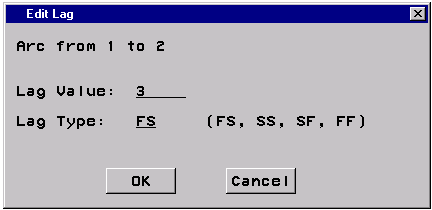
You can modify the type of the precedence constraint or the lag value associated with the precedence constraint by right-clicking on the arc and selecting . The ensuing dialog box is shown in Figure 5.24. Enter the value of the lag duration in the first field and the type of the lag in the second field. Valid values of lag are Finish-to-Start (FS), Start-to-Start (SS), Start-to-Finish (SF), and Finish-to-Finish (FF).
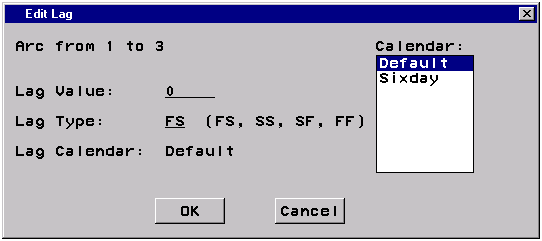
If calendars are defined in the project, the Edit Lag dialog box includes the lag calendar associated with the selected precedence constraint. You can change the lag calendar by selecting from the list of available calendars that is displayed within the Edit Lag dialog box shown in Figure 5.25.
To modify the Progress using the Gantt View, you must include the Actual Schedule in the view. You can drag the actual schedule bar for the activity to change the amount of progress on the activity; you can also move the activity’s actual bar to change the Actual Start of the activity.
When the project contains progress information, a Timenow line is drawn in the Gantt View, indicating the TIMENOW date. You can move the Timenow line by dragging it. When you change the value of TIMENOW, the progress information changes for all the activities. A confirmation window requires you to confirm that you do want to change the progress information for all the activities. (See also Macro Variable TIMENOW.)
You can also edit the progress columns in the Table View .