Setting Up a Connection to SPD Server
The SAS
ODBC Driver uses a TCP/IP network connection and a SPD Server library–spds.dll–to
communicate with the SPD Server. Contact your SPD Server administrator
to get the spds.dll file from the
lib directory in the SPD Server distribution. Then, place the spds.dll
file in C:\Program Files\SAS\SharedFiles\General.
Use the
instructions in this section to create a Data Source Name (DSN) for
accessing data on an SPD Server.
-
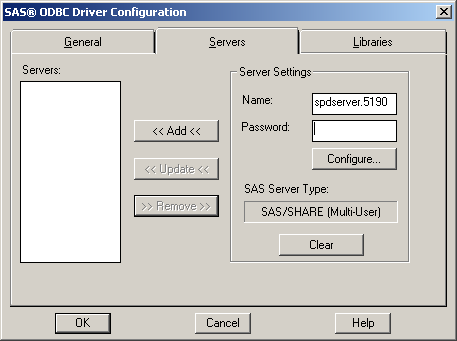
Click the Servers tab. In the Name field, provide a two-part name such as
spdserver.5190.SAS/SHARE (Multi-User) -
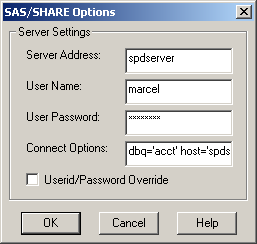
Provide the requested information:is your password on the SPD Server. If you provide a
User Namewithout aUser Password, then you are prompted for a password at connection time. The SAS ODBC Driver encrypts the password before storing the encrypted value in the Windows registry.requests that the UID keyword and PWD keyword be used in the ODBC client application. The driver passes the value of the PWD keyword as the user login password, and the value of the UID keyword as the user ID. For more information about using this option, see Userid/Password Override. -
Click the Libraries tab. Define a library for each data library that you want to access with this DSN.Note: Add a library for the DBQ= domain that you provided in the connect options. This library is called the primary LIBNAME domain. Also, add additional libraries that you want to access. These libraries are called secondary LIBNAME domains.
-
Provide a name in the Data Source Name field. Use the Server menu to select the correct server for the DSN. For more information about SQL options, see SQL Options on the General Tab.

