Organize the Model Hierarchy
In this exercise, you create an organizational folder,
a project control group with multiple projects, and a version for
each project within the control group.
Create a Folder
To provide an organizational
folder to manage your modeling projects:
-
Right-click the
MMRoot node
in the Project Tree and select
New Folder.
The
New Folder dialog box appears.
-
Specify the following
folder properties and click
OK.
Description
enter an optional folder
description.
The new folder appears
in the Project Tree.
Create a Project Control Group
To create a project
control group:
-
Right-click the
Tutorial10 folder
and select
NewProject
Control Group. The
New Project
Control Group wizard appears.
-
Specify the following
project properties and click
Next:
Name
enter Portfolio
1
for the name.
Description
enter an optional description.
-
Click
OK.
The project control group is created in the Project Tree.
-
Right-click the project
control group in the Project Tree and select
Create Projects
from a Control Table. The
Create Projects
from a Control Table wizard appears.
-
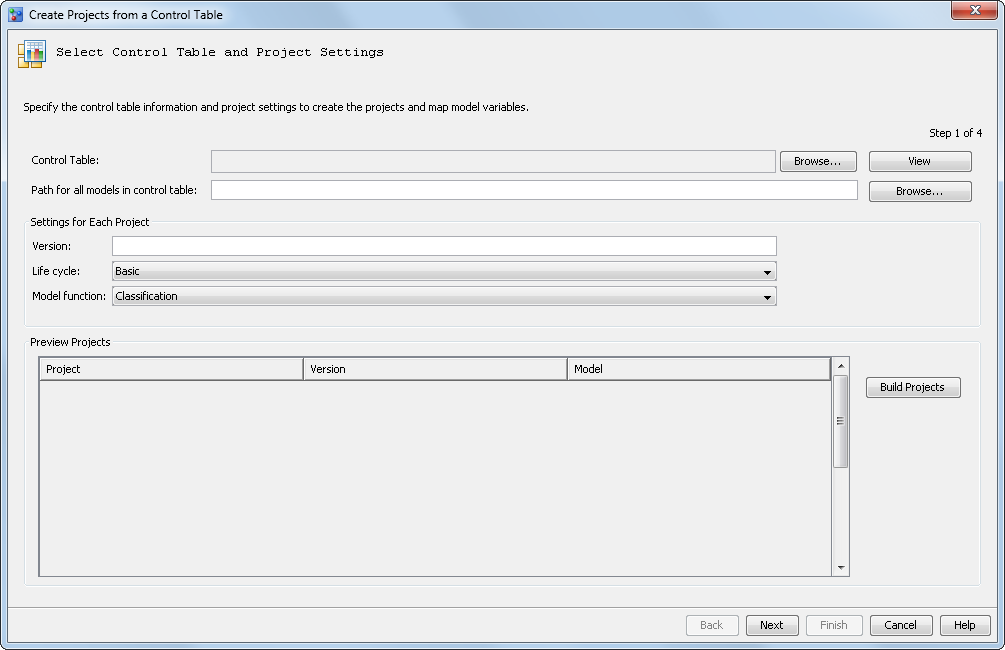
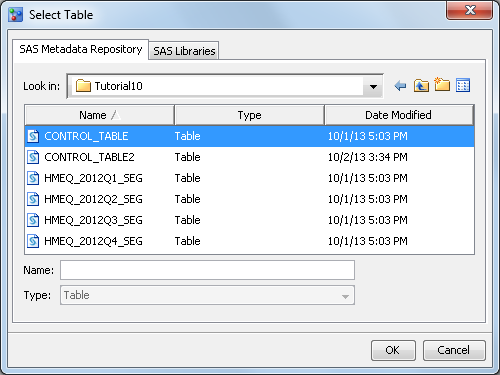
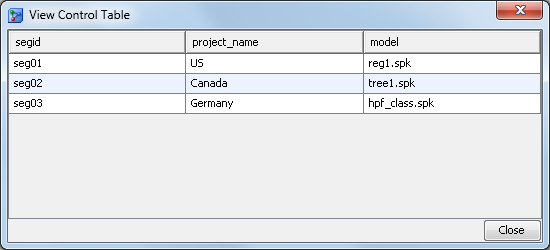
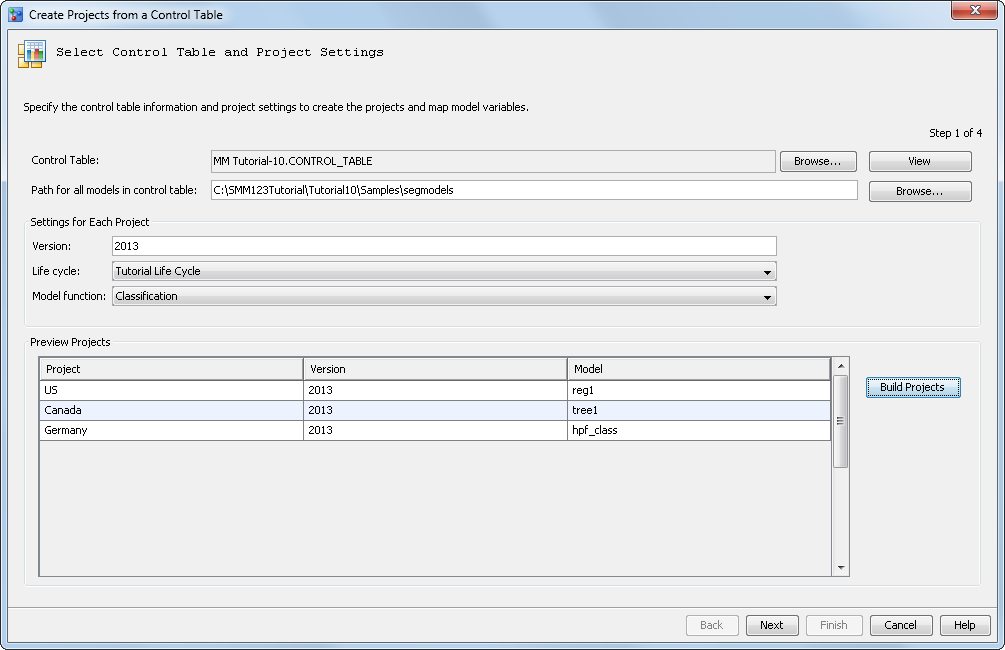
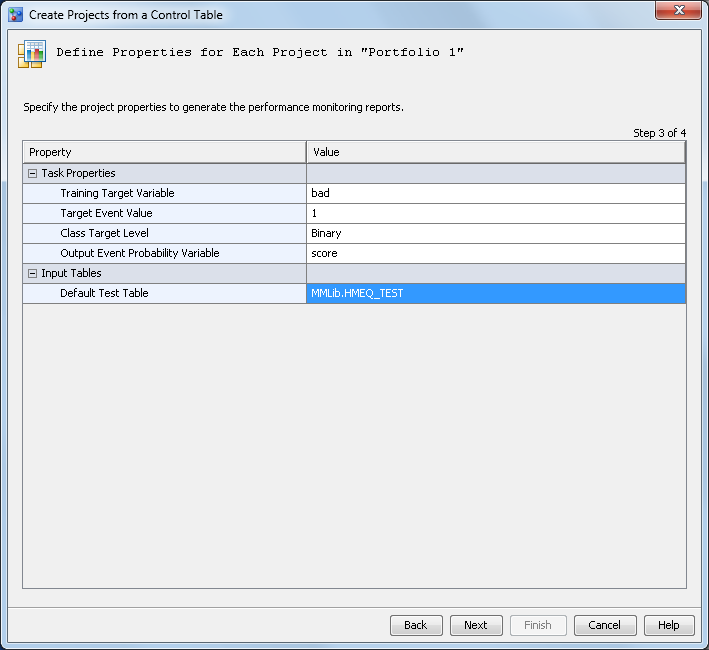
Click
Browse to
select the control table from the SAS Metadata Repository or from
local SAS libraries.
For this exercise, navigate
to the
Tutorial10 library folder where you
registered the data sets, select
CONTROL_TABLE,
and then click
OK.
Note: If you want to be able to
set both a champion model and a challenger for the projects use
CONTROL_TABLE2.
Click
View to
view the columns and values in the control table.
-
Click
Browse to
select the location of the model SPK files that are in the control
table. The location should be
C:\SMM123Tutorial\Tutorial10\Samples\segmodels
.
-
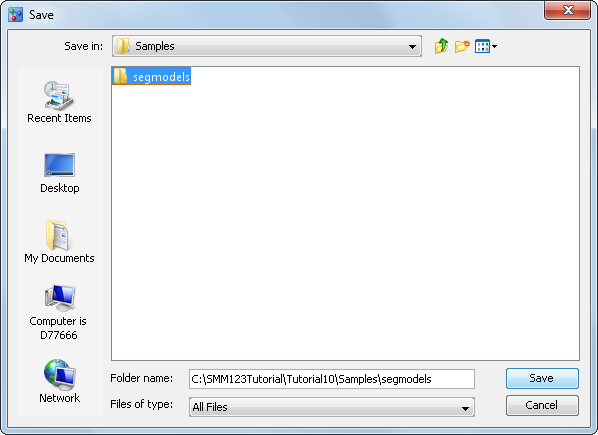
Specify the settings
to be applied to all projects in the control table when they are added
to the project control group:
Life cycle
select the user-defined
template
Tutorial Life Cycle that you created
in the first tutorial.
For more
information, see Create a Life Cycle Template.
-
Click
Build
Projects to add the projects, versions, and models to
the
Preview Projects list.
-
Click
Next.
The
Set Project Variables page appears.
-
Specify the input and
output variables to apply to all of the projects in the control group
using one of these methods:
-
Click the
Import
Variables button for the
Project Input Variables table.
On the
SAS Metadata Repository tab, double-click
Shared DataModel ManagerTutorial3. Select
HMEQ_PROJECT_INPUT and
click
OK.
-
Click the
Import
Variables button for the
Project Output Variables table.
Select
HMEQ_PROJECT_OUTPUT and click
OK.
-
Click
Next.
The
Define Properties for Each Project page
appears.
Specify the task properties
and input tables to apply to all projects within the control group:
Output Event Probability Variable
-
Click
Next to
view the summary of information that has been specified.
-
Click
Finish.
The projects are created with the version, life cycle, and model function
that was specified. The models for each project in the control table
are added to the
Models folder within each
version.
Note: The champion model for each
project within the project control group must be set manually.
For more information,
see Declare a Champion Model.
Copyright © SAS Institute Inc. All rights reserved.