Install and Register the Tutorial Files
About Installing and Registering the Tutorial Files
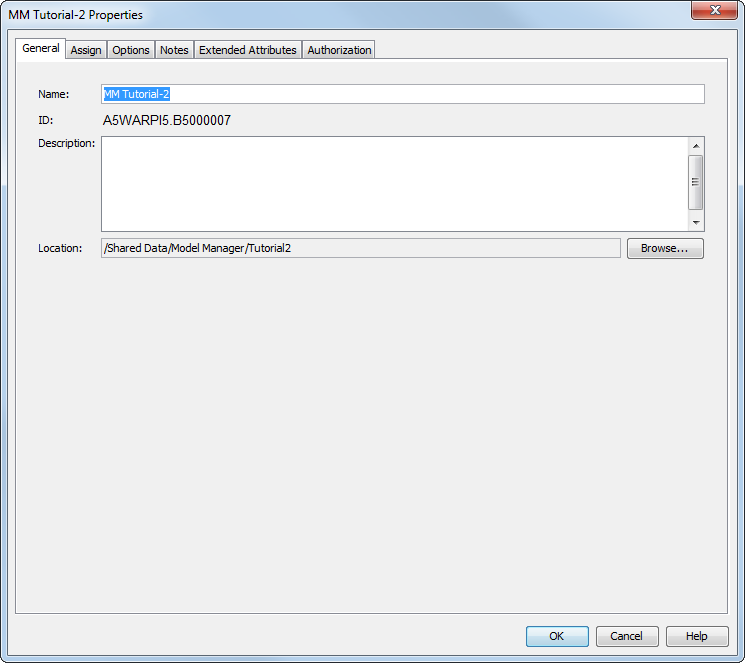
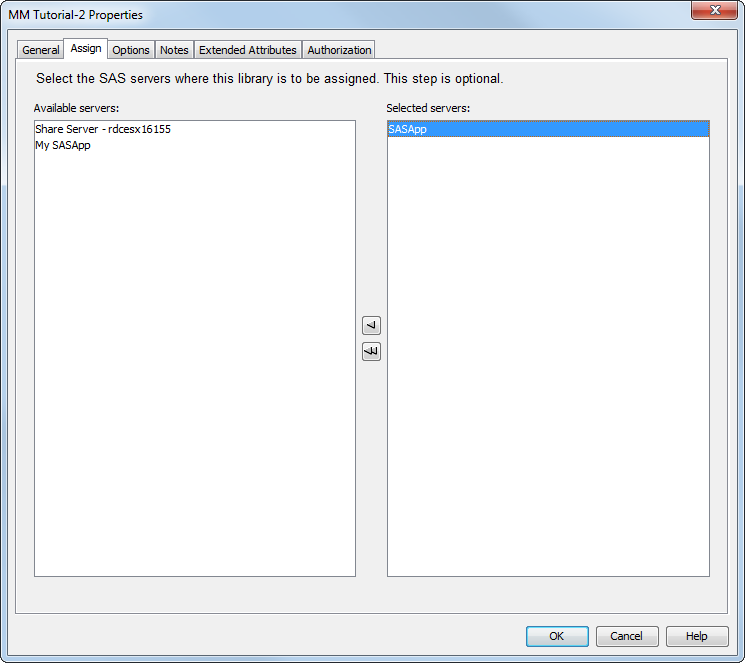
You can either define
a data library and register the tables in the SAS Metadata Repository
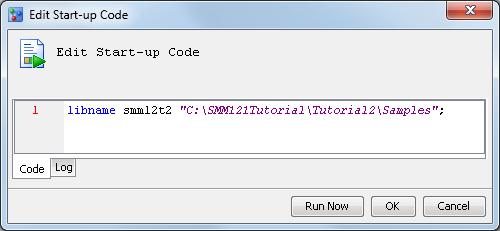
using SAS Management Console, or you can use the Edit
Start-up Code feature of SAS Model Manager to make tables
available from the local SAS Workspace Server or network drive. The
tutorials are designed to use the SAS Metadata Repository. For more
information, see Using Tables from a Local or Network Drive.
Before you use tables
in the SAS Metadata Repository, the tutorial data sets and models
must be installed and registered using SAS Management Console. An
administrator who has Write access to the SAS Application Server and
who has a valid SASApp user ID and password must install and register
the tutorial files.
Some tutorials require
files other than data sets and models, such as score code and templates.
These files do not need to be registered in the SAS Metadata Repository.
The drive where you extract the tutorial ZIP file must be accessible
to the SAS Metadata Repository and to tutorial users. Tutorial users
can also extract tutorial ZIP files to their local computers in order
to access the other files.
Download the Tutorial Files
The ZIP file SMM123Tutorial.zip
contains the tutorials' data sets, models, and score code, and it
is available from http://support.sas.com/documentation/onlinedoc/modelmgr/. Before you begin any of the tutorials, extract the tutorial
files to a computer that is accessible to the SAS Metadata Server
and to the SAS Model Manager users. Follow the steps for using WinZip
to extract the files. If you are using a different extraction program,
follow that program's instructions for extracting the files.
UNIX Specifics: To
complete the tutorials in a UNIX environment, first locate the CPORT
files. Files that you use to import the data sets into UNIX are located
in the SMM123_UNIX_cport_files.zip file that is available from http://support.sas.com/documentation/onlinedoc/modelmgr/. Instructions, as well as the sample code for performing
an import, are provided in the Readme.txt file.
Prepare Tutorial 2 Data Sets and Models
The Required Tutorial Files
Register the Tutorial 2 Files in SAS Management Console
You can either define
a data library and register the tables in SAS Management Console,
or use the Edit Start-up Code feature of SAS Model Manager to use
tables from the local SAS Workspace Server or network drive. For more
information, see Using Tables from a Local or Network Drive.

Prepare Tutorial 3 Data Sets and Models
The Required Tutorial 3 Files
The SAS data sets and
models that are required for this tutorial are on your local computer
after you extract them from the ZIP file SMM123Tutorial.zip. If you
have not extracted the tutorial files, see Install and Register the Tutorial Files.
Register the Tutorial 3 Files in SAS Management Console
You can either define
a data library and register the tables in SAS Management Console,
or use the Edit Start-up Code feature of SAS Model Manager to use
tables from the local SAS Workspace Server or network drive. For more
information, see Using Tables from a Local or Network Drive.
Prepare Tutorial 5 Data Sets and Models
The Required Tutorial 5 Files
The SAS data sets that
are required for this tutorial are on your local computer after you
extract them from the ZIP file SMM123Tutorial.zip. If you have not
extracted the tutorial files, see Install and Register the Tutorial Files.
Register the Tutorial 5 Files in SAS Management Console
You can either define
a data library and register the tables in SAS Management Console,
or use the Edit Start-up Code feature of SAS Model Manager to use
tables from the local SAS Workspace Server or network drive. For more
information, see Using Tables from a Local or Network Drive.
Prepare Tutorial 6 Data Sets and Models
The Required Tutorial 6 Files
The SAS data sets that
are required for this tutorial are on your local computer after you
extract them from the ZIP file SMM123Tutorial.zip. If you have not
extracted the tutorial files, see Install and Register the Tutorial Files.
Register the Tutorial 6 PD Files in SAS Management Console
You can either define
a data library and register the tables in SAS Management Console,
or use the Edit Start-up Code feature of SAS Model Manager to use
tables from the local SAS Workspace Server or network drive. For more
information, see Using Tables from a Local or Network Drive.
Register the Tutorial 6 LGD Files in SAS Management Console
You can either define
a data library and register the tables in SAS Management Console,
or use the Edit Start-up Code feature of SAS Model Manager to use
tables from the local SAS Workspace Server or network drive. For more
information, see Using Tables from a Local or Network Drive.
Prepare Tutorial 8 Data Sets and Models
The Required Tutorial 8 Files
The SAS data sets and
models that are required for this tutorial are on your local computer
after you extract them from the ZIP file SMM123Tutorial.zip. If you
have not extracted the tutorial files, see Install and Register the Tutorial Files.
Register the Tutorial 8 Files in SAS Management Console
You can either define
a data library and register the tables in SAS Management Console,
or use the Edit Start-up Code feature of SAS Model Manager to use
tables from the local SAS Workspace Server or network drive. For more
information, see Using Tables from a Local or Network Drive.
Prepare Tutorial 10 Data Sets and Models
The Required Tutorial 10 Files
The SAS data sets and
models that are required for this tutorial are on your local computer
after you extract them from the ZIP file SMM123Tutorial.zip. If you
have not extracted the tutorial files, see Install and Register the Tutorial Files.
Register the Tutorial 10 Files in SAS Management Console
You can either define
a data library and register the tables in SAS Management Console,
or use the Edit Start-up Code feature of SAS Model Manager to use
tables from the local SAS Workspace Server or network drive. For more
information, see Using Tables from a Local or Network Drive.
Prepare Tutorial 12 Data Sets and Models
The Required Tutorial 12 Files
The SAS data sets and
models that are required for this tutorial are on your local computer
after you extract them from the ZIP file SMM123Tutorial.zip. If you
have not extracted the tutorial files, see Install and Register the Tutorial Files.
Register the Tutorial 12 Files in SAS Management Console
You can either define
a data library and register the tables in SAS Management Console,
or use the Edit Start-up Code feature of SAS Model Manager to use
tables from the local SAS Workspace Server or network drive. For more
information, see Using Tables from a Local or Network Drive.
Using Tables from a Local or Network Drive
Overview

Copyright © SAS Institute Inc. All rights reserved.