Publish Models to a Database
Overview
SAS Model Manager enables
you to publish the project champion model and challenger models that
are associated with the DATA Step score code
type to a configured database. SAS Model Manager uses the SAS Scoring
Accelerator and SAS/ACCESS interface to the database to publish models
to the database. The Scoring Accelerator takes the models from SAS
Model Manager and translates them into scoring files or functions
that can be deployed inside the database. After the scoring functions
are published using the SAS/ACCESS interface to the database, the
functions extend the database’s SQL language and can be used
in SQL statements such as other database functions. After the scoring
files are published, they are used by the SAS Embedded Process to
run the scoring model.
The SAS administrator
can specify the Publish Scoring Options setting
in SAS Management Console. If this setting is specified and the scoring
function publish method is chosen, the scoring metadata tables in
the database are populated with information about the project and
pointers to the scoring function. This feature enables users to review
descriptions and definitions of the published model. The audit logs
track the history of the model's usage and any changes that are
made to the scoring project.
For more
information, see Publishing Models to a Database in SAS Model Manager: User's Guide.
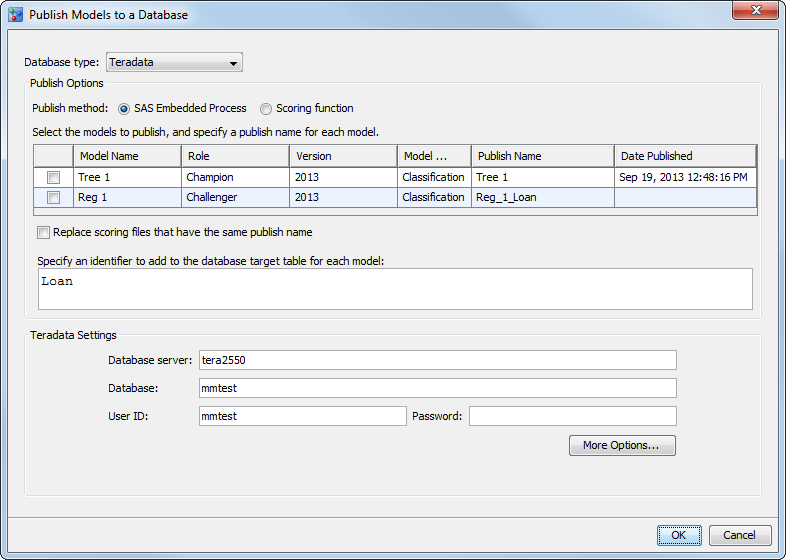
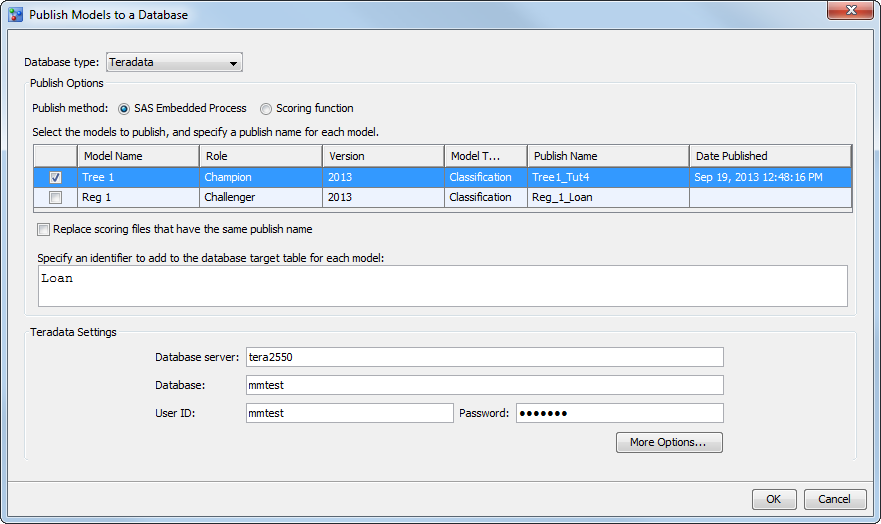
Publish a Model Using the SAS Embedded Process Publish Method
In this exercise, you
publish a project's champion model to a database using the SAS
Embedded Process publish method.
-
Verify that you have set the project champion model. For more information, see Set the Champion Model.
-
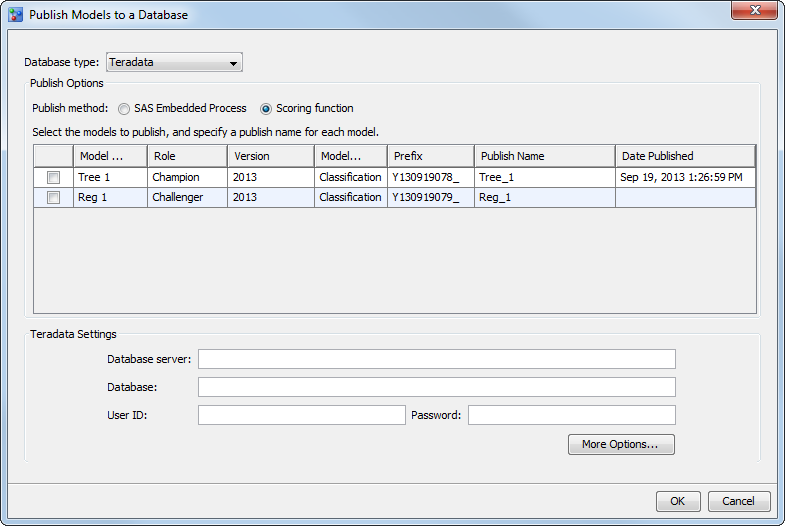
Select a database type and select SAS Embedded Process for the publish method. The type of database and the publish method that you choose determine which database settings and options are required. The default publish method is SAS Embedded Process.Operating Environment Information: The SAS Embedded Process can be used with the SAS Scoring Accelerator for Netezza to run scoring models with the release of SAS 9.4. The SAS Administrator can enable Netezza support for SAS Model Manager so that the Netezza database type appears when using the SAS Embedded Process publish method. For more information, see the SAS Model Manager: Administrator's Guide

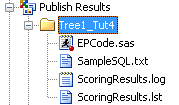
Note: After you have completed
the publishing process, you can view the log file. The Publish
Results folder in the Project Tree contains a folder
for each model that was published. The publish name is used to create
a folder for each model that is published. That folder contains the
ScoringResults.log file. The time at which the process started, details
about who initiated the process, and the time at which the project
was published are recorded. Error messages are also recorded in the
log file. The log file provides an audit trail of all relevant actions
in the publishing process.
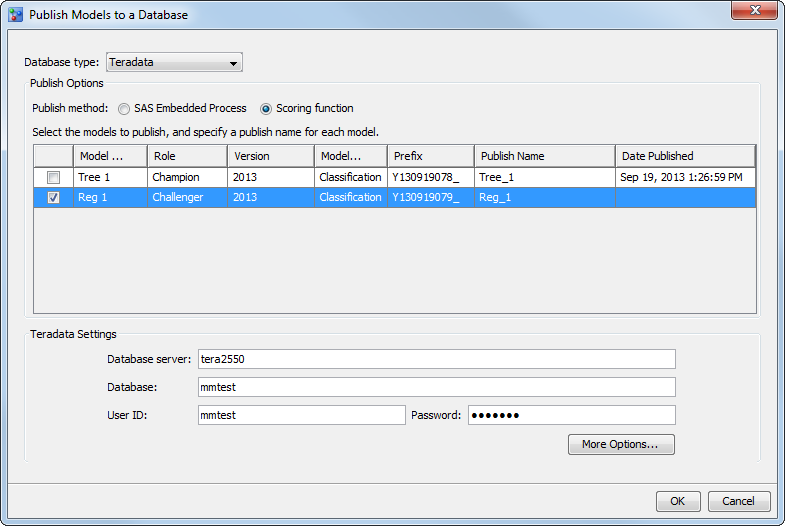
Publish a Model Using the Scoring Function Publish Method
In this exercise, you
publish a project’s champion model to a database using the
scoring function publish method.
-
Verify that you have set the project champion model in Tutorial 3. For more information, see Set the Champion Model.
-
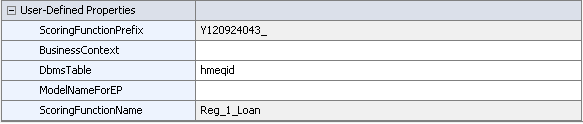
(Optional) Select the Loan project folder and enter a value for the DbmsTable user-defined property. This value is the scoring input table that the DBA might have created in the database to be used with a scoring application.Note: Before you use scoring application or SQL code to score this project, you must first set the DbmsTable property. Set the property to the name of the input table in your database that you want to use for scoring the champion or challenger model. When you publish a scoring function, the information that is associated with the input table in the database is updated to contain the value of the DbmsTable property. The scoring application or SQL code can then query the database for the input table name to use as the scoring input table.
-
Enter a publish name for each model that you selected to publish. The scoring function publish method has a system-generated prefix and a publish name. These are used to publish the model scoring function. The publish name is a user-defined value that can be modified.Here are the naming convention requirements:
-
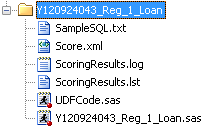
The SAS score code (for example,
Y120924043_Reg_1_Loan.sas), the scoring results log, and output for the scoring function are placed in the Publish Results <prefix_publish-model-name_project-name> folder in the project file list, and the ScoringFunctionName and ScoringFunctionPrefix user-defined
project properties are populated.
<prefix_publish-model-name_project-name> folder in the project file list, and the ScoringFunctionName and ScoringFunctionPrefix user-defined
project properties are populated.


Note: After you have completed
the publishing process, you can view the log file. The Publish
Results folder in the Project Tree contains a folder
for each model that was published. The publish name is used to create
a folder for each model that is published. That folder contains the
ScoringResults.log file. The time at which the process started, details
about who initiated the process, and the time at which the project
was published are recorded. Error messages are also recorded in the
log file. The log file provides an audit trail of all relevant actions
in the publishing process.
Copyright © SAS Institute Inc. All rights reserved.