Declare a Champion Model
In this exercise you declare a champion model.
Set the Champion Model
-
Expand the
Models folder
in the
2013 version. Right-click
Model
1, select
Set as Champion, and
click
Yes to confirm.
-
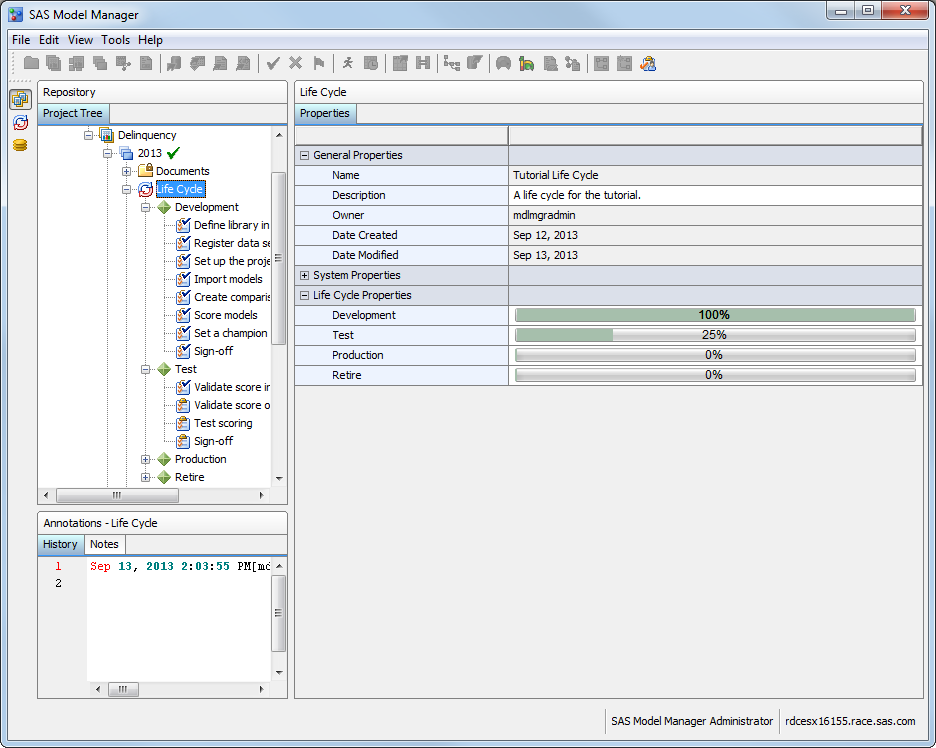
Verify that the

icon appears next to the champion model and the version.
-
Select the version folder
to examine its properties. The value for
Date Modified is
today's date. The value for the
Champion Model ID is
the champion model's UUID.
Tip
To document the reasons or
assumptions for your selection of the champion model, use the version
Notes tab.
SAS Model Manager automatically annotates the
History tab.
For more information,
see Using the Annotations View.
Update the Life Cycle (Optional)
To update the Development
milestone:
-
In the
Delinquency project,
expand
2013 Life CycleDevelopment
.
-
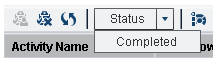
Select the
Set
a champion model task. Click the
Status box
and select
Completed.
-
Select the
Sign-off task
to indicate that all of the
Development milestone
tasks are complete. Click the
Status box
and select
Completed.
-
Select the
Set
a champion model and
Sign-off tasks.
The
Date Completed and
Completed
By fields have been updated with today's date and
your user ID.
-
Expand the
Test milestone.
Select the
Validate score input data task.
Click the
Status box and select
Completed.
Note: The
Set a champion
model task must have been completed before you can complete
this task.
-
Click the
Life
Cycle node to examine its properties. The value for
Date
Modified is today's date. The
Development and
Test properties
display a bar chart that shows the percentage of completed tasks for
this milestone.
Update the Workflow Process (Optional)
To complete the activities
in the associated workflow:
-
Select
ToolsMy Workflow Inbox or click

from the SAS Model Manager main window to view the
workflow activities in your workflow inbox. Workflow Console is launched
in a web browser, and displays the Activities category view.
Note: The list displays only the
activities for which you are the actual owner or are assigned as a
potential owner, and that have the state of
Started.
-
From the
Activities category
view, select an activity name, and click

.
Note: You can select an activity
name and click

to release an activity that you had previously claimed.
-
(Optional) Enter a property
value or change an existing property value in the
Properties pane.
-
(Optional) Double-click
an activity to view the activity details. From the activity details
view, you can modify activity properties or perform the model management
tasks that are associated with the activity.
Note: If you did not claim the
activity from the Activities category view, you can select the
Claim check
box in the activity status bar.
-
(Optional) Add a comment
to the activity using the
Comments pane.
-
Select a status value
to complete the activity. The workflow continues to the next activity.
-
Repeat steps 2 through
6 for the activities that you completed during this tutorial.
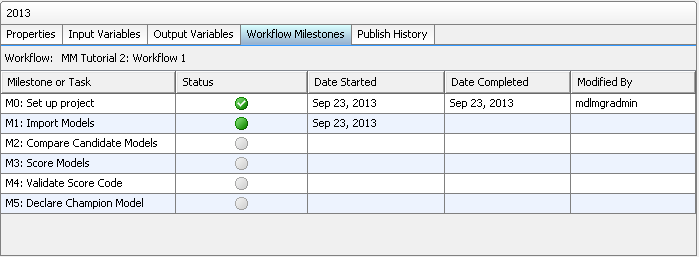
Note: A workflow can be configured
to display the activities that are associated with a milestone or
task on the
Workflow Milestones tab and in
the Workflow Milestones report for a version in the SAS Model Manager
client application. From the
Workflow Milestones tab,
you can view the status of milestones or tasks that are associated
with activities in the workflow.
Copyright © SAS Institute Inc. All rights reserved.