Create Model Comparison Reports
In this exercise, you create several model comparison
reports that are used in the selection and approval of a champion
model. After you create the reports, you view the reports in the Reports folder. The reports enable you to evaluate candidate
models in a version or across versions by assessing the structure,
performance, and resilience of your models.
Create a Model Profile Report
The Model Profile report
creates three tables to display the profile data that is associated
with the model input variables, output variables, and target variables.
To create this report, follow these steps:
-
Expand the
2011 version in the
Delinquency project and right-click the
Reports folder.
Then select
Reports New Report Wizard
. The
New
Report Wizard opens.
-
In the
New
Report Wizard, use the specified values for these fields
and click
OK:
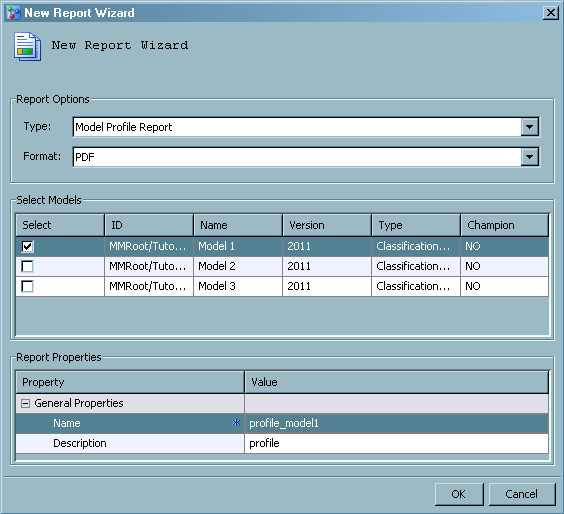
select Model Profile Report.
select PDF. PDF is the default value,
and it might already be the value for Format.
select the box for Model 1.
replace the default
report name with the report name profile_model1 in the Name field.
Here is the New Report
Wizard at this point in the process. Click
OK when you are finished.
-
When the information
dialog box confirms that the report was created successfully, click
Close.
Create a Delta Report
The Delta report compares
the profile data for two models and notes the differences. To create
this report, follow these steps:
-
Expand the
2011 version in the
Delinquency project and right-click the
Reports folder.
Then select
ReportsNew Report Wizard. The
New
Report Wizard opens.
-
In the
New
Report Wizard, use the specified values for these fields
and click
OK:
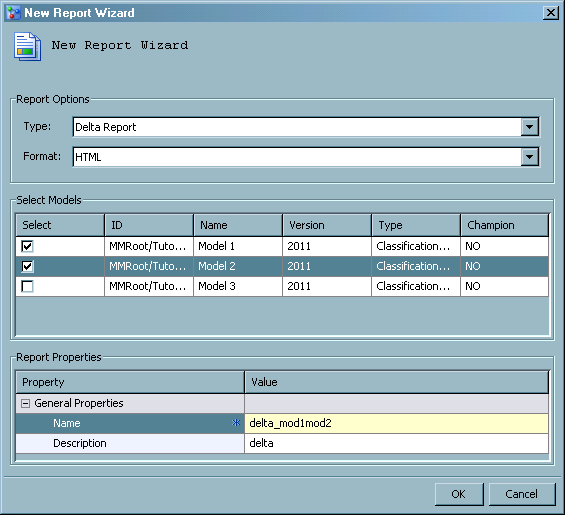
select the boxes for Model 1 and Model 2.
replace the default
report name with the report name delta_mod1mod2 in the Name field.
Here is the New Report
Wizard at this point in the process. Click
OK when you are finished.
-
When the information
dialog box confirms that the report was created successfully, click
Close.
Create a Dynamic Lift Report
The Dynamic Lift report
provides visual summaries of the performance of one or more models
for predicting a binary outcome variable performance. To create this
report, follow these steps:
-
Expand the
2011 version in the
Delinquency project and right-click the
Reports folder.
Then select
ReportsNew Report Wizard. The
New
Report Wizard opens.
-
In the
New
Report Wizard, specify the following options and click
OK:
select Dynamic Lift Report.
select the boxes for Model 1 and Model 3.
replace the default
report name with the report name lift_mod1mod3 in the Name field.
Here is the New Report
Wizard at this point in the process. Click
OK when you are finished.
-
When the information
dialog box confirms that the report was created successfully, click
Close.
View a Model Comparison Report
To view a model comparison
report, follow these steps:
-
Expand the version folder
2011 and the
Reports folder.
-
Right-click the report
name and select
ReportsView Report.
Note: If user credentials are
required, then specify a user ID and password that have permission
to access the SAS Content Server.
-
Use the PDF viewer to
distribute or print a copy of the report. In Adobe Reader, select
FileSendPage
by E-mail.
-
For a detailed description
of the model comparison reports, see the
SAS Model Manager: User's Guide.
Update the Life Cycle (Optional)
To update the Development
milestone, follow these steps:
-
In the
Delinquency project, expand
2011Life CycleDevelopment.
-
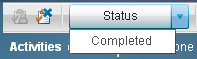
Select the
Create comparison reports task. Select the
Status box and select
Completed.
-
Select
Create comparison reports. The
Completed
Date and
Completed Byfields
have been updated with today's date and your user ID.
-
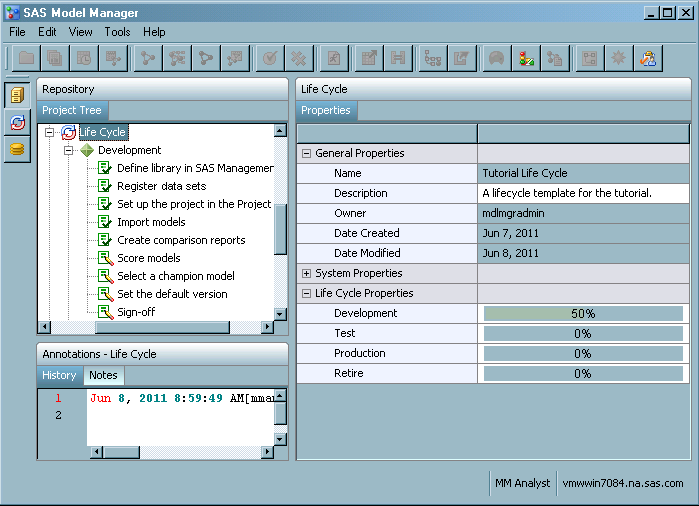
Click the
Life Cycle node to examine its properties. The value
for
Date Modified is today's date. The
Development property displays a bar chart that shows
the percentage of completed tasks for this milestone.
Update the Workflow Process (Optional)
To complete the activities
in the associated workflow process, follow these steps:
-
Click

from the SAS Model Manager main window to view the
workflow process activities in your workflow inbox. Workflow Console
is launched in a Web browser, and displays the Activities category
view.
Note: The list displays only the
activities for which you are the actual owner or are assigned as a
potential owner, and that have the state of
Started.
-
From
the
Activities category view, select an activity
name, and click
to claim an activity.
Note: You can select an activity
name and click

to release an activity that you had previously claimed.
-
(Optional) Enter a property
value or change an existing property value in the
Properties pane.
-
(Optional) Add a comment
to the activity using the
Comments pane.
-
Select a status value
to complete the activity. The workflow process continues to the next
activity.
-
Repeat steps 2 through
5 for the activities that you completed during this tutorial.
Copyright © SAS Institute Inc. All rights reserved.