Using the Adapter Setup Wizard
Accessing and Navigating the Adapter Setup Wizard
Steps to Complete the Adapter Setup Wizard
The Adapter
Setup wizard guides you through several steps that help
define the ETL jobs, staged tables, summarized aggregation tables,
information maps, and Gallery transformations for the selected adapter.
The steps vary based on the requirements of the adapter that you select.
Creating Jobs Using the Adapter Setup Wizard
The Adapter
Setup wizard enables you to define and create the ETL
jobs that are required to process your IT resource data. You do not
need to run the Adapter Setup wizard frequently
for a given adapter. For best results, run the Adapter
Setup wizard initially for a given adapter and do not
run it again for the same adapter unless you have changes in how you
would like to process input data. Running the Adapter
Setup wizard additional times does not update the jobs,
transformations, or tables from the previous runs. Instead, it creates
new jobs, transformations, and tables.
To specify all of the
necessary parameters that the Adapter Setup wizard
requires to create the jobs for an adapter, perform the following
steps:
-
-
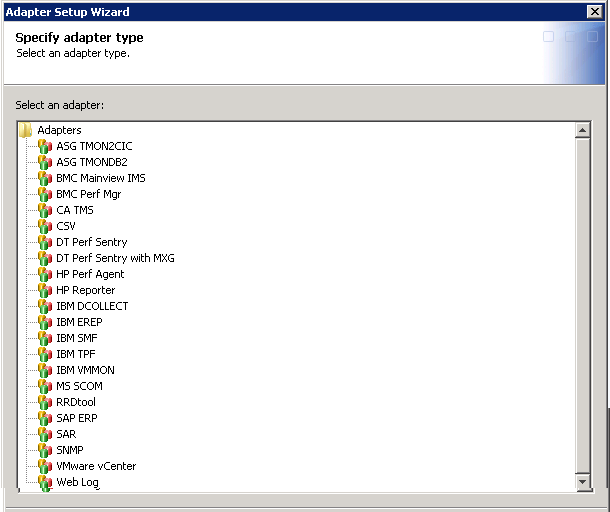
Click the adapter that you want to use from the list of the adapters provided. You can move the cursor over an adapter to a view a tooltip that provides the full name of the adapter, any former names of the adapter, and information about the types of data that the adapter provides. The remaining pages and parameters that are presented in the Adapter Setup wizard are based on the specific adapter that you select on this page.Note: The AS/400 and IMS adapters are not available for selection on this page. The staging code that is required for these data sources is not automated by the Adapter Setup wizard. However, SAS IT Resource Management supplies staging transformations for these adapters. You can use these staging transformations to create staging jobs manually for these data sources. For more information about how to create a staging job manually using a staging transformation, see Add a Staging Transformation to a Staging Job.For more information about the specific adapters that SAS IT Resource Management supports, see Supported Adapters.
-
-
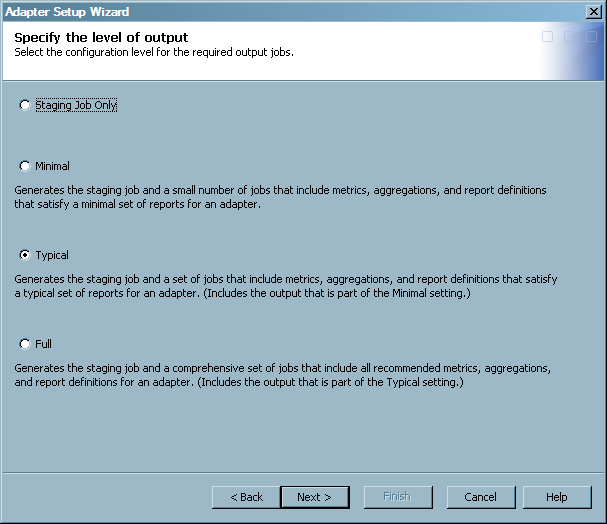
Specify the configuration level that represents the scope of output jobs that you want the Adapter Setup wizard to create.Note: If you are using an adapter that does not include aggregations that are categorized with configuration levels, then the level is automatically set to create a staging job only and this page does not display.Configuration levels enable you to specify the general scope or amount of aggregation tables and jobs that you want the Adapter Setup wizard to create. These levels provide various presentations of granularity in the data based on the aggregations and metrics that are available for an adapter. The jobs that are created for each level include the metrics that are used in the reports for that level. These jobs might also include other metrics that have been predetermined to be useful for reporting on the given level.Configuration levels are unique for each adapter. However, in some cases, the levels can be identical for a given adapter. For more information about the metrics and aggregations that are supported for each adapter, see the SAS IT Resource Management metrics documentation. To locate the SAS IT Resource Management documentation, use the Products Index A-Z at http://support.sas.com/documentation/index.html.
-
creates a staging job only for the adapter. If you select this option, no aggregation jobs, information map jobs, or reporting jobs are created.creates a staging job and additional jobs that include metrics, aggregations, and report definitions for a small number of reports. This level is for reporting on a small scale. You might use this level to create jobs that are related to low-priority, non-critical machines.creates a staging job and a robust set of jobs that include metrics, aggregations, and report definitions for a typical set of reports. This level includes all of the jobs that are part of the Minimal level. In addition, it includes metrics, aggregations, and jobs that IT Resource Management has identified as being of interest for the selected adapter. You might use this level to create jobs that are related to mission critical resources.creates a staging job and a comprehensive set of jobs that include most metrics, aggregations, and report definitions that SAS IT Resource Management supports. This level includes all of the jobs that are part of the Typical level. In addition, it includes many of the other metrics that are recommended for an adapter. You might use this level when you want the full benefits of the domain intelligence that is available with the IT Resource Management solution as well as additional information from the full set of metrics that are available from the adapter data sources.Note: Increasing the configuration level results in more complex transformations and jobs. If you select Full when you need only the Typical level, then the extra complexity causes the Adapter Setup wizard to be slower to complete than is necessary for your needs. Also, the nightly ETL jobs will take longer to process.
-
-
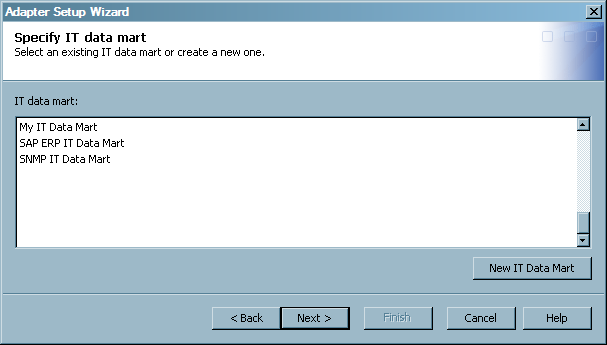
Specify the IT data mart where you want to save the ETL jobs that the Adapter Setup wizard will create, or create a new IT data mart.
-
Select an IT data mart from the list of available IT data marts. If you do not want to use one of the data marts in the list, then click New IT Data Mart. This action launches a wizard that guides you through the process of creating and defining a new IT data mart. When you are finished, the wizard returns you to the Adapter Setup wizard.
-
-
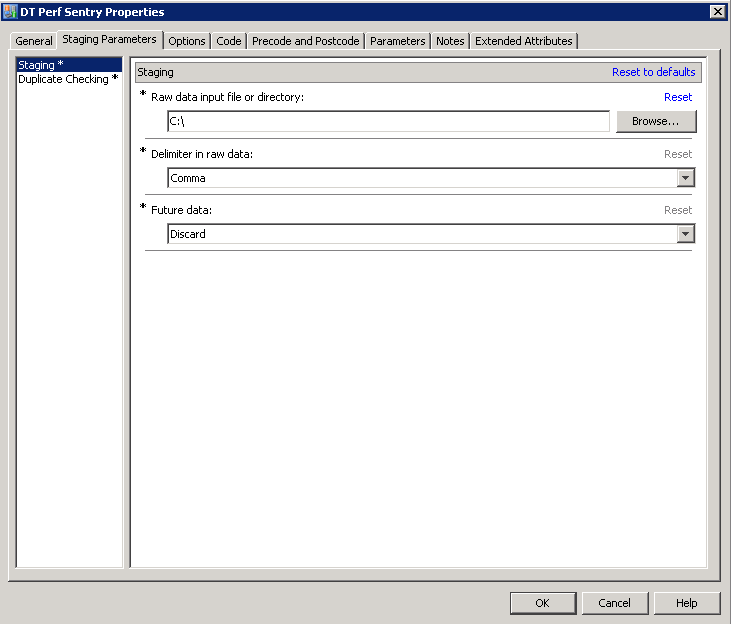
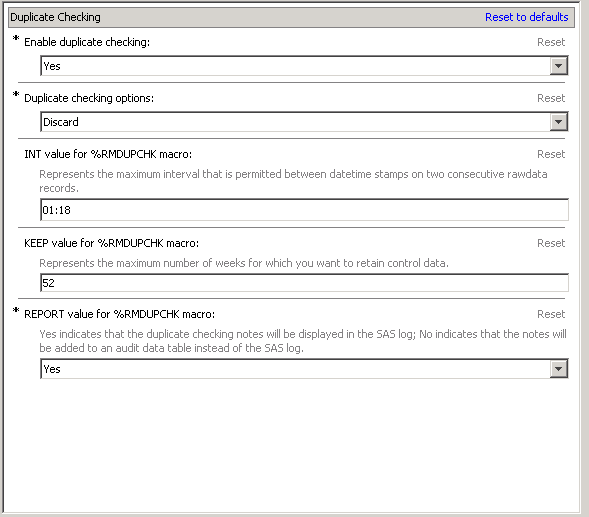
Specify staging and duplicate-data checking parameters for the selected adapter. Staging parameters vary by adapter as they specify the configurations that are required to extract, transform, and load specific raw data into staged tables.The parameters that are marked with an asterisk (*) require a value. All other parameters do not require a value.You can also click Reset for a given staging parameter to use the default value if there is one available for the parameter. If the default value is already selected, then the Reset option is not available. You can also click Reset to defaults to set all the staging parameters to the default values.Note: Reset to defaults does not reset a parameter that is dependent on another parameter if the parent parameter does not change.For more information about the staging and duplicate-data checking parameters that are available for each adapter, see Staging Parameters.
-
Note: If you selected the adapter VMware vCenter, then the Adapter Setup wizard presents two pages of staging parameters: one for VMware Data Acquisition jobs and one for VMware vCenter jobs. For more information about accessing raw data for the VMware vCenter adapter, see Data Sources Supported by SAS IT Resource Management Adapters.
-
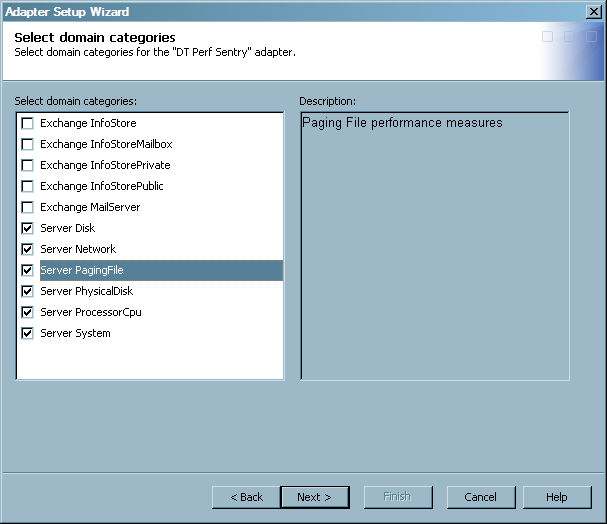
Specify one or more domain categories that you want the Adapter Setup wizard to use when creating the resulting jobs.Note: If you are using an adapter that does not have aggregation and information map jobs available from the Adapter Setup wizard, then the wizard creates only a staging job and skips this page.The preceding example shows the domain categories that are available for the DT Perf Sentry adapter. All of the domain categories that are related to Server data have been selected. Note that the description in the box on the right corresponds with the domain category that is highlighted in the Select domain categories box.The Adapter Setup wizard helps you manage system performance by enabling you to select only the domain categories that are essential to the performance management and capacity planning processes for your enterprise. The Adapter Setup wizard creates a predefined set of jobs based on the domain categories that you select. The time that the Adapter Setup wizard takes to create the jobs varies based on the number of staged tables, aggregation jobs, and report jobs that are generated for the domain categories that you select.Note: If you are using an adapter that does not include domain categories, then this page does not display.For more information about domain categories, see Domain Categories.
-
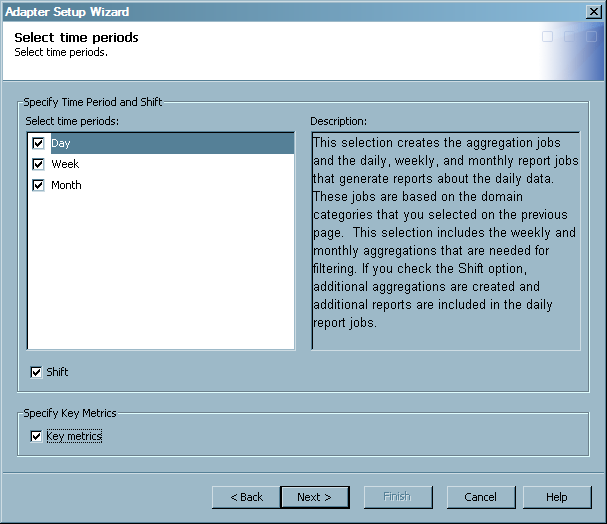
Select the time periods and key metrics that you want to use for the aggregation and reporting jobs.Note: If you are using an adapter that does not have aggregation and information map jobs available from the Adapter Setup wizard, then the wizard creates only a staging job and skips this page.The preceding example shows that all time periods and key metrics have been selected. Note that the description in the box on the right corresponds with the time period that is highlighted in the Select time periods box.The time periods are another way that the Adapter Setup wizard helps you manage system performance, aggregations, and jobs. The wizard enables you to select only the time periods that are essential to the performance management and capacity planning processes for your enterprise. The Adapter Setup wizard creates only the aggregation and report jobs that reflect the time periods and key metrics that you select. In turn, you do not have to sort through extra jobs and reports that focus on time intervals that you do not need.Note: You must select at least one time period or the Key metrics option to continue. (That is, you can select any combination of these four choices: Day, Week, Month, or Key metrics, but you must select at least one.)For more information about the specific aggregations that the Adapter Setup wizard creates based on time period and shift, see Aggregations by Time Period.
-
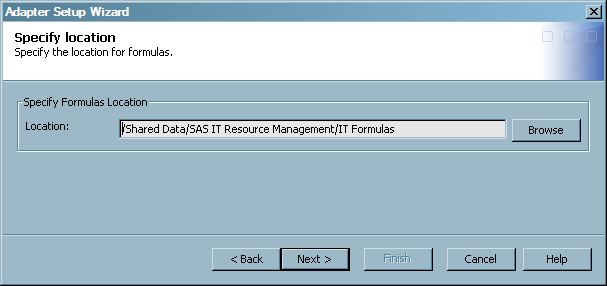
Specify the location of any user-written formulas to use in addition to the formulas that SAS IT Resource Management supplies.The staged tables and aggregation tables that the Adapter Setup wizard creates include computed columns that reference various formulas. When the tables with computed columns are instantiated, SAS IT Resource Management looks for the corresponding formulas in the list of supplied formulas.You might have customized or user-written formulas that you prefer to use. If so, then use this page of the wizard to specify the location of the user-written formulas that you want to use. The Adapter Setup wizard then looks in the folder that you specified for any formulas that have the same name as those in the tables that it creates. If a formula with the same name is in the folder, then the wizard uses that formula. If the formula is not found in your specified location, then the wizard searches for the formula in this location:
Shared Data/SAS
                                 IT Resource Management/IT Formulas
. If the formula is still not found, then the wizard searches for it in this location:Products/SAS IT Resource Management/IT Formula.-
Click Browse to navigate to and select the folder that includes any user-written formulas that you want to use instead of the formulas that SAS IT Resource Management supplies. This field is optional and does not allow manual entries. If you do not have user-written formulas that you want to use and do not specify a folder in this field, then the Adapter Setup wizard defaults to the supplied formulas.
-
-
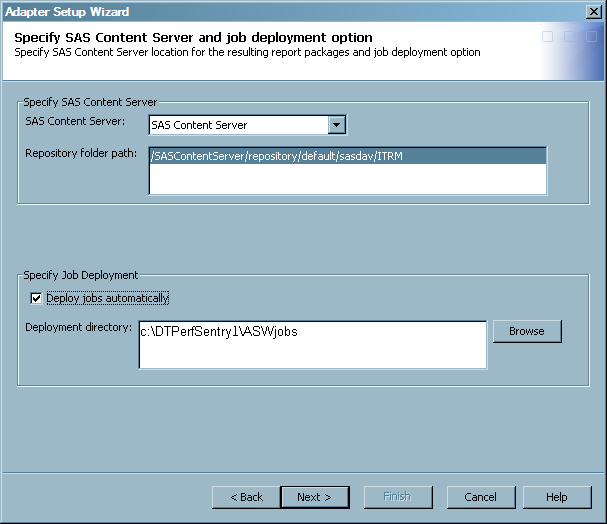
Specify the location of the SAS Content Server where the report definitions are retrieved and where the reports that are generated from the resulting jobs are stored. Also specify whether you want the Adapter Setup wizard to automatically deploy the jobs that it creates.This page does not appear if you selected the configuration level Staging Job Only on the second page of the wizard. In this case, the Adapter Setup wizard creates only one staging job that you must deploy manually.Note: If you are using domain categories that do not result in reporting jobs, then the SAS Content Server options are not available on this page. For more information, see Jobs That the Adapter Setup Wizard Creates for Domain Categories.The report definitions that the Adapter Setup wizard uses to create the report jobs are stored on the SAS Metadata Server. In addition, the reports that are generated from the report jobs are stored on the SAS Content Server.
-
If you are using domain categories that result in reporting jobs, specify the following parameters for the SAS Content Server:specifies the path within the SAS Content Server where the report definitions and reports are stored. The default location is
/SASContentServer/repository/default/sasdav/ITRM.URL file name parameters specifies the parameters that pertain to the URL filename, such as Proxy, user ID, or password. For example, the contents of this field could be user='userID', pass='password', and so on. The contents of this field are used to communicate with Gallery Manager. In most configurations, these parameters are not needed. -
Specify the following parameters to indicate whether you want the Adapter Setup wizard to deploy the jobs that it creates:
-
-
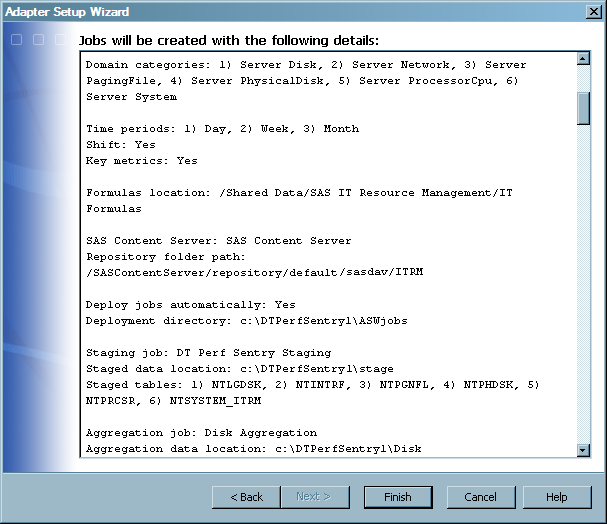
View a summary of the metadata that you specified for the adapter, staging, aggregations, information maps, reports, and jobs that you specified with the Adapter Setup wizard.The summary consolidates all of the specifications that you provided on the previous pages of the wizard.
-
Review the summary and ensure that it reflects the specifications and results that you expect. If you want to change a value that you specified on a previous page, click Back to navigate to the appropriate page and change the parameter value as needed.The last item on the Summary page provides the location where a log file for the current Adapter Setup wizard instance is stored. This text file is automatically stored on your machine after each execution of the Adapter Setup wizard. The log includes all of the information that is detailed on the Summary page of the Adapter Setup wizard. It also includes the dates and times at which the Adapter Setup wizard was run. For more information about the log file, see Log File Created by the Adapter Setup Wizard.
-
Click Finish when complete. The wizard creates the jobs and saves them in an
<adapter><number>folder within the IT data mart that you selected. The time that the Adapter Setup wizard takes to create the resulting jobs varies based on the adapter and the parameters that you specify. A progress bar shows the status when the wizard creates the appropriate jobs. If the jobs cannot be created, an error message is displayed.Note: The first time you edit a job that the Adapter Setup wizard created, the job is marked as needing to be saved. (An asterisk is next to the name in the title bar of the Job Editor window). This is because the Job Editor is storing the initial editor settings for how the job is displayed in the window. The job was saved when the Adapter Setup wizard executed.
If you do not select to have the Adapter Setup wizard automatically deploy the jobs that it creates, then you must deploy the resulting jobs if you want to run them in batch mode. You can right-click a job to open a menu that provides various options such as deployment and scheduling tasks. For information about running the jobs that the Adapter Setup wizard creates, see Running Jobs. For more information about deploying a job, see Deploy a Job for Scheduling or SAS Data Integration Studio Help. -