Working with SAS Management Console

Introduction to SAS Management Console

After successfully executing the installation and configuration instructions that are delivered with SAS IT Resource Management, the data administrator must perform the setup tasks that are required by SAS IT Resource Management. These tasks ensure that performance analysts and information consumers have the permissions and tools that they need in order to work with their IT resource data. The data administrator performs these tasks with SAS Management Console and SAS Enterprise Guide.
Note: Unlike the previous versions of SAS IT Resource Management (versions 3.1 and 3.1.1), no specific customizations are needed for SAS IT Resource Management 3.2 and later.
SAS Management Console provides a single point of control for managing resources on all platforms that are supported by SAS. By invoking SAS Management Console, the data administrator has access to the many management functions that it provides. For information about these functions, see the SAS Management Console: User's Guide at http://support.sas.com/documentation/index.html. Use the A-Z index to SAS Product Documentation to locate the documentation for SAS Management Console.
SAS Management Console enables SAS IT Resource Management data administrators to perform the following tasks:
  • Add users and groups to the SAS Metadata Repository. By creating user groups, the data administrator can set permissions that provide security for data and reports that are registered in the SAS Metadata Repository. These groups govern how group members can access the various components of the system.
    Note: The User Manager component of SAS Management Console controls this function.
  • Add users and groups to the Access Control Template (ACT) table. When you add users or user groups to the ACT table, you can also set permissions that govern the tasks that those users or user groups can perform. The permissions govern the resources that have been registered in the SAS Metadata Repository.
    Note: The Authorization Manager component of SAS Management Console controls this function.
  • Add locations (or directories) for the deployment of jobs that are created in SAS IT Resource Management. After users define their jobs, they can submit those jobs for immediate execution or deploy them for scheduling in SAS Management Console. After a job is deployed, you can schedule the job to run in batch mode at a specified date and time.
    Note: The Schedule Manager component of SAS Management Console controls the function of specifying a job deployment directory.
To access SAS Management Console, from your Windows desktop, select Startthen selectProgramsthen selectSASthen selectSAS Management Console.

Adding Users and Groups of Users

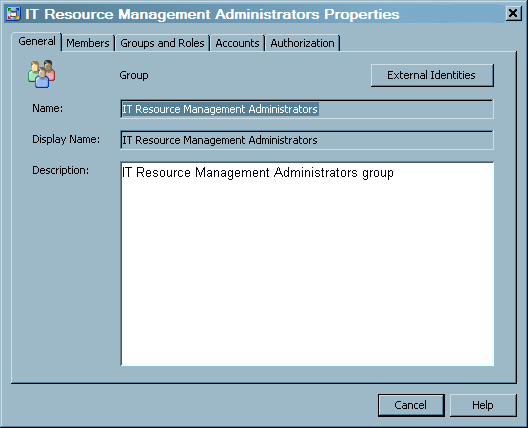
About SAS IT Resource Management User Groups

The installation process of SAS IT Resource Management establishes two user groups:
  • IT Resource Management Administrators
    IT Resource Management Administrators can access all folders and galleries in Gallery Manager.
  • IT Resource Management Users
    IT Resource Management Users can access their own private folders and any public folders and galleries. In addition, they can access only their own private folders in Gallery Manager. (Public folders can be accessed by anyone.)
Note: Users who do not belong to either group have Read-Only access to public folders in Gallery Manager. In addition, Gallery Manager honors only the IT Resource Management Administrators and IT Resource Management Users groups. It does not honor any other groups that might be established.
SAS Management Console enables you to add new or existing users to a SAS IT Resource Management user group. To invoke SAS Management Console, perform the following steps:
  1. Start SAS Management Console by selecting Startthen selectProgramsthen selectSASthen selectSAS Management Console.
    Connect to SAS Management Console by using the unrestricted user ID.
  2. In the Repository field at the top of the Plug-ins tab, select the Foundation repository from the drop-down list.
  3. After adding a new or existing user to one of the IT Resource Management groups, set the login and then the permissions for that user. (A login is a copy of information about the external account for each application authentication domain.)

Add a New User to a SAS IT Resource Management User Group

To add a new user to one of the two groups that are provided by SAS IT Resource Management, perform the following steps:
  1. Right-click the User Manager component of SAS Management Console. From the drop-down list, select Newthen selectUser.
    The General tab of the New User Properties dialog box appears. Enter the name and other identifying information for the user on this dialog box.
  2. Click the Groups and Roles tab. From the Available Groups and Roles column, select the group (that is, IT Resource Management Administrators or IT Resource Management Users) into which you want to place the new user. Click the arrow to add the selected group to Member of column.
  3. Define a login for this new user.
    Click the Accounts tab. Click New to display the New Login Properties dialog box where you can add login information for the new user. Ensure that the User ID and Password fields are entered. (DefaultAuth is the supplied entry that contains the login for the SASITRM server.)
  4. Click OK to save your changes.

Add an Existing User to a SAS IT Resource Management User Group

To add an existing user to one of the two groups that are provided by SAS IT Resource Management, perform the following steps:
  1. From the list of registered users in the User, Group, or Role column, right-click the IT Resource Management Administrators or IT Resource Management Users and select Properties.
    IT Resource Management Administrators Properties Dialog Box
    IT Resource Management Administrators Properties Dialog Box
    The dialog box contains five tabs: General, Members, Groups and Roles, Accounts, and Authorization. The Properties dialog box enables you to view and modify information about the selected user or user group.
  2. Click the Members tab to display a list of the Available Identities and the Current Members. To add a user to the Current Members of selected group, highlight that user in the Available Identities column. Use the arrow to move the selected user to the Current Members column.
  3. For each selected member, make sure that user has a login.
    To set the login for a user, click Properties. On the Accounts tab, ensure that the User ID and Password fields are entered. (DefaultAuth is the supplied entry that contains the login for the SASITRM server.)
  4. Click OK to save your changes.

Set Permissions for Users

Permissions can be set in the ACT table in the Authorization Manager component of SAS Management Console. The ACT consists of a list of users and groups and indicates, for each user or group, whether permissions are granted or denied. An entry in the table can be applied to multiple resources. Make sure that the users have the appropriate permissions for the Foundation repository.
Note: For more information, see the SAS Intelligence Platform: Security Administration Guide.

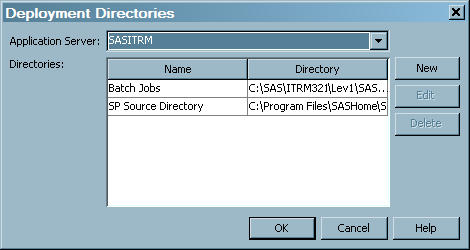
Adding Locations for the Deployment of Jobs

In order to run a job in batch mode, a job must be deployed into a directory on the application server. The location of this directory can be defined in SAS Management Console. New deployment directories can also be defined in the SAS IT Resource Management Client, while you are deploying a job. To specify the location, perform the following steps:
  1. If SAS Management Console is not running, start it by selecting Startthen selectProgramsthen selectSASthen selectSAS Management Console.
    Note: You must have the authority to use the Scheduler Manager plug-in in SAS Management Console. Your system administrator can grant this authority, if necessary.
  2. Click the Plug-ins tab, if necessary, to display plug-ins in the left panel of SAS Management Console. In the Repository field at the top of this panel, select the Foundation repository from the drop-down list.
  3. Select the Schedule Manager component of SAS Management Console.
    Note: If the Schedule Manager component is not displayed in the list of plug-ins, your user ID is not defined to have access to Schedule Manager. Users can be granted access to Schedule Manager by administrative users.
  4. From the menu bar, select Actions. From the drop-down list, select Deployment Directories. The Deployment Directories dialog box appears.
    Deployment Directories Dialog Box
    Deployment Directories Dialog Box
  5. In the Application Server field, you can specify the application server that you want to use for deploying jobs. Use the drop-down list to show the application servers that are available, and click to select a server. (SASITRM is the application server that is configured by default when SAS IT Resource Management is installed.)
  6. In the Directories section of the Deployment Directories dialog box, you can specify one or more directories where the generated code for deployed jobs is to be stored. The server that is selected in the Application Server field must be able to resolve the paths to these directories.
    SAS IT Resource Management supplies a Batch Jobs directory. The path to this supplied directory on the SASITRM server is: SASEnvironment\SASCode\Jobs.
    In the Deployment Directories dialog box, you can perform the following tasks:
    • Define a new directory. To do so, click New.
    • Update a directory. To do so, select the directory and click Edit.
    • Remove the metadata for a directory. To do so, select the directory and click Delete.
    If you are defining locations in z/OS traditional file system locations, you can specify the name of the directory as the full name of a partitioned data set.
    For more detailed information about these tasks, click Help.
  7. Click OK to save your changes.