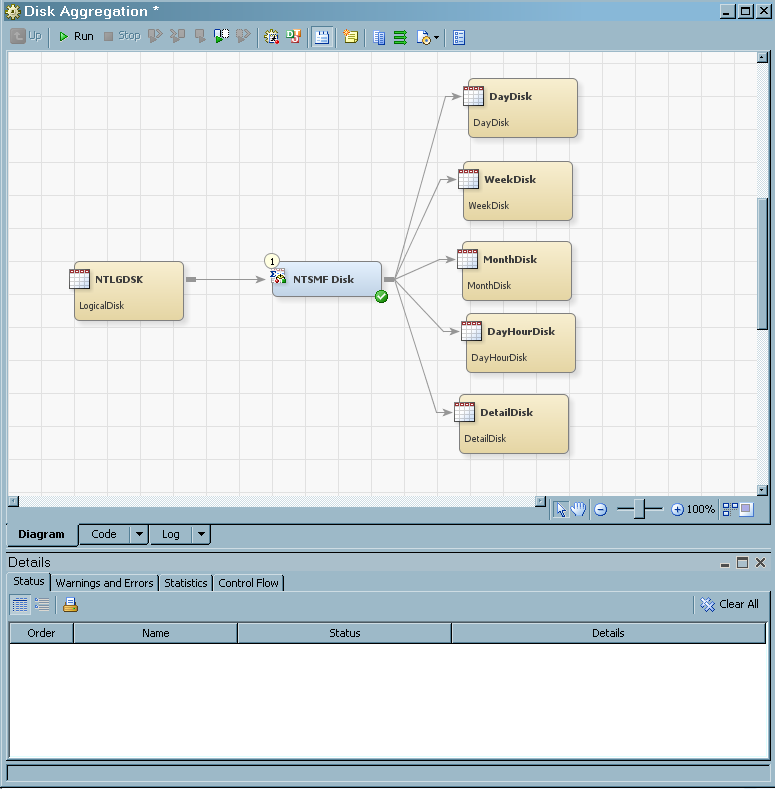
Running Jobs
Run a Job Immediately
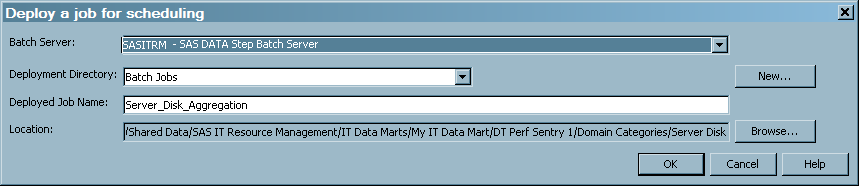
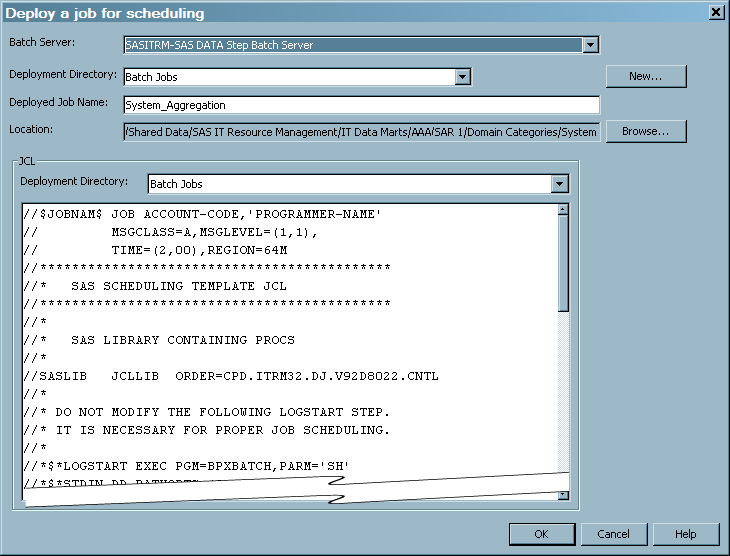
Deploy a Job for Scheduling
How to Deploy a Job
You can deploy a job
so that it can be scheduled to run in batch mode on the default SAS
application server.
-
The batch server, the deployment directory, and the name and path of the job that you selected are the default values that are displayed in this window.
-
The Deployment Directory field specifies the physical path to the directory where the generated code for the job is stored. From the drop-down list, select a different deployment directory. Select New to open the New directory window where you can define a new deployment directory.
-
If you define a new deployment directory in the
z/OS operating environment, the new directory will contain a file that has the SAS source code for the job and a file that contains the generalized job control language (JCL) that can run the job. You can modify this generalized file of JCL according to the requirements of your site.
-
The Deployed Job Name field specifies the name of the file that contains the generated code for the selected job. You can edit the default name, but the name must be unique in the context of the Deployment Directory that was previously specified. This field is available only when you deploy a single job. When you deploy multiple jobs, the filename is the same as the job names, but the name has a .sas extension.
-
The code is then generated for the job and stored in the directory that is specified. If the deployment is successful, a message is displayed confirming that result. Metadata about the deployed jobs is saved to the current SAS Metadata Server. A status window is displayed and indicates whether the deployment was successful. Another object with the same name as the deployed job is stored in the IT Data Marts tree. This deployed job can be identified by the deployed job icon:
 . This deployed job is now available for scheduling.
Schedule a Job to Run in Batch
After you deploy a
job for scheduling, you can deploy it using any scheduling software
that is available in your operating environment. An administrator
can set up and run your job with any of the following types of software:
Note: For more information about
scheduling, see Scheduling in SAS 9.2. This
document is associated with plug-ins to SAS Management Console. It
is available at http://support.sas.com/documentation/onlinedoc/sasmc/index.html.
How to Schedule a Job Using a Built-In or Third-Party Scheduler
The deployed job
is a file that contains SAS code. In order to schedule it using a
built-in or third-party scheduler, you must supply an appropriate
invocation of SAS, which runs this code.
This invocation must
invoke the correct version of SAS with the configuration that is specified
in the SAS IT Resource Management installation and configuration instructions.
For more information about how to invoke SAS on your operating system,
see SAS Companion for UNIX Environments, SAS Companion for z/OS , or SAS Companion
for the Microsoft Windows Environment, as appropriate.
After you have set up
the SAS invocation, you can then use your preferred scheduler to add
this job to the script, batch file, or JCL that invokes SAS. For example,
on UNIX, you can use `cron' and add the shell script invocation to
the
crontab file. For third-party schedulers
and for schedulers that are supplied as part of the operating system,
follow the documentation for that scheduler.
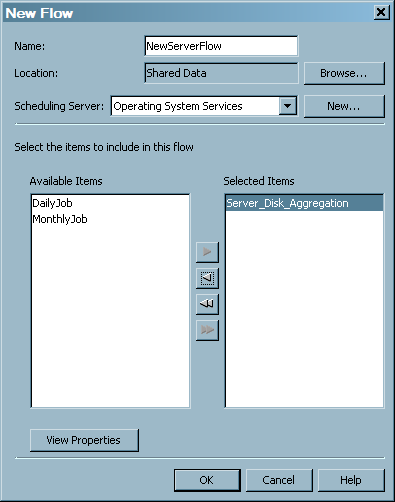
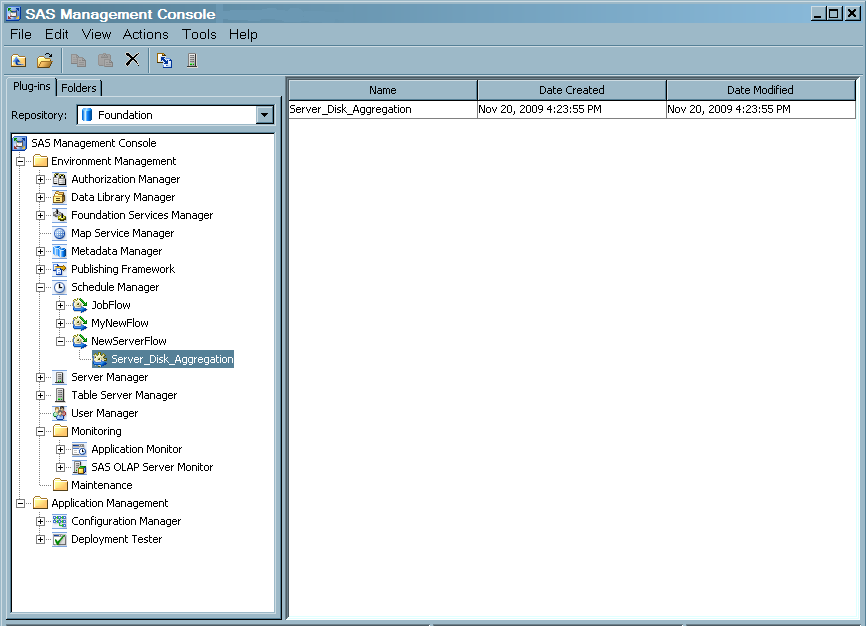
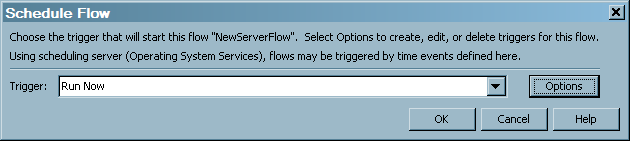
How to Schedule a Job Using the Schedule Manager in SAS Management Console
-
From the drop-down list, select when to run the flow—to run now or to run manually. Click Options to open the Trigger Options dialog box on which you can select a trigger to start the flow, such as a specific date, time, and recurrence. Click OK. When prompted, enter a user ID and password for the scheduling server. A message will be displayed confirming the successful scheduling of the job.
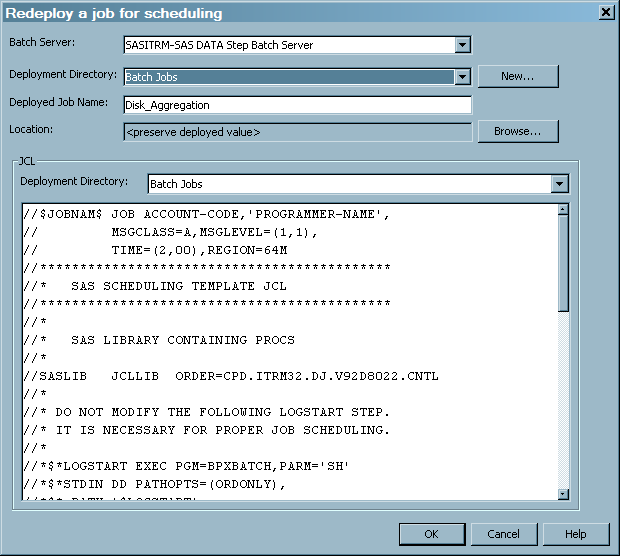
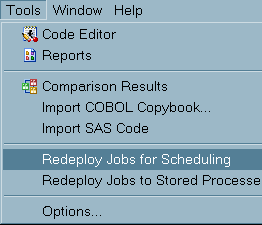
Redeploy a Job
If you update a job
that you already deployed, you must redeploy it so that the latest
version of the job is scheduled. For example, if a table is deleted
from a job, then the job must be deployed again.
-
The Redeploy a job for scheduling dialog box appears.
-
You can choose to preserve the deployed value of the job's metadata. However, you can change where the job is redeployed by changing the deployment directory and its location. If you define a new deployment directory in the Windows or UNIX operating environments, the new deployment directory will contain the SAS source code for the job.
-
Under the
z/OS operating environment, you can also choose to preserve the deployed value of the job's metadata. If you want to change where the job is redeployed, select a new value for the Deployment Directory field. If you define a new deployment directory in thez/OS operating environment, the new directory will contain the SAS source code for the job and a file that contains the generalized JCL that can run the job. You can modify this generalized file of JCL according to the requirements of your site.
-

Redeploy All Jobs on the Server
If you made changes
that affect all jobs that are deployed on the server, you must redeploy
then so that the latest versions of the jobs are scheduled. For example,
if the computing environment of the server where the deployed jobs
are stored changes, the jobs must be deployed again.
Note: The code that is generated
for a job contains the credentials of the person who created the job.
If those credentials have changed, and a deployed job contains outdated
user credentials, the deployed job will fail to execute. In that case,
redeploy the job with the appropriate credentials.
-
Under the
z/OS operating environment, you can choose to preserve the deployed value of the job's metadata. If you want to change where the job is redeployed, select a new value for the Deployment Directory field. If you define a new deployment directory in thez/OS operating environment, the new directory will contain the SAS source code for the job and a file that contains the generalized JCL that can run the job. You can modify this generalized file of JCL according to the requirements of your site. Code is generated for the jobs that you redeployed. The code is saved to the deployment directory of the SAS application server that is used to deploy jobs.
Running an “Overall” Job with the %RMRUNETL Macro
You can choose to run
your staging, aggregation, information map, and reporting jobs within
a single processing macro. The staging job is run first, and then
the aggregation jobs are run in parallel using Multi-Processing (MP)
Connect, followed by the information map jobs that are run in parallel,
and finally the report jobs that are run in parallel. If the staging
job fails, the aggregation, information map, and report jobs are not
run. After each job completes, the SAS log is examined by the program.
The completion status of the job (Success, Warning, or Error) is sent
by e-mail to the specified recipient. If the log displays warnings
or errors, the e-mail includes the text of the error or warning along
with the corresponding line number in the log file.
For information about
how to set up the %RMRUNETL macro that provides this ability, see %RMRUNETL.
Allocating the Raw Data File Externally
When a job is deployed,
the file that was entered in the Raw data file or directory field of the Staging Parameters tab of
the staging transformation (or in the Adapter Setup wizard) appears in the generated code as part of a macro assignment
(a z/OS batch job.
%let statement). In a production
environment, it is possible that the raw data file changes from day
to day, or that it needs to be allocated externally, for example in
the JCL of a Note: For adapters that accept
files or directories as input, the code is
%LET RAWDATA=raw-data-assignment.
If the raw data file
or directory is allocated externally, it will be used in preference
over the location referred to in the
%let statement. For completeness, the %let statement can be removed, but this is not necessary.
CAUTION:
Do not
remove or comment out the %let statement for adapters that do not
have a raw data file or a directory.
For some adapters
such as the SAP ERP, MS SCOM, HP Reporter, VMware Data Acquisition,
and VMware vCenter adapters, the
%let statement is present in the code. However, that statement does not
specify a file or a directory. Instead, the %let statement points to the libref of the SAS library that is associated
with the raw data. (The location of the input library typically remains
fixed, unlike the name or location of individual raw data files.)
If the job is redeployed,
the raw data assignment will be reset and will need to be removed
again, unless the raw data parameter in the Staging Parameters tab is removed beforehand.
When allocating the
raw data file externally for MXG based adapters, the correct fileref
must be used. (On z/OS , the fileref is assigned with a DD JCL statement.)