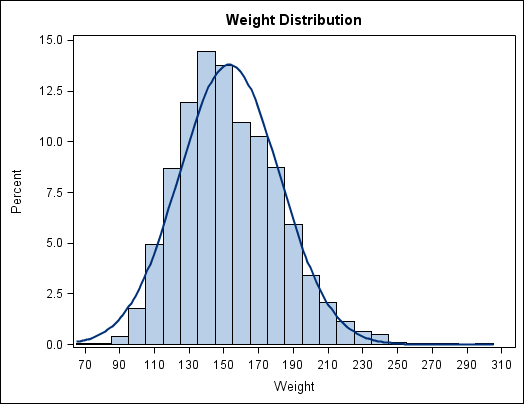
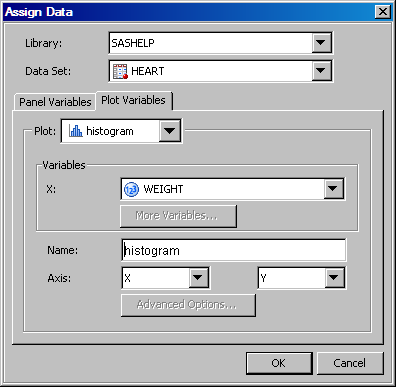
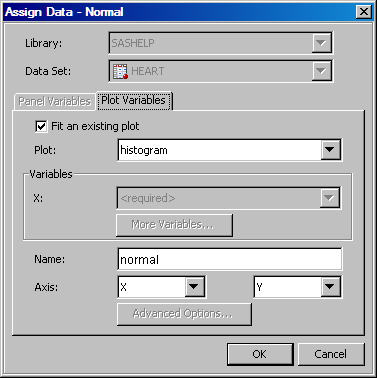
Quick-Start Example One: Design a Simple Graph

About Quick-Start Example One

This example uses the Heart data set in the SASHELP library. The example shows the distribution of the weight of individuals who participated in a medical study. The graph that you create here contains a histogram and a normal density curve.
Simple Histogram and Normal Curve
To create this graph, follow these steps.

Step One: Create the Graph and Assign Data

In this step, you create a graph from the Graph Gallery.
  1. Open the Graph Gallery if it is not already open. Select Filethen selectNewthen selectFrom Graph Gallery, or click the Graph Gallery Graph Gallery button toolbar button.
  2. On the Basic tab, double-click the Histogram icon.
    The Histogram icon looks like this: Histogram icon
    The Assign Data dialog box appears.
  3. In the Assign Data dialog box, complete these steps:
    • Select SASHELP from the Library list box.
    • Select HEART from the Data Set list box.
    • Select WEIGHT from the X list box.
    Assign Data dialog box, variables for the simple graph
  4. Click OK.

Step Two: Add a Normal Plot to the Graph

  1. From the Plot Layers panel of the Elements pane, click and drag the Normal icon to the graph. (If the Elements pane is not visible, select Viewthen selectElements to display it.)
    The Normal icon looks like this: Normal icon
    The Assign Data dialog box appears.
  2. In the Assign Data dialog box, keep the default selections.
    Assign Data dialog box, variables for the simple graph
    Note the following:
    • You cannot change the library and data set. All plots that reside in a common cell must use a common data set.
    • By default, the Fit an existing plot check box is selected. This setting indicates that the variables of the normal density curve are matched to those of the histogram. Accordingly, the X variable list box is dimmed.
  3. Click OK.

Step Three: Customize the Graph Title

The histogram contains a placeholder title above the plot. By default, the title contains the text “Type in your title...”.
  1. Double-click the placeholder title. The placeholder text is highlighted:
    title text box
  2. In the text box, enter Weight Distribution.

Step Four: Remove the Graph Footnote

The histogram contains a placeholder footnote in the lower left corner of the graph. By default, the footnote contains the text “Type in your footnote...”.
For this example, you can remove the footnote.
To remove the footnote, right-click the placeholder footnote and select Remove Footnote from the pop-up menu.

Step Five: Save the Graph

It is recommended that you save this graph so that you can later return to it.
  1. Select Filethen selectSave As.
  2. Save the file to the desired location. Specify the name that you want for the file. For example, you might enter quickStart. The file type SGD Files (*.sgd) is selected by default.
  3. Click Save.
The next quick-start example builds on this graph. See Quick-Start Example Two: Enhance the Simple Quick-Start Graph.