Using the Grid Manager Plug-in for SAS Management Console

Overview

The Grid Manager plug-in for SAS Management Console enables you to monitor SAS execution in a grid environment. This plug-in enables you to manage workloads on the grid by providing dynamic information about the following:
  • jobs that are running on the grid
  • nodes that are configured in the grid
  • job queues that are configured in the grid
Information is displayed in tabular or chart format. Here is an example of a job view:
Job View in the Grid Manager Plug-in to SAS Management Console
Grid manager plug-in
Using the SAS Grid Manager, you can customize the view by selecting the columns of data to display and the order in which they should appear. In addition, you can filter, sort, and refresh the display of jobs.
Subsetting Data in the Grid Manager Plug-in
subsetting data in grid manager
Each grid that you define must have one grid monitoring server configured and running on a machine in the grid.

Maintaining the Grid

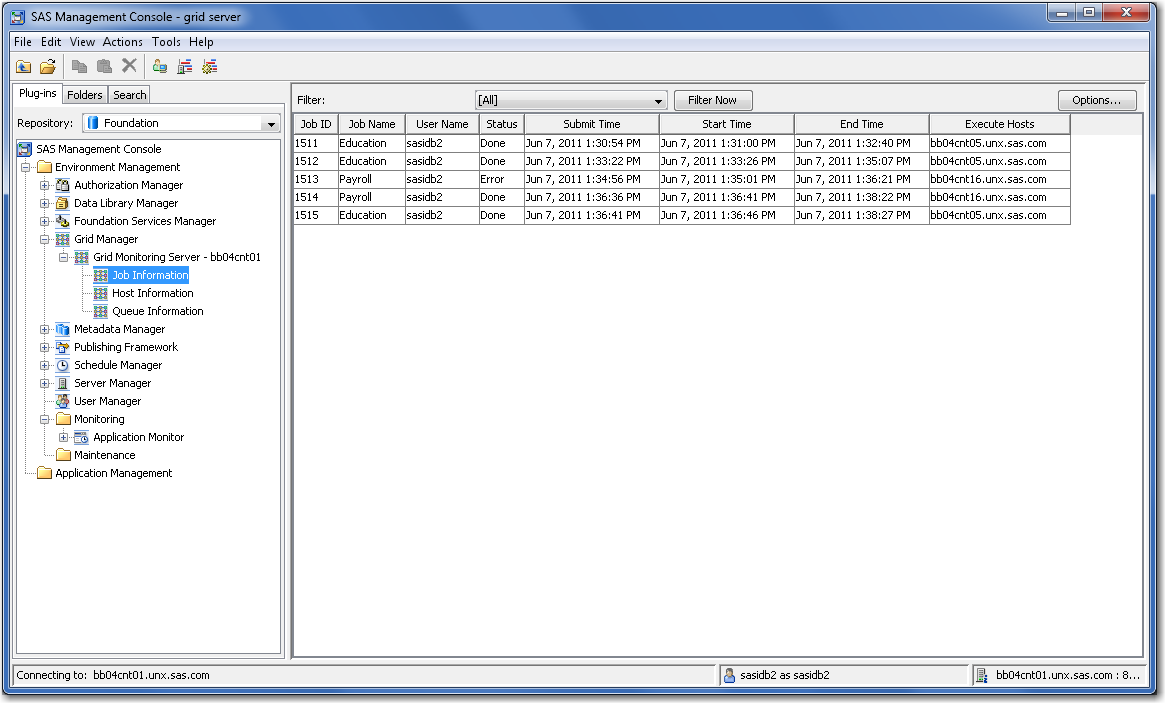
Viewing Grid Information

When you expand the Grid Manager node in the navigation tree, all of the grid monitoring servers that you have defined are listed under the name of the plug-in. Each one represents a unique grid. To view information about a specific grid, expand the server's node in the navigation tree. The information for a grid is grouped into three categories in the navigation tree:
  • Job Information
  • Host Information
  • Queue Information
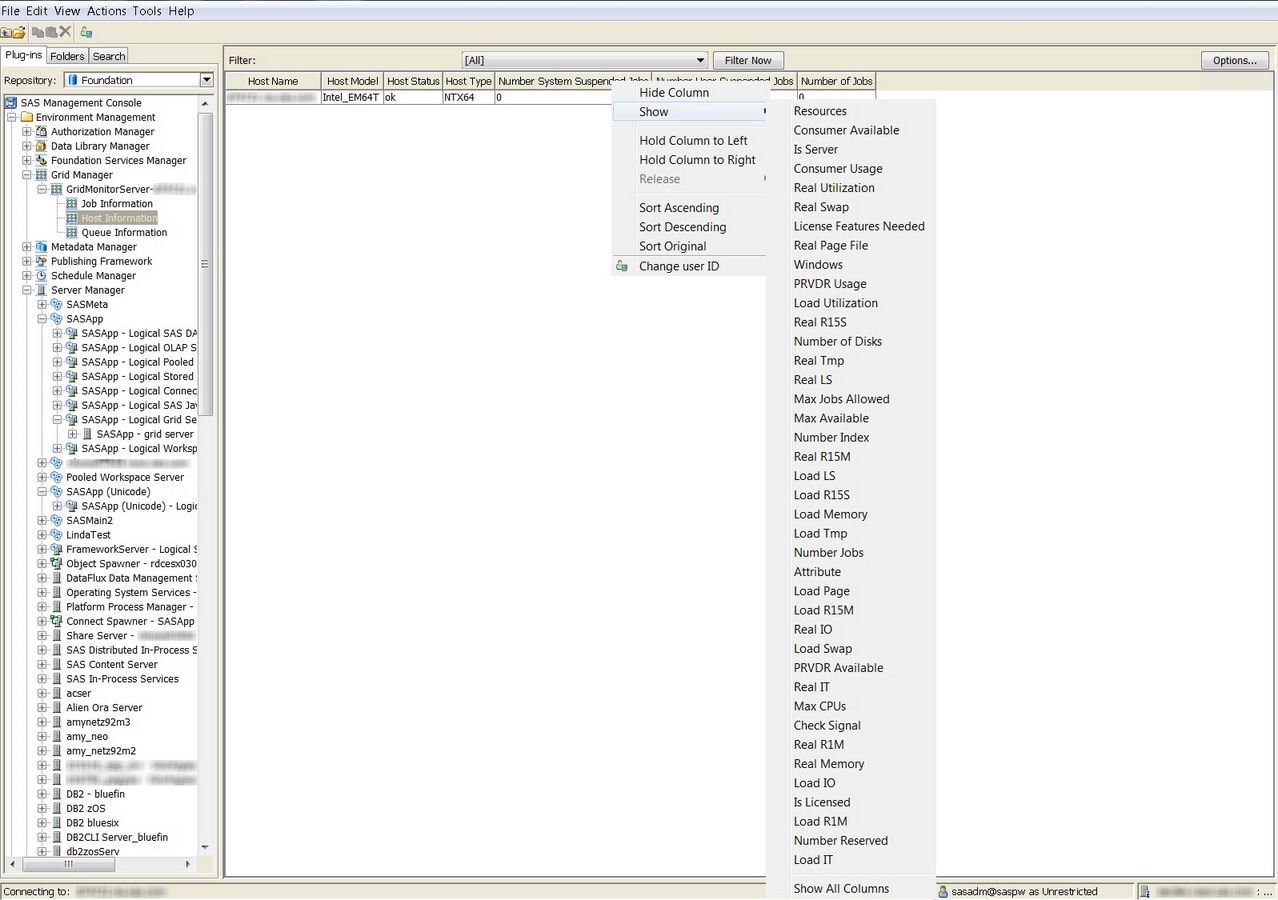
Select a category to display a table that contains information for the category. You can 
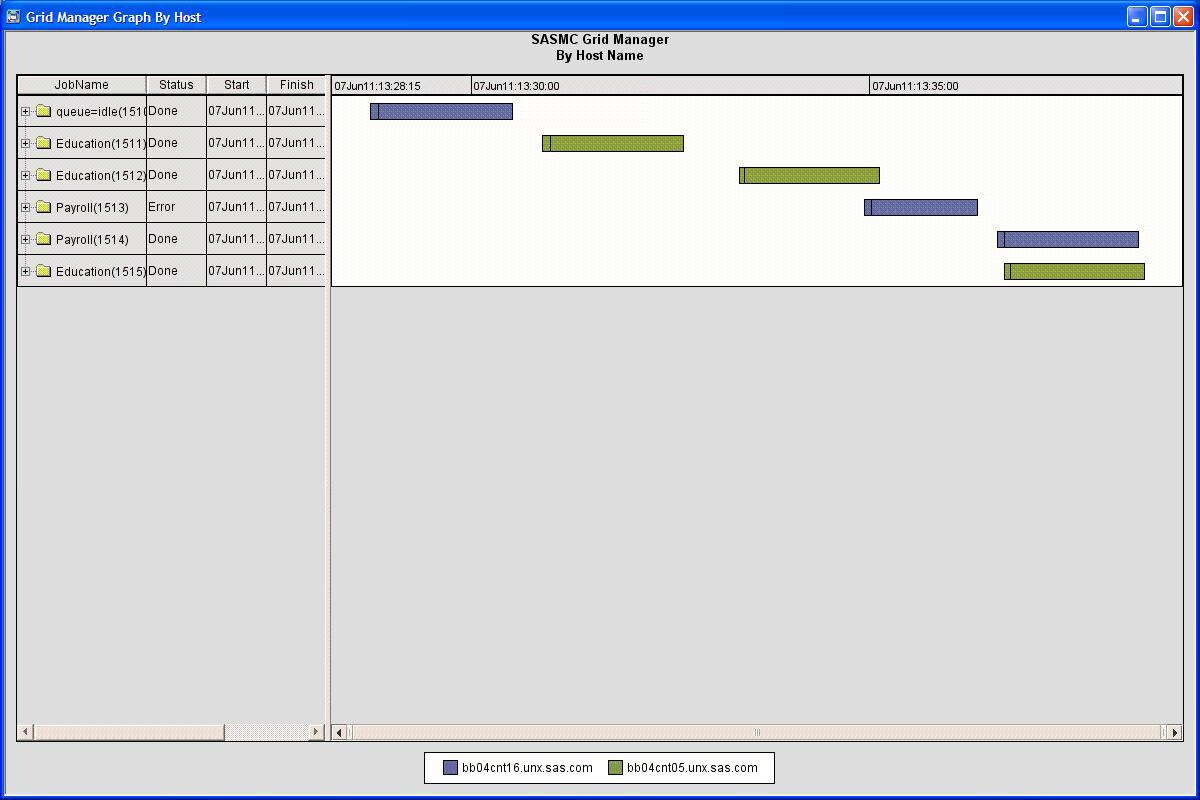
also display a graph of the job information. Click the column headings 
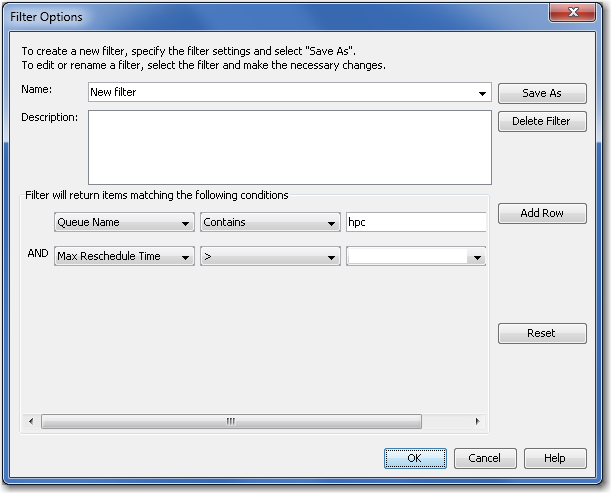
to select the information that is displayed in the table. Click Options to start the Filter wizard, which you can use to select which jobs to display.
Filter Options Dialog Box
filter options window
After you have defined filters, you can select a filter and click Filter Now to filter the displayed information. You can also manage jobs, hosts, and queues from the tables.
Right-click the Grid Monitoring Server node in the navigation tree and select Options to specify that the information from the grid is automatically refreshed and how often it is refreshed.

Managing Jobs

Use the Grid Manager to terminate or suspend running jobs and terminate or resume suspended jobs.
To terminate a job, follow these steps:
  1. In the selection tree, select the Job Information node.
  2. In the table, locate the job that you want to cancel.
  3. Right-click any column in the row for the job and select Terminate Task from the pop-up menu.
If you log on to SAS Management Console using a user ID that is defined as an LSF Administrator ID, you can terminate any jobs that have been submitted to the grid. Users can terminate only their own jobs. The LSF Administrator can terminate any job. If you are terminating a job on Windows, be sure to match the domain name exactly (including case).
To suspend a job (pause the job's execution), follow these steps:
  1. In the selection tree, select the Job Information node.
  2. In the table, locate the job that you want to suspend.
  3. Right-click any column in the row for the job and select Suspend Job from the context menu.
To resume processing of a suspended job, follow these steps:
  1. In the selection tree, select the Job Information node.
  2. In the table, locate the job that you want to resume.
  3. Right-click any column in the row for the job and select Resume Job from the context menu.

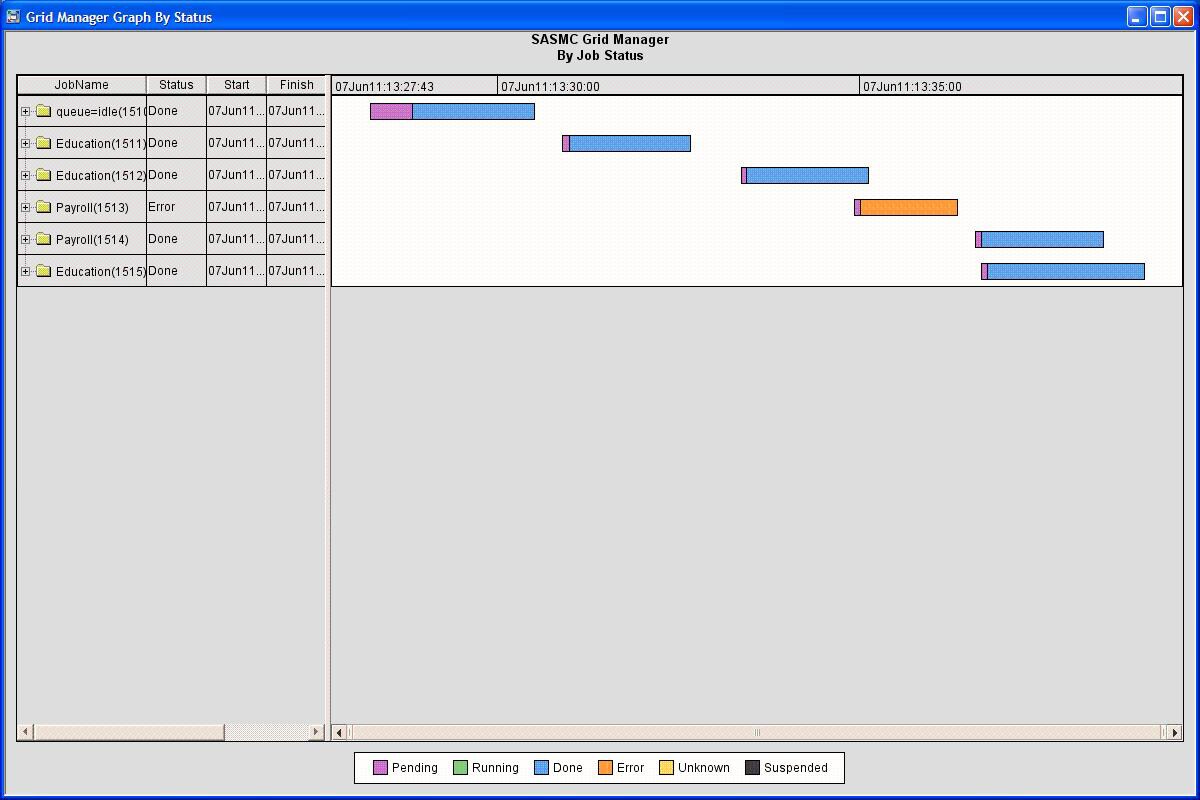
Displaying Job Graphs

You can use the Grid Manager to display GANTT charts for jobs running on the grid. To display a chart, follow these steps:
  1. In the selection tree, select the Job Information node.
  2. Right-click and select either Create Graph by Host or Create Graph by Status from the Actions menu, the context menu, or the toolbar.
  3. Select Create Graph by Host to display a Gantt chart that shows the amount of time taken to process each job and identifies the machine on which the job ran.
    Display of Grid Jobs by Host
    grid jobs by host
  4. Select Create Graph by Status to display a Gantt chart that illustrates the amount of time that each submitted job spent in each job status (such as pending or running).
    Display of Grid Jobs by Status
    grid jobs by status

Closing and Reopening Hosts

You can use the Grid Manager to close or reopen hosts on the grid. A closed host cannot process any jobs that are sent to the grid. Closing a host is useful when you want to remove the host from the grid for maintenance. You can also close the grid control server to prevent it from receiving work.
Note: The status of a host does not change right away after it has been opened or closed. By default, the host status is polled every 60 seconds by the Grid Management Service. The polling time interval is specified by the GA_HOST_POLL_TIME property in the ga.conf file, which is located in the <LSF_install_dir>/gms/conf directory.
To close a host, follow these steps:
  1. In the navigation area, open the node for the grid containing the host.
  2. Select the Host Information node.
    The display area contains a table of the hosts in the grid.
  3. In the table, right-click the host that you want to close and select Close from the context menu.
The host now cannot accept jobs that are sent to the grid.
To open a host that has been closed, follow these steps:
  1. In the navigation area, open the node for the grid containing the host.
  2. Select the Host Information node. The display area contains a table of the hosts in the grid.
  3. In the table, right-click the host that you want to open and select Open from the context menu. The host can now accept jobs that are sent to the grid.

Managing Queues

You can use the Grid Manager to close, open, activate, and inactivate queues. A closed queue cannot accept any jobs that are sent to the grid. An inactive queue can still accept jobs, but none of the jobs in the queue can be processed. Closing a queue is useful when you need to make configuration changes to the queue.
To close a queue, follow these steps:
  1. In the navigation area, open the node for the grid containing the queue.
  2. Select the Queue Information node.
    The display area contains a table of the queues in the grid.
  3. In the table, right-click the queue that you want to close and select Close from the context menu.
    The queue is now prevented from accepting jobs that are sent to the grid.
To open a closed queue, follow these steps:
  1. In the navigation area, open the node for the grid containing the queue.
  2. Select the Queue Information node.
    The display area contains a table of the queues in the grid.
  3. In the table, right-click the queue that you want to open and select Open from the context menu.
    The queue can now accept jobs that are sent to the grid.
To inactivate a queue, follow these steps:
  1. In the navigation area, open the node for the grid containing the queue.
  2. Select the Queue Information node.
    The display area contains a table of the queues in the grid.
  3. In the table, right-click the active queue that you want to make inactive and select Inactivate from the context menu.
To activate a queue, follow these steps:
  1. In the navigation area, open the node for the grid containing the queue.
  2. Select the Queue Information node.
    The display area contains a table of the queues in the grid.
  3. In the table, right-click the inactive queue that you want to make active and select Activate from the context menu.