Using Multiple Application Server Contexts
Using multiple queues
enables you to control the workflow of jobs that are processed on
the grid. For example, you can set up queues to handle jobs based
on priority, type, or SAS application. However, using multiple queues
requires you to specify the queue name each time you submit a job
to the queue. By creating multiple application server contexts, you
can create a separate logical grid server for each queue, making it
easier to process the job using the proper set of resources. By sending
the job to the appropriate application server, you automatically send
it to the appropriate queue.
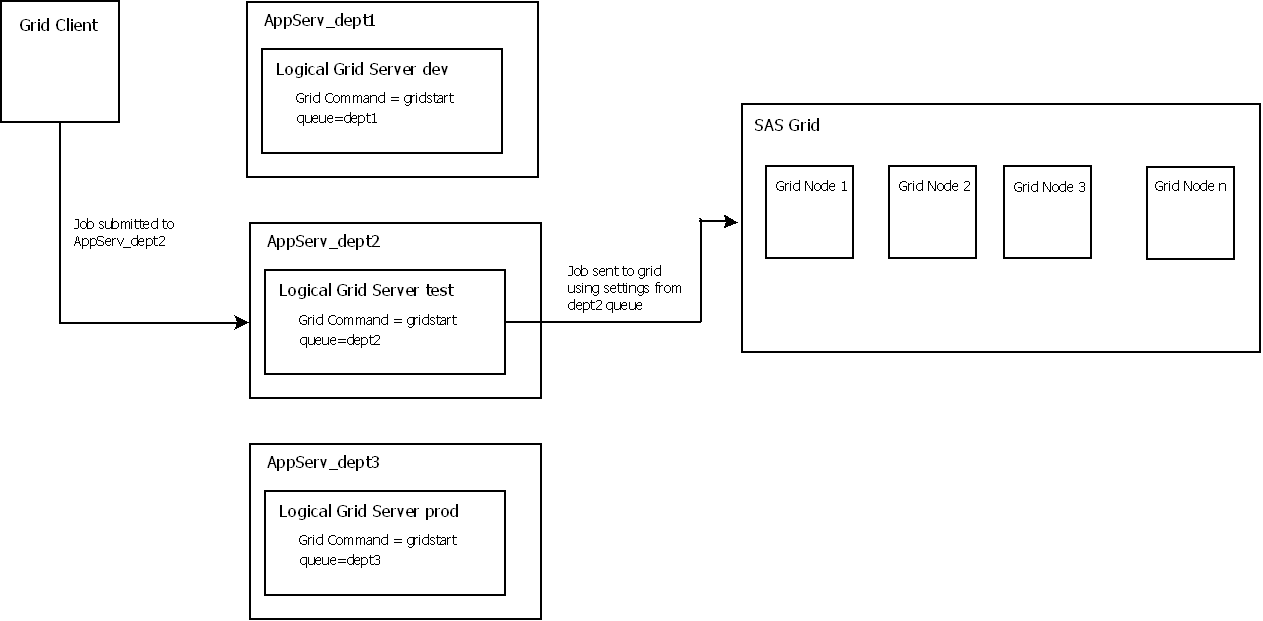
For example, you might
use this capability to set up a grid where each department has its
own queue. You might want to specify different parameters depending
on which department is submitting a job. Once you create a queue definition
for each type of processing, you can create a SAS application server
and logical grid server for each type of processing, specifying the
appropriate queue definition on each one. Because you specify the
same grid command on each server definition, all jobs are processed
by the same grid (although you can specify different SAS start-up
commands with each command). However, jobs sent to the dept2 application
server are processed using the dept2 queue definition, and jobs sent
to the dept3 server are processed using the dept3 queue definition. See Multiple Application Servers for Multiple Departments for a diagram
of this configuration.
You can also use this
capability to set up queues based on the applications that send jobs
to the grid. For example, you might have one queue for jobs that are
sent to the grid from SAS Enterprise Guide and another for jobs sent
from SAS Enterprise Miner. You would still create a queue, a SAS application
server, and a logical grid server for each queue that you define.
However, because jobs from these applications require a workspace
server to process them, you would also need to add a workspace server
component to each SAS application server definition. See Multiple Application Servers for Application Processing for a diagram
of this configuration.
-
Define the queues that you want to use or a grid command that is specific to the application or business group that will be using this application server context. See Using Queues for more information.

