Forecasting Projects
The system collects all the forecasting models you create, together with the options you set, into a package called a forecasting project. You can save this information in a SAS catalog entry and restore your work in later forecasting sessions. You can store any number of forecasting projects under different catalog entry names.
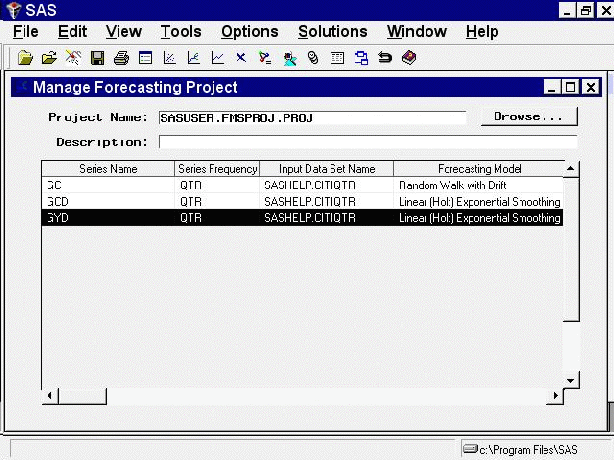
To see how this works, select the Manage Projects button. This opens the Manage Forecasting Project window, as shown in Figure 43.23.

The table in this window lists the series for which forecasting models have been fit, and it shows for each series the forecasting model used to produce the forecasts. This window provides several features that allow you to manage the information in your forecasting project.
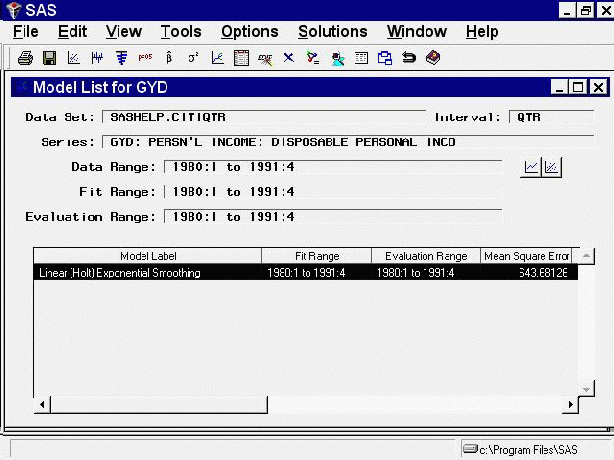
You can select a row of the table to drill down to the list of models fit to the series. Select the GYD row of the table, either by double-clicking with the mouse or by clicking once to highlight the table row and then selecting List Models from the toolbar or from the Tools menu. This opens the Model List window for this series, as shown in Figure 43.24.

Because the Automatic Model Fitting process kept only the best fitting model, only one model appears in the model list. You can fit and retain any number of models for each series, and all the models fit and kept will appear in the series’ model list.
Select Close from the toolbar or from the File menu to return to the Manage Forecasting Project window.