Standardizing Columns

Problem

You want to standardize the metadata for table columns that have the same name and that are used for the same purpose. For example, two columns named Total Sales should perhaps have the same data type and column length. Standardizing metadata can be especially useful for the target tables in SAS Data Integration Studio jobs. After you perform the standardization process, the columns in the existing table are updated the next time you run the job.

Solution

You can use the Column Standardization Tool wizard to standardize the column metadata and evaluate the effects through the use of impact analysis. The column standardization function is provided as a plug-in to SAS Management Console and SAS Data Integration Studio. The wizard helps you to update table column metadata between tables so that they match. You can use this wizard to standardize column lengths between two or more tables, formats, and other attributes that you would like to match between the tables. Finally, you can use this feature to generate a report about column differences or log updates for audit purposes.

Tasks

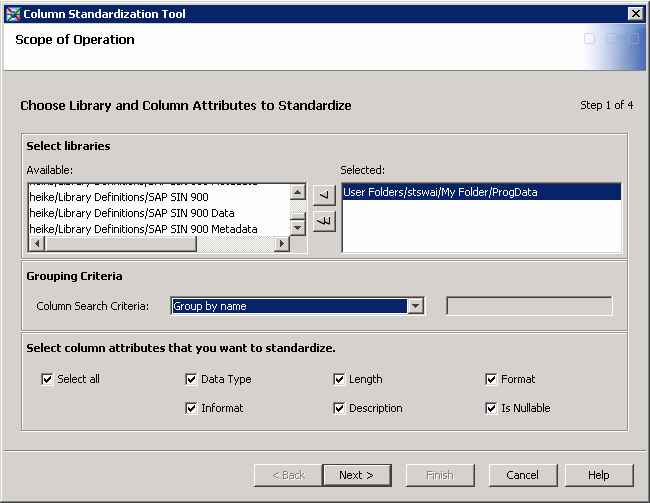
Select Libraries and Column Attributes

Use the Scope of Operation page to choose one or more libraries and a set of attributes to standardize.
Perform the following steps:
  1. Select the libraries that you want to process for standardization and move them to the Selected field. For example, you can select the ProgData library.
  2. Specify a grouping criterion such as Group by name in the Column Search Criteria field.
  3. Specify the set of attributes that you want to standardize. Note that you can select Select all to select all of the attributes at once.
    The libraries and attributes selected for a sample column standardization run are shown in the following display:
    Scope of Operation
    Scope of Operation
  4. Click Next to access the Non-standard Columns page.

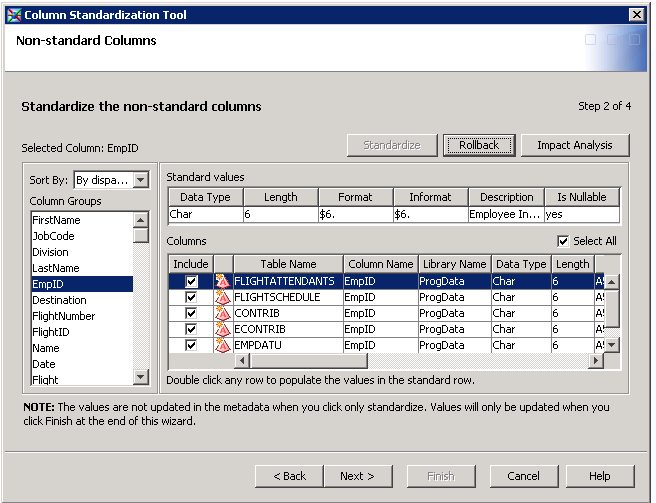
Standardize Non-Standard Columns

Use the Non-standard Columns page to select the columns that you want to standardize and enter standard values.
Perform the following steps:
  1. Select a column in the Column Groups field, which is displayed because the Group by name criteria was selected in the Column Search Criteria field. For example, you can select the EmpID column.
    Note: You can use the drop-down menu in the Sort By field. For example, you can select By disparity display the columns with the most disparities at the beginning of the columns list. You can also sort columns by name. Finally, you can sort by the number of tables in which the columns are used.
  2. Select a row in the Columns table. Each row contains the data for the column in one of the tables included in the libraries that you have selected for standardization. (You should select a row that closely approximates the values that you would like to standardize, such as the row containing the EmpID column in the FLIGHTATTENDANTS table.)
  3. If SAS Management Console is installed, click Impact Analysis to see how the selected column and table combination is used in jobs. Then you can review the jobs to ensure your planned standardizations will not affect the jobs adversely. For information about impact analysis, see About Impact Analysis and Reverse Impact Analysis.
  4. Double-click the selected row to populate its values into the Standard values row.
  5. Review the fields that you want to standardize. Edit the values in the Standard values row as needed.
    The following standardizations were made for this example:
    • Length: 6 (was 4 for some tables)
    • Format: $6. (was missing for some tables)
    • Informat: $6. (was missing for some tables)
    • Description: Employee Identification Number (was missing for some tables)
    These values will be uniform across all of the tables in the selected libraries after the standardization is applied.
  6. Click Standardize to apply the standardization. Note that the metadata will be changed only at the end of the wizard.
  7. Review the results of the standardization in the Columns table.
    These results are shown in the following display:
    Non-Standard Columns
    Non-Standard Columns
    Note that you can click Rollback to reverse the standardization of the selected column.
  8. Repeat the standardization process for the other columns in the Column Groups field.
  9. Click Next to access the Standardization Summary page.

Review the Standardization Summary

Use the Standardization Summary page to display a summary of the columns that will be modified.
The following display shows the summary for the sample standardization:
Standardization Summary
Click Non-Standard Columns Report to see a detailed report of the changes. Note that this report is optional. It contains a list of all of the nonstandard columns found in the metadata search. This search is performed using the search criteria user specified in first tab of the wizard.

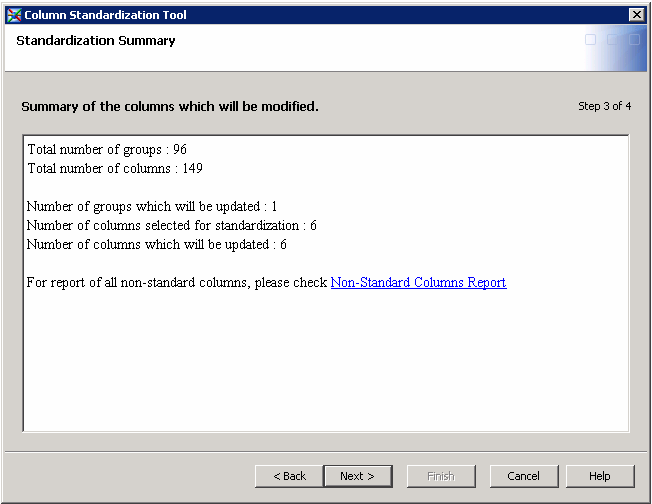
Review the Column Standardization Report

Use the Column Standardization Report to review a detailed listing of the changes included in the standardization process.
The following display shows the report for the sample standardization.
Column Standardization Report
After you have reviewed the report, click Next to complete the standardization process and display the Execution Report page. Note that the metadata is updated at this point.

Complete the Standardization

Use the Execution Report page to confirm that the standardizations were successfully executed.
The following screen shows the Execution Report page for the sample standardization:
Execution Report
Execution Report
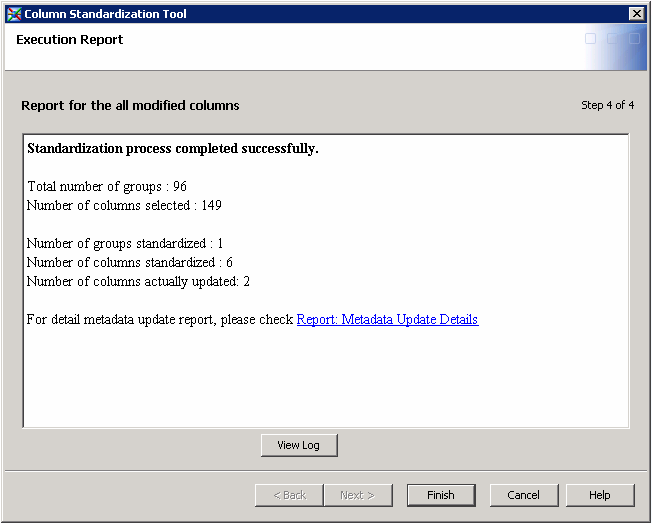
Note that you can click Report: Metadata Update Details to display the report. 
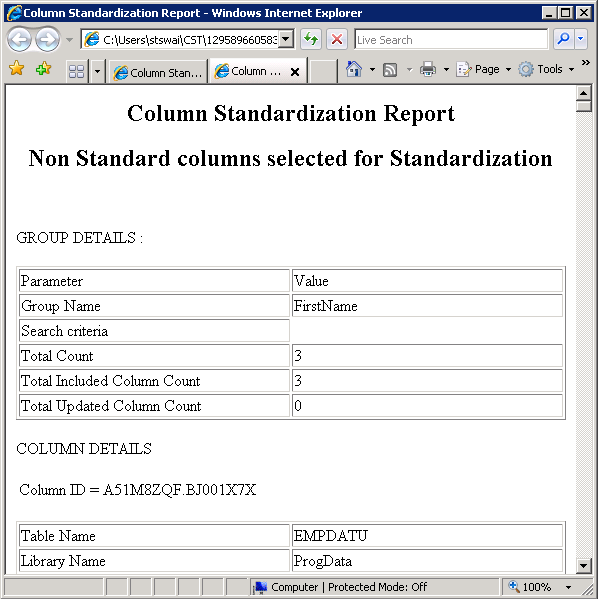
This report contains a list of the columns involved in the actual standardization process. The Non-Standard Columns Report and the Report: Metadata Update Details are located in the following location: <User location>\CST\<Folder with timestamp>.
You can also review a log of the standardization process. Finally, click Finish to close the Column Standardization Tool wizard.