SAS Lineage Window
Overview
Diagram Pane
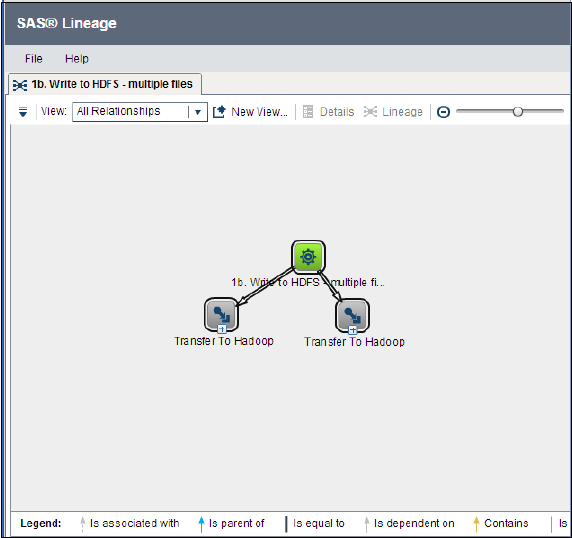
The Diagram pane displays
the diagram for the object that you selected in the Select
a Lineage Subject window. The pane will be empty if you
closed the Select a Lineage Subject window
without selecting a subject. See
Selecting a Subject.
The pane shows the selected
subject in the default view. For information about changing the default
view, see
Manage User-Defined Views.
Due to how relationships
work, diagrams can include duplicate objects, such as the same job,
as a source and a target. These duplicate objects are displayed in
only the Impact Analysis and Governance diagrams. They are not displayed
in All Relationships diagrams.
An example of a diagram
that displays duplicates is a transformation that can both read from
and write to the same table. Objects representing the table appear
both upstream from the transformation node and downstream from the
transformation node in the diagram.
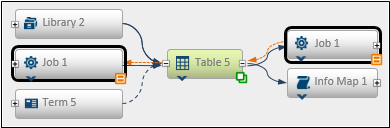
The duplicate objects
are identified by an icon in the lower right corner of the node. The
only special action associated with duplicate objects is that selecting
one of the duplicate objects in the diagram causes its matching node
to be also selected.
Objects can also be
clustered in the diagram. Objects are clustered based on their types,
relationship to the expanded object, and direction of that relationship.
If enough objects of the same type are related to the expanded object
with the same relationship type and relationship direction, these
objects are clustered together as one node in the diagram.
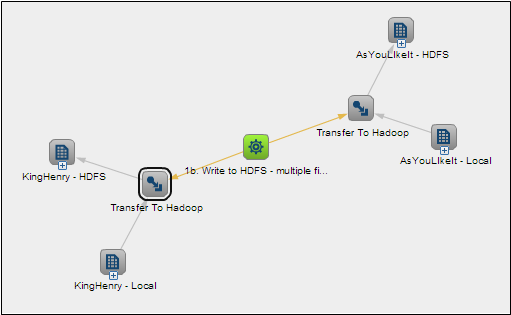
When a clustered object
is expanded, it displays all of the relationships that its member
objects are a part of, except relationships between member objects.
Expanding a clustered object is similar to having expanded each member
object individually. Once a clustered object has been expanded, when
any of its members are unclustered, those objects should be added
to the diagram in a fully expanded state. If a clustered object has
not been expanded, any member objects that are added to the diagram
are displayed in a collapsed state, unless all of the objects to which
that member object is related are already present on the diagram.

You can use the components
in the toolbar to perform the following functions:
-
Access the Action button. The Action button duplicates many of the toolbar functions and adds the following functions: search for a subject, manage and edit views, expand and collapse diagrams, print diagrams, and import sets of relationships.
-
Select the view used in the diagram.
-
Select an object and open the pane that contains the Details and Filters tabs.
-
Display a diagram for a selected item in a new tab, This diagram uses the current view.
-
Resize the diagram.
-
Reset the zoom level.
-
Refresh the screen to display the original diagram.

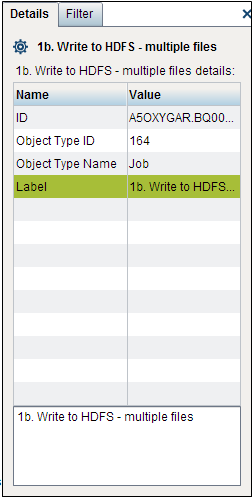
Details Tab and Filter Tab
The pane that contains
the Details tab and the Filter tab
are displayed when you select an object in a diagram and click Details.
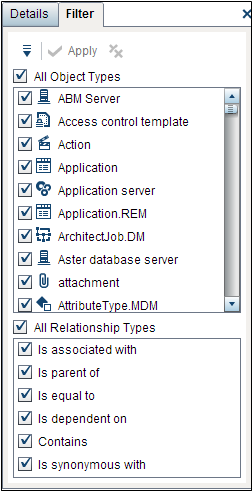
You can create filter
conditions and apply them to the current diagram. You can use the Action button
to save the filter conditions as a view and add it to View menu.
For more information about filters, see
Create a User-Defined View.
Copyright © SAS Institute Inc. All rights reserved.