Sort and De-Duplicate Data in Hadoop
Introduction
Example
Follow these steps to
use the Sort and De-Duplicate directive:
-
Open SAS Data Loader, as described in Getting Started.
-
Use the Summarize Rows task to group rows in the target according to column values, and then summarize numeric values for each group or subgroup.If you do not want to generate summary values for groups of rows, or if you want to remove duplicate rows, click Next to display the Filter task and go .Note: If your source data is in Hive 13 format or lower, the Summarize task will not handle special characters in column names. To resolve the issue, either rename the columns or move the source table into Hive 14 format.Follow these steps to use the Summarize Rows task:
-
Click Aggregation and select the summary type. The available summary types are defined as follows:Countspecifies the number of rows that contain values in each group.Count Distinctspecifies the number of rows that contain distinct (or unique) values in each group.Maxspecifies the largest value in each group.Minspecifies the smallest value in each group.Sumspecifies the total of the values in each group.
-
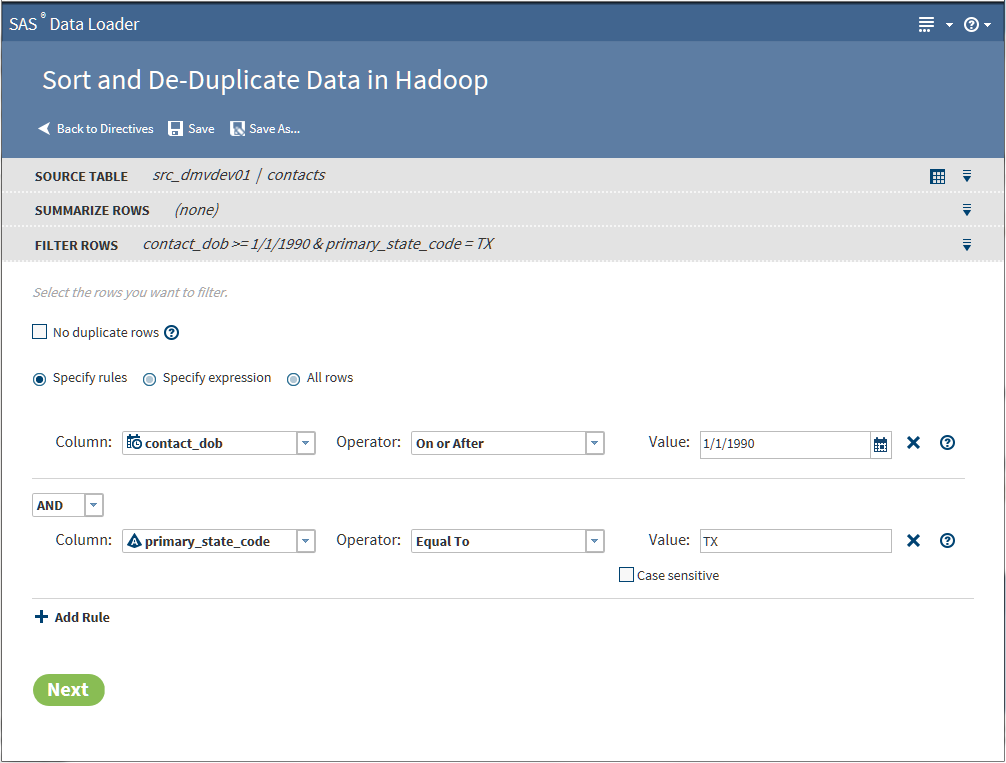
The Filter task enables you to remove duplicate rows and filter or remove unnecessary rows from the target.If you specify summaries or if you do not need to filter rows from the target, then click Next to display the Columns task.Follow these steps to use the Filter task:
-
To filter rows using a Hive expression, click Specify expression and go to Step 4d .
-
-
-
Use the Columns task to remove, reorder, or rename columns. You can also add columns that receive the results of user-written Hive expressions.If you defined summaries in the Summarize Rows task, or if you do not need to modify columns, then click Next to display the Sort task and go to to Step 6.Follow these steps to use the Columns task:
-
In Selected Columns, click icons to perform the following tasks:
-
To rename columns, click
 , or click and enter the new name in the Target
Name column.
, or click and enter the new name in the Target
Name column.
-
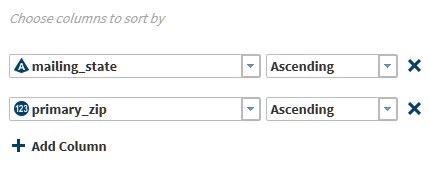
To rearrange or reorder columns, click the up and down arrow icons. Note that the top row in Selected Columns is the leftmost column, or column 1, in the target table.
-
To remove columns from the target, click the trash can icon or the left arrow icons.
-
To add a new column and add data to that column using an existing Hive expression, click
 . In the Hive expression column,
paste your Hive expression.
. In the Hive expression column,
paste your Hive expression.
-
To add new columns that contain a Hive expression, and to develop that expression using the Advanced Editor, click
 . The Advanced Editor helps
you browse and select Hive functions and column names for your expression.
To learn how to use the Advanced Editor, see Using the Advanced Editor for Hive Expressions.
. The Advanced Editor helps
you browse and select Hive functions and column names for your expression.
To learn how to use the Advanced Editor, see Using the Advanced Editor for Hive Expressions. -
To edit with the Advanced Editor columns that contain a Hive expression, click
 .
.
-


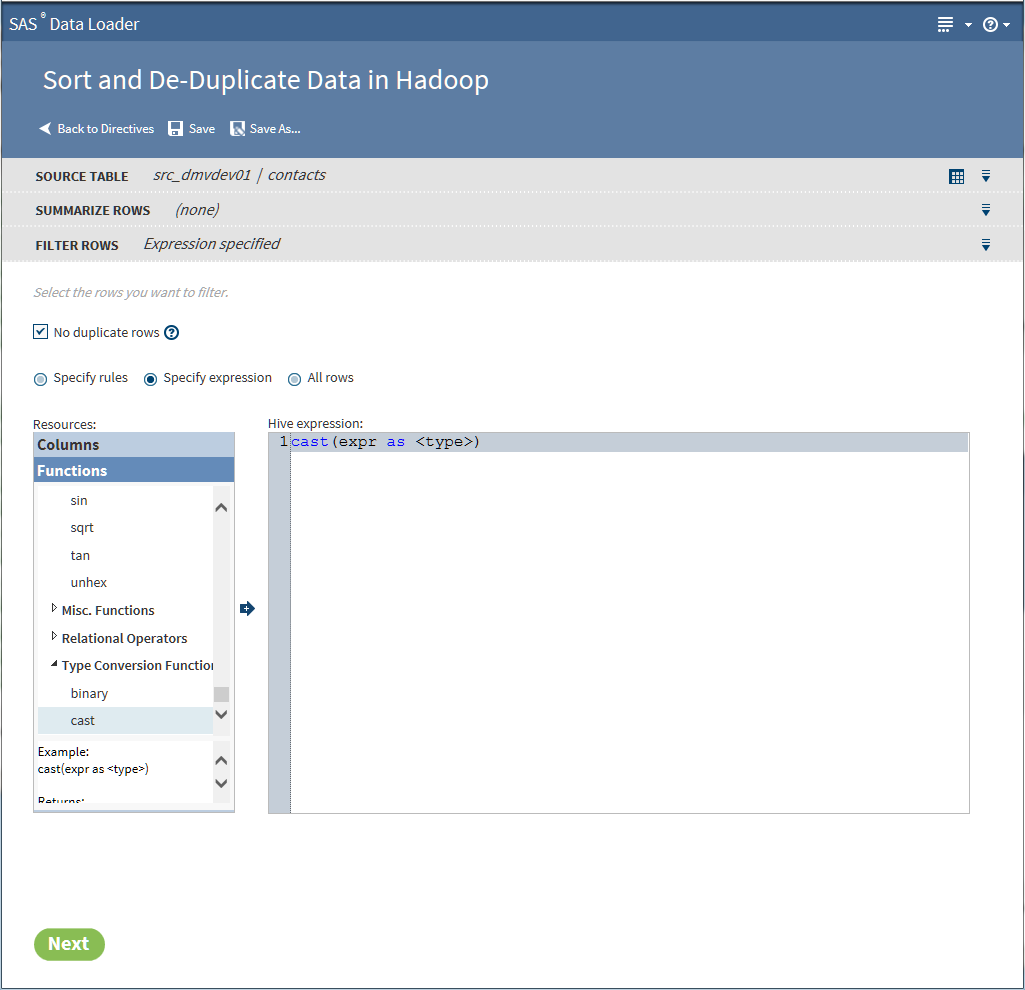
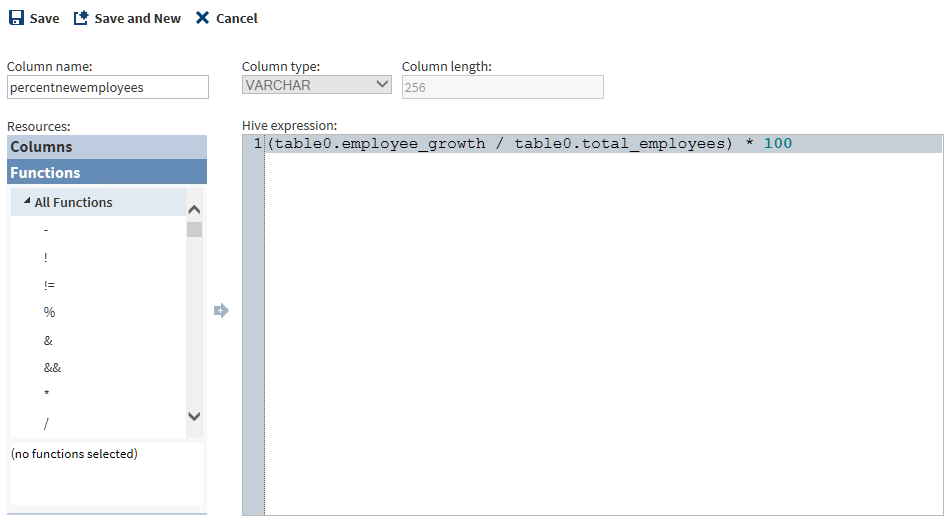
Using the Advanced Editor for Hive Expressions
In the directive Sort
and De-Duplicate Data in Hadoop, in the Columns task,
you use the Advanced Editor to add or edit
user-written Hive expressions. The expressions are run by the Sort
and De-Duplicate job to add data to new target columns. The Advanced
Editor enables you to insert column names and Hive function
syntax into your expressions.
Follow these steps to
use the Advanced Editor:
Copyright © SAS Institute Inc. All rights reserved.