Transforming SDTM Domains or ADaM Data Sets into a define.xml File

Overview: Transforming SDTM Domains or ADaM Data Sets into a define.xml File

The CDISC-SOURCE to CRT-DDS transformation transforms SDTM domains or ADaM data sets into a define.xml file. The define.xml file complies with the CRT-DDS standard.
Note: For detailed information about creating a job with a transformation, see the SAS Data Integration Studio: User's Guide or the SAS Data Integration Studio online Help.

Register a New Document File

Before you can create a job that uses a define.xml file, you must register a new document file. The document file references the target define.xml file.
Note: The target define.xml file is created on the server. If you want to open the target define.xml file from the job, then the target file must be in a shared location that can be accessed from the computer on which you are using SAS Data Integration Studio. An example of a shared location is a network drive.
To register a new document file, perform the following steps:
  1. In the Folders tree, right-click a folder, and then select Newthen selectDocument.
    The New Document dialog box appears.
  2. Enter a name and an optional description.
  3. (Optional) Click Browse adjacent to the Location field, and then navigate to the location in which to store the document.
  4. Click Browse adjacent to the File field, and then navigate to the location of the define.xml file.
  5. Click OK.

Transform SDTM Domains or ADaM Data Sets into a define.xml File

To transform SDTM domains or ADaM data sets into a define.xml file that complies with the CRT-DDS standard, perform the following steps:
  1. Create an empty job.
    For detailed information about creating a empty job, see the SAS Data Integration Studio: User's Guide or the SAS Data Integration Studio online Help.
  2. In the Transformations tree, expand Clinical, and then drag CDISC-SOURCE to CRT-DDS onto the diagram.
    CDISC-SOURCE to CRT-DDS transformation on the Diagram tab
  3. Right-click CDISC-SOURCE to CRT-DDS, and then select Properties.
    The CDISC-SOURCE to CRT-DDS Properties dialog box appears.
    For detailed information about the Properties dialog box, see the SAS Data Integration Studio: User's Guide or the SAS Data Integration Studio online Help.
  4. Click the Tables tab.
  5. From the Data Model Type drop-down list, select the type of table or domain to include in the define.xml file.
  6. From the Study/Submission drop-down list, select a study or submission.
    The Available Tables by Study/Submission table displays all data tables that are associated with the study or submission.
  7. Select one or more data tables.
  8. If you selected multiple data tables and want to change the order of the data tables in the define.xml file, perform the following steps:
    1. Click Order Domains.
      The Order Domains dialog box appears.
    2. Select a data table, and click Move Up and Move Down to change the order.
    3. Click OK.
  9. (Optional) Click the Generation tab, and perform the following steps:
    1. Enter the header comment text for the define.xml file.
    2. Select an output encoding and log level.
    3. Choose whether to create a define.pdf file and whether to create internal hyperlinks.
    4. Select an output style sheet to use.
      Note: By default, no output style sheet is used. You can use a default style sheet provided by SAS Clinical Standards Toolkit, or you can select your own style sheet.
    5. Choose whether to save the work tables to a permanent location, and browse to the location.
      Tip
      Saving the work table to a permanent location enables you to further customize the define.xml file. For more infromation, see Adding Information to the CRT-DDS define.xml File.
  10. (Optional) Click the Reports tab, and perform the following steps:
    1. Select the Generate Report check box.
    2. Perform one of the following steps:
      • Click Browse adjacent to Browse to Folder, and then navigate to a server folder.
      • In the Server Folder field, enter the name of a server folder.
      The folder must be on the server and must not be a local folder.
    3. Enter a name for the report in the Report File Name field, and then specify the report output format.
    4. To limit the number of records to include in the report, enter a number in the Limit # of records to field.
      If you leave this field blank, all records are included in the report.
    5. Select the panels to include in the report and whether informational messages are included.
  11. Click OK.
  12. From the Folders tree, drag the define.xml file onto the diagram.
  13. To connect the CDISC-SOURCE to CRT-DDS transformation to the define.xml file, drag the cursor from the output port of the transformation to the define.xml file.
  14. To store CRT-DDS Results work table in a permanent location, perform the following steps:
    Note: By default, the CRT-DDS Results work table is written to a temporary work location.
    1. Right-click the Work Table icon (Work Table icon), and then select Properties.
      The Properties dialog box appears.
      For detailed information about the Properties dialog box, see the SAS Data Integration Studio: User's Guide or the SAS Data Integration Studio online Help.
    2. Click the Physical Storage tab, select a SAS library for the Location field, and then click OK.
  15. Save and run the job.
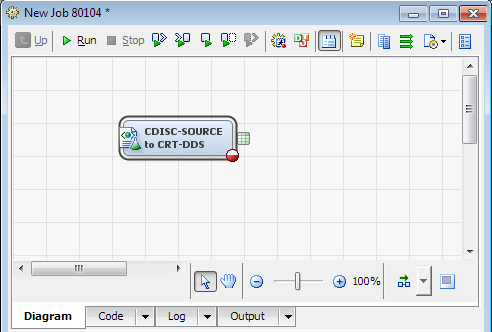
    SAS Data Integration Studio generates the SAS code for transforming, and then submits the code to SAS. The CRT-DDS define.xml file is created. If a define.xml already exists in that location, then it is overwritten (if the permissions on the file allow it to be overwritten). The results are written to the CDISC-SOURCE to CRT-DDS Results table.
  16. Review the Results table, and check for errors or warnings.
    You can view the define.xml file by navigating to the location where you created the document file, and then opening the define.xml file with a Web browser. If the Web browser fails to open the define.xml file, and displays an error message about an invalid path, then the define.xml file is located on a drive to which you do not have access. To resolve the problem, move the define.xml file.