Adding Information to the CRT-DDS define.xml File
Overview: Adding Information to the CRT-DDS define.xml File
You can save the data
from the CDISC-SOURCE to CRT-DDS transformation so that you can edit
the tables to add information to the CRT-DDS that is not represented
in the SAS Clinical Data Integration metadata. The process involves
the following tasks:
-
For information, see Save the Work Tables from a CDISC-SOURCE to CRT-DDS Transformation.
-
For information, see Adding Annotated CRF and Value-Level Metadata to the CRT-DDS define.xml File.
Save the Work Tables from a CDISC-SOURCE to CRT-DDS Transformation
To save the work tables
from a CDISC-SOURCE to CRT-DDS transformation, perform the following
steps:
-
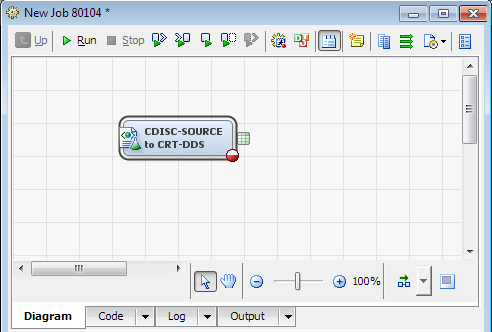
In the Transformations tree, expand Clinical, and then drag CDISC-SOURCE to CRT-DDS onto the diagram.For information about adding a CDISC-SOURCE to CRT-DDS transformation, see Transforming SDTM Domains or ADaM Data Sets into a define.xml File.
-
Note: The folder must be accessible by the SAS Workspace Server where the code executes. This means that the folder that appears is not on your local computer, but is on the SAS Workspace Server. You must have Write access permission to this folder. If there are tables from a previous CDISC-SOURCE to CRT-DDS transformation in this folder, they will be overwritten without any prompting.
-
SAS Data Integration Studio generates the SAS code for creating the define.xml file, and then submits the code to SAS. The CRT-DDS define.xml file is created. Several tables are created in the folder that you selected. Depending on the metadata found for the domain and study, many of these tables will be empty. For more information about the tables that are created, see the SAS Clinical Standards Toolkit: User's Guide.
Adding Annotated CRF and Value-Level Metadata to the CRT-DDS define.xml File
Overview: Adding Annotated CRF and Value-Level Metadata to the CRT-DDS define.xml File
You can include the
annotated Case Report Form (CRF) metadata and value-level metadata
about the domains that you collected during a study. To do this, you
edit the SAS data sets that were generated by the CDISC-SOURCE to
CRT-DDS transformation to include the metadata. Then, you run the
%CRTDDS_WRITE macro to generate the CRT-DDS define.xml file.
*Lookup OID for the SDTM 3.1.2 standard in MetaDataVersion;
proc sql noprint;
select OID into :mdv from _svWork.MetaDataVersion
where name="CDISC-SDTM 3.1.2";
quit;
*Add records for Annotated CRF;
proc sql;
insert into _svWork.AnnotatedCRFs
set DocumentRef = "BlankCRF",
leafID= "AnnotatedCRF",
FK_MetaDataVersion = "&mdv";
insert into _svWork.MDVLeaf
set ID= "AnnotatedCRF",
href = "./blankcrf.pdf",
FK_MetaDataVersion = "&mdv";
insert into _svWork.MDVLeafTitles
set title= "Blank Annotated CRF",
FK_MDVLeaf = "AnnotatedCRF";
quit;
*reassign srcdata to location of _svWork data sets;
data _null_; path=pathname('_svwork'); rc=libname('srcdata');
rc=libname('srcdata',path);
run;
*create new define.xml file using updated SAS CRT-DDS data sets;
%crtdds_write(_cstCreateDisplayStyleSheet=1);
Here is example code
that includes the value-level metadata in the SC domain. The code
includes two values:
height without shoes and weight
without shoes.
*Lookup OID for the SDTM 3.1.2 standard in MetaDataVersion;
proc sql noprint;
select OID into :mdv from _svWork.MetaDataVersion
where name="CDISC-SDTM 3.1.2";
quit;
*Lookup OID for the SCTEST column in ItemDefs;
proc sql noprint;
select OID into :srccol from _svWork.ItemDefs
where name='SCTEST';
quit;
*add record for a new valuelist SCTESTVALS;
proc sql ;
insert into _svWork.ValueLists
set OID= "SCTESTVALS",
FK_MetaDataVersion = "&mdv";
*add record associating the value list SCTESTVALS to the OID for SCTEST ItemDefs record;
insert into _svWork.ItemValueListRefs
set ValueListOID= "SCTESTVALS",
FK_ItemDefs = "&srccol";
*add records to the ItemDefs data set for each value in the SCTESTVAL value list;
insert into _svWork.ItemDefs
set OID= "VAL001",
Name = "SCTEST",
DataType = "text",
Length = 3,
SASFieldName = "SCTEST",
comment = "Height taken barefoot",
label="Height in inches",
FK_MetaDataVersion = "&mdv"
set OID= "VAL002",
Name = "SCTEST",
DataType = "text",
Length = 4,
SASFieldName = "SCTEST",
comment = "Weight without shoes",
label="Weight in pounds",
FK_MetaDataVersion = "&mdv";
*add records associating the value list SCTESTVALS to rows in the ItemDefs data set;
insert into _svWork.ValueListItemRefs
set ItemOID= "VAL001",
OrderNumber=1,
Mandatory="Yes",
KeySequence=1,
FK_ValueLists = "SCTESTVALS"
set ItemOID= "VAL002",
OrderNumber=2,
Mandatory="Yes",
KeySequence=2,
FK_ValueLists = "SCTESTVALS";
quit;
*reassign srcdata to location of _svWork data sets;
data _null_; path=pathname('_svwork'); rc=libname('srcdata');
rc=libname('srcdata',path);
run;
*create new define.xml file using updated SAS CRT-DDS data sets;
%crtdds_write(_cstCreateDisplayStyleSheet=1);Add Annotated CRF Metadata or Value-Level Metadata to the CRT-DDS define.xml File
To add annotated CRF
metadata or value-level metadata to the CRT-DDS define.xml file, perform
the following steps:
-
In the Transformations tree, expand Clinical, and then drag CDISC-SOURCE to CRT-DDS onto the diagram.For detailed information about adding a CDISC-SOURCE to CRT-DDS transformation, see Transforming SDTM Domains or ADaM Data Sets into a define.xml File.
-
Select the Save work tables to permanent location check box, click Browse that is adjacent to the Location field, and then select a location.For more information about saving tables, see Save the Work Tables from a CDISC-SOURCE to CRT-DDS Transformation.
-
To add records to the annotatedcrfs, mdvleaf, and mdvleaftitles data sets (for CRF metadata), or valuelists, itemvaluelistrefs, valuelistitemrefs, and itemdefs data sets (for value-level metadata), perform the following steps:
-
For example code, see Overview: Adding Annotated CRF and Value-Level Metadata to the CRT-DDS define.xml File.
Copyright © SAS Institute Inc. All rights reserved.