Importing Data Standards Metadata

Overview: Importing Data Standards Metadata

You define a study relative to a particular data standard, such as CDISC-SDTM or a data standard from your company, by importing the data standard from the SAS Clinical Standards Toolkit.
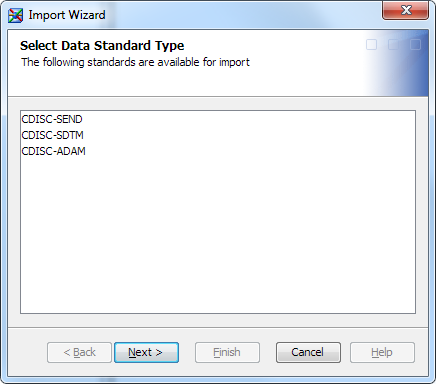
If you want to use a CDISC standard, import data standard metadata from the SAS Clinical Standards Toolkit. Importing the metadata enables you to update your environment with new releases of data standards from CDISC. CDISC data standards are provided with the SAS Clinical Standards Toolkit. For more information, see the SAS Clinical Standards Toolkit: User's Guide.
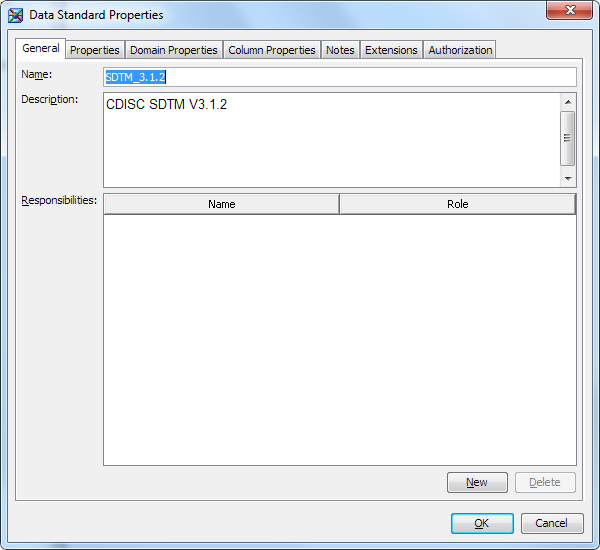
After importing a data standard that supports domain templates, column groups, and validation data sets, these items are displayed in the Data Standards folder in the Clinical Administration tree. For example, if you select the CDISC-SDTM data standard type and version 3.1.2, the domain templates (SDTM domains), column groups (SDTM classes), and validation data sets (compliance checks) are displayed in a folder that you specify in the Import wizard.
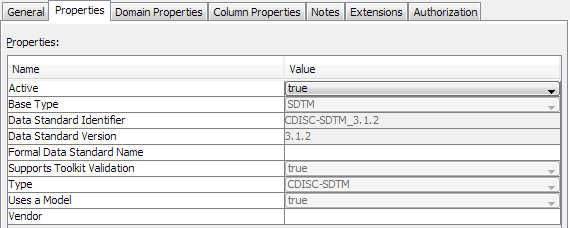
By default, an imported data standard has a status of Inactive. This status enables you or a data standards administrator to review the template and make changes before releasing it for general use. When you or the data standards administrator is satisfied with the template, you can change its status to Active, which makes the template available for general use. For more information, see Make a Data Standard Available for General Use.
Note: You must have appropriate permissions to view the Clinical Administration tree. For more information, see Adding Users to the Clinical Administrators Group.

Import Data Standards Metadata

To import data standards metadata, perform the following steps:
  1. In the Clinical Administration tree, select Data Standards, right-click, and then select Import.
    The Import Wizard appears.
    Import wizard
  2. If the Default Application Server page appears, select one of the application servers that are listed.
    The Default Application Server page appears only when a SAS Foundation application server is accessed for the first time in a SAS Clinical Data Integration session. If you are unsure about which application server to select, contact the SAS installation representative.
  3. On the Select Data Standard Type page, select the data standard type, and then click Next.
    The Select Data Standard Version page appears.
  4. Select the data standard version to use, and then click Next.
  5. On the Define General Properties page, edit the default values.
    1. Enter a name and an optional description.
      Note: It is a best practice not to include spaces in the data standard name.
    2. (Optional) In the Formal Name field, enter a more descriptive name for the data standard.
    3. In the Identifier field, enter a text value to uniquely identify the data standard in metadata.
      A default value is provided. The value that you enter is verified as unique before you continue.
    4. (Optional) Enter the version and vendor.
  6. Click Next.
    Several Verify Properties pages appear.
    Note: The names of the pages depend on the data standard that you selected.
  7. (Optional) Edit the property values.
    Note: Properties are an advanced feature in SAS Clinical Data Integration. If you are uncertain about what property values to select, accept all of the default values.
  8. Click Next.
  9. (Optional) If the data standard supports validation, on the Validation Library page, perform the following steps:
    1. Select a library or create a library.
      For more information about SAS libraries, see the SAS Data Integration Studio: User's Guide or the SAS Data Integration Studio online Help.
      Note:
      • You must have appropriate permissions for the selected library. For more information about permissions, see SAS Management Console: Guide to Users and Permissions.
      • The path for the selected library must exist.
      • The library metadata object is created immediately. Even if you close the Import Model wizard, the library will remain.
    2. Click Next.
      Several verification pages appear. The names of the pages depend on the data standard that you selected.
      Note: This information is provided only as a reference. It enables you to review the metadata before storing it. You cannot make changes to this information. If you see problems in the metadata, contact whomever is responsible for registering the data standard in the SAS Clinical Standards Toolkit.
  10. Click Next.
  11. Review the summary, and then click Finish.
  12. (Optional) Make the data standard available for general use.

Make a Data Standard Available for General Use

To make a data standard available for general use, perform the following steps:
  1. In the Clinical Administration tree, expand Data Standards.
  2. Select the data standard, right-click, and then select Properties.
    The Data Standard Properties dialog box appears.
    Data Standard Properties dialog box
  3. Click the Properties tab.
    Data Standard Properties dialog box — Properties tab
  4. In the Active row, change false to true.
  5. Click OK.