Creating a Link to a Report, a Web Page, or Another SAS Application
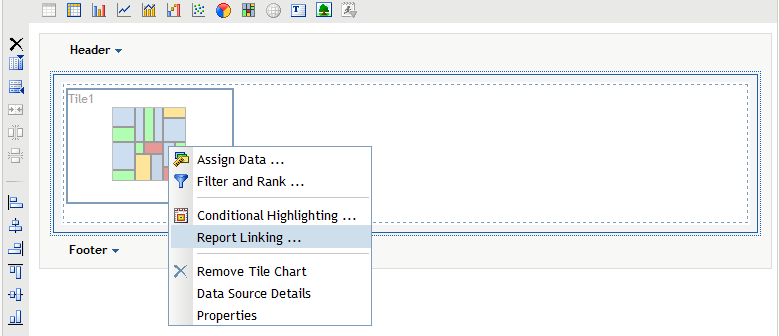
Access the Report Linking Dialog Box for Images, Tables, or Graphs
You create report links
by using the Report Linking dialog box while
in Edit mode. To create a report link for images, tables, or graphs,
complete these steps:
-
For a link to an existing report, continue with the steps described in Linking to an Existing Report or Stored Process. For a link to a Web page, continue with the steps described in Linking to a Web Page.
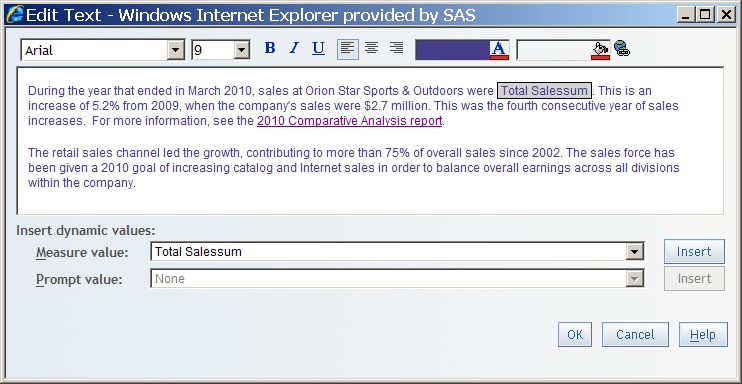
Access the Report Linking Dialog Box for Text Objects
You create report links
by using the Report Linking dialog box while
in Edit mode. To create a report link for text objects, complete these
steps:
-
Enter the complete text that you want to display. Then highlight the text that you want to link from. Do not select anything other than plain text (no formatting changes).TipBe careful not to select all the text in a paragraph. Selecting the entire paragraph also selects the underlying HTML tags, which results in an error message stating that the selected text cannot be made into a link.TipIf you are using Internet Explorer, and you want to create a link from text that is already a Web address (such as
www.mycompany.com) or an e-mail address (such asmyname@mycompany.com), do this instead: First, type in a temporary name that is not a valid URL (for example, wwwXmycompany.com), and select it. Click and fill in the Report Linking dialog
box as described in Linking to a Web Page. Then click OK. Finally, change
the temporary name in the text to the desired text (for example, change wwwXmycompany.com to wwwmycompany.com).
and fill in the Report Linking dialog
box as described in Linking to a Web Page. Then click OK. Finally, change
the temporary name in the text to the desired text (for example, change wwwXmycompany.com to wwwmycompany.com).
-
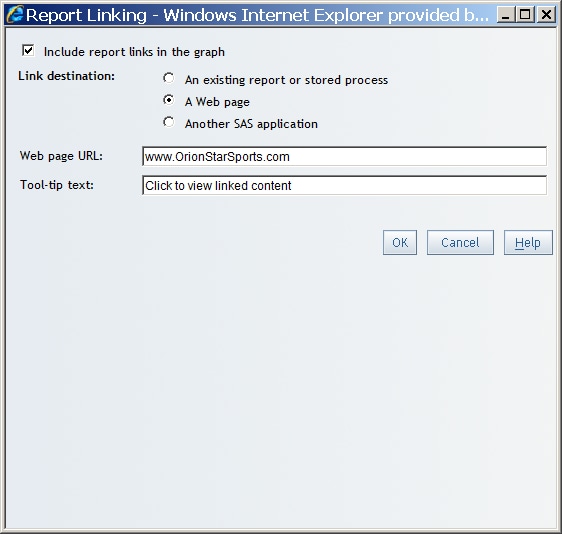
To link to a Web page, continue with the steps described in Linking to a Web Page.
Choosing a Link Destination
Linking to an Existing Report or Stored Process
When you link reports,
you can associate data item values and prompts so that the prompt
window is bypassed for the target report and the target report is
automatically subset based on the values in the source report. You
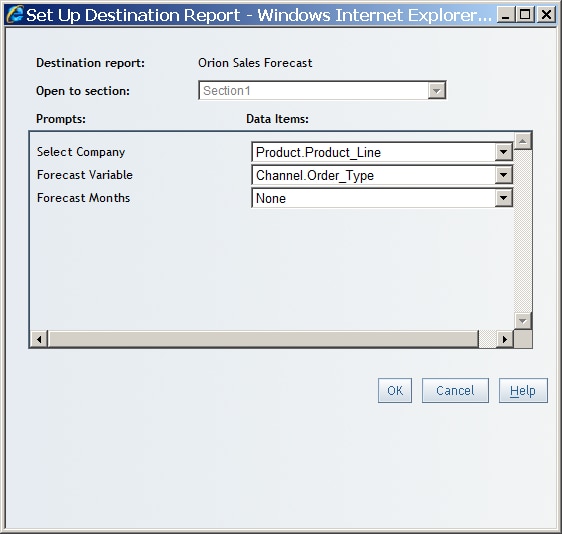
can associate values and prompts in the Set Up Destination
Report dialog box, which is explained in Step 6 here.
For multidimensional
crosstabulation tables, SAS Web Report Studio can pass the following
values to a prompt in a target relational report:
For
multidimensional reports only, you can also pass hidden data item
values to the prompts in a linked report. The hidden values can be
categories that are not visible in the table.
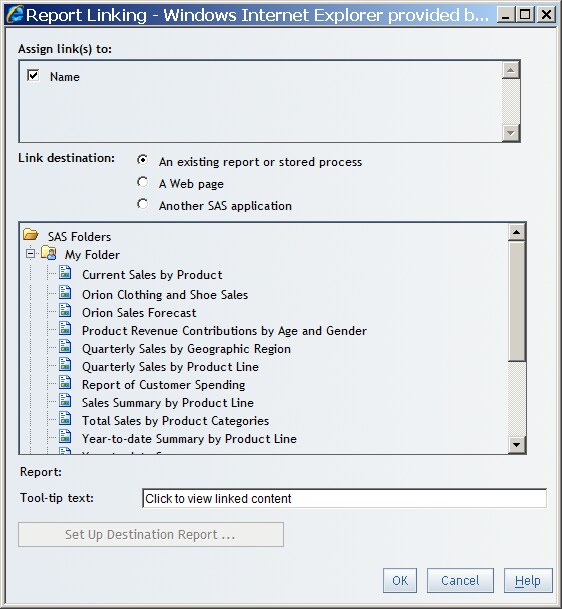
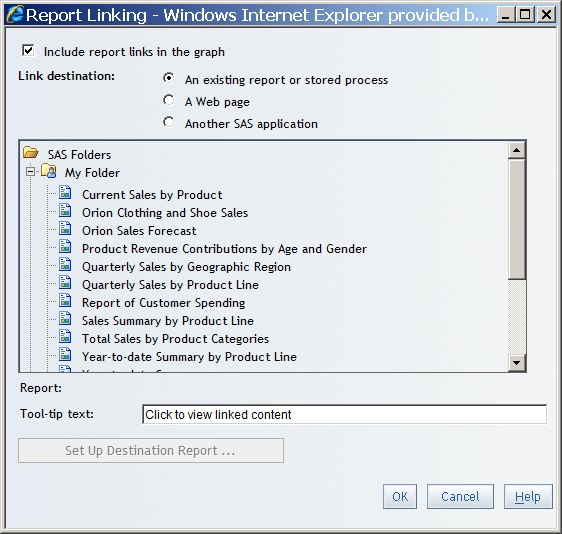
To link to an existing
report or stored process, complete these steps:
-
If the destination report contains multiple sections or prompts, then click Set Up Destination Report to open the Set Up Destination Report dialog box and assign data items in the source report to prompts in the target report.If the destination report contains multiple sections, the Open to section drop-down list contains the names of the sections in the destination report. Select the section that you want to appear when a user clicks to follow a link.If the destination report contains any prompts or if the report object in your source report contains suitable data items, then the box contains a drop-down list of Data Items for each prompt in the destination report. The data item that you select has to be compatible with the prompt. Data items that are incompatible cannot be assigned. For example, a character prompt for age groups, such as child and adult, cannot accept numeric data item values, such as 5 or 35. For more information about compatibility between prompts and data items, see Defining Prompts in Report Linking. If you do not assign a data item value to each prompt, the prompt window appears and you must confirm the current values or enter new ones.If none of the available items in the drop-down list provides the intended value for a given prompt, then leave the drop-down list unchanged.If you get unexpected results in the target report, here are some potential ways to remedy the situation:
-
If a table or graph in the target report unexpectedly displays the message: No values were returned, then you can check the prompt values that were actually used by clicking the Refresh Data option. The prompt window for the current section of the target report appears with the values that were actually used. Sometimes the format of the values used by prompts can affect the results. In such cases, you should verify that the formats of the values delivered from the source report agree with the formats expected by the prompts. For example, unexpected results could occur if a target prompt expected values in uppercase and the source report delivered the values in lowercase. You could simply correct the values on the prompt screen. Alternatively, you could adjust the source or target or both reports so that the values passed from the source agree with the expectations for the target prompt or prompts.
-
Linking to Another SAS Application
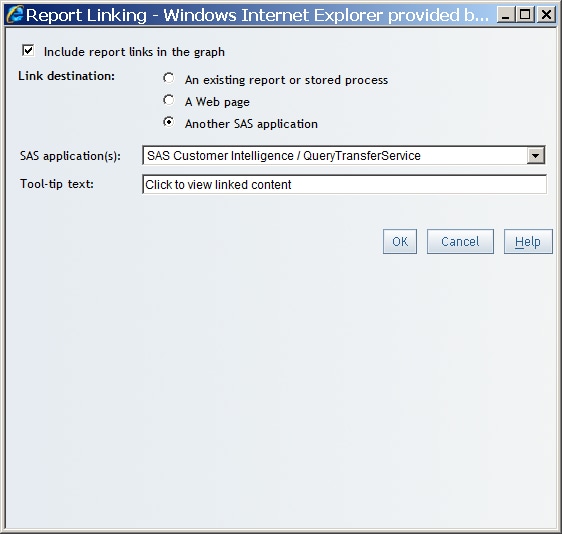
The ability to link
to another SAS application is available only from tables and graphs
that are based on information map data sources. This feature has to
be set up in advance by a system administrator. Only users with the
appropriate role and capability can link to another SAS application.
If you have questions about your role or capabilities, contact your
system administrator.
To link to another
SAS application, follow these steps:
Creating a Link for a Group Break
To link to a report
from a group break, complete these steps:
-
For a link to an existing report, continue with the steps described in Linking to an Existing Report or Stored Process. For a link to a Web page, continue with the steps described in Linking to a Web Page.