Create a Header or a Footer

For an individual report section, a header and a footer can contain a banner image, static text, dynamic text, and a dividing line. An image in a header or a footer can link to a URL. All content is optional.
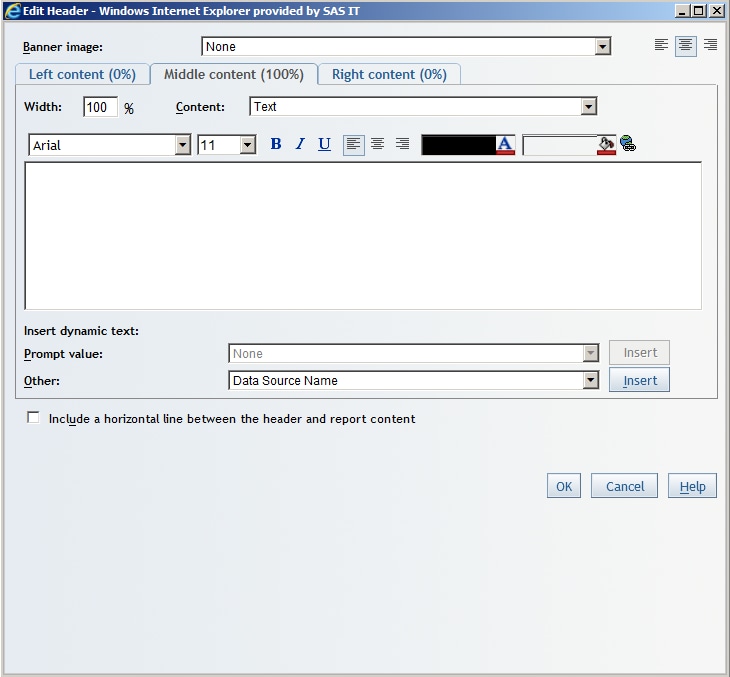
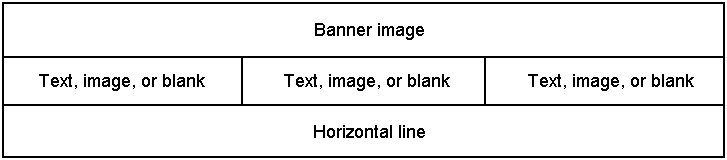
Below the optional, full-width banner image, each header or footer is divided into three content areas (left, middle, and right). Each content area can contain a single image, rich text, or nothing. Images and text cannot be combined within the same content area.
Here is how the content in a header or footer might appear in a report:
Graphic representation of the header or footer
To create a header or a footer, complete these steps:
  1. Perform one of these tasks:
    • Click Header and select Edit to open the Edit Header dialog box.
    • Click Footer and select Edit to open the Edit Footer dialog box.
    Edit Header Dialog Box
    Edit Header Dialog Box
  2. (Optional) Select the name of an image from the Banner image drop-down list and specify an alignment. The alignment icons align the banner image relative to the whole report. A thumbnail of the selected image displays.
    Note: The images in this list are provided by your system administrator. You cannot alter the banner image in any way using SAS Web Report Studio.
  3. Select the Left content, Middle content, or Right content tab. These three tabs control the content and width of each content area.
    The Middle content tab displays initially with a width of 100%, and the Left content and Right content tabs have no content and a width of 0%. Fractional percentages are not allowed.
  4. Use the Width field to specify the percentage for the content area. The Left content, Middle content, or Right content tab automatically updates with the new width. The width for the content areas are minimum, not maximum, values.
    Note: Width values are not validated until you click OK. It is possible to exceed 100% while you are working on each content area.
    Note: The width value does not change the size of images or distort them. Only a system administrator can alter images for the footer.
  5. Specify the Content using the drop-down list. Text appears by default. You can also select None or one of the available images.
  6. Enter text into the field. You can type static text, you can select dynamic text, or you can use a combination of both. For more information about dynamic text, see Step 9.
    Note: You cannot enter text if you selected to display an image in the Content drop-down list.
  7. Use the formatting tools to change the font, font size, font style, background color, foreground color, and alignment. For images, you can use the alignment icons to set the horizontal alignment within the overall width of the content area.
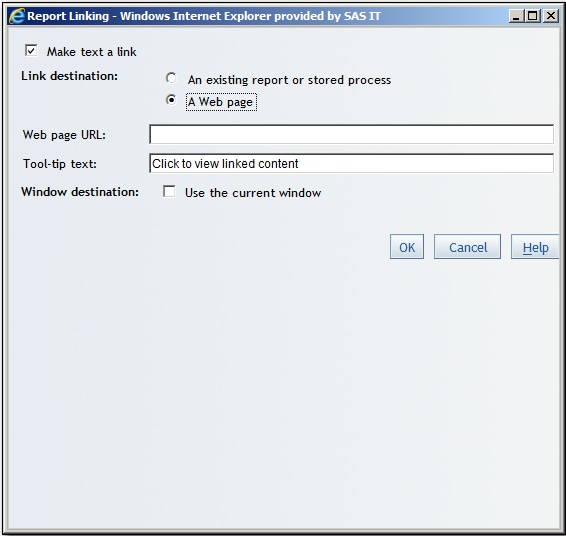
  8. (Optional) Link an image to an existing report, a stored process, or a URL. When you follow a Web link, a new browser window opens. The source report is not closed, so there is no link to return you to it. When you follow a link to another report or stored process in SAS Web Report Studio, the target object appears in the primary SAS Web Report Studio window, and a Return to previous report link is available.
    To link an image, follow these steps:
    1. Select the image name in the Content drop-down list.
    2. Click hyperlink icon to display the Report Linking dialog box.
      Report Linking Dialog Box for Headers and Footers
      Report Linking Dialog Box for Headers and Footers
      In the Report Linking dialog box, select the Make text a link check box.
      Specify the Link destination. If you are linking the image to a Web page, then type the address in the Web page URL field.
      You can also select the Use the current window option for the Window destination. When you select this option, SAS Web Report Studio passes your logon information to another SAS application, such as the SAS Information Delivery Portal. This means that you will be logged off SAS Web Report Studio. You will be prompted to save changes before you are logged off. If you do not select the Use the current window option, then the link opens in a new window.
    3. Click OK to return to the Edit Header or Edit Footer dialog box.
  9. (Optional) Specify dynamic text.
    You can insert a prompt value by selecting the name of the prompt in the Prompt value drop-down list and then clicking Insert to place the prompt name into the text box at the insertion point. Type at least one character or one space before entering any additional prompt values. The header or footer in the rendered report displays the value that you entered for the prompt.
    The Other option lets you insert the Data Source Name, Data Source Description, Date the data was last refreshed, Report Author, Date Modified, Report Description, or Report Name. For examples of these dynamic text options, see Dynamic Text Options and Examples.
    Click Insert to insert the dynamic text.
    Tip
    After inserting a dynamic text item, type at least one character or space before inserting another dynamic text item. For more information about text formatting, see Format Text in Reports.
  10. (Optional) Perform one of these tasks:
    • For a header, select the Include a horizontal line between the header and report content check box.
    • For a footer, select the Include a horizontal line between the footer and report content check box.
  11. Click OK. A message displays if the widths of the content areas do not add up to exactly 100%.
    Edit mode updates to show you a preview of the new header or footer. Any text that you added appears without formatting and any paragraphs appear left-justified. Only the first 80 characters appear. If there are more than 80 characters, an ellipsis (...) is added.
    If the width of a content area is less than 100%, then the maximum number of characters is reduced proportionally.
Note: To collapse the Header or Footer section, click collapse pane icon. Collapsing the header, footer, or both in Edit mode does not change how the header or footer displays in View mode.