For an
individual report section, a header and a footer can contain a banner
image, static text, dynamic text, and a dividing line. All content
is optional.
Below
the optional, full-width banner image, each header or footer is divided
into three content areas (left, middle, and right). Each content area
can contain a single image, rich text, or nothing. Images and text
cannot be combined within the same content area.
Here is
how the content in a header or footer might appear in a report:
To create a header
or a footer, complete these steps:
-
Perform
one of these tasks:
-
Click
Header and select
Edit to open the
Edit Header dialog box.
-
Click
Footer and select
Edit to open the
Edit Footer dialog box.
-
(Optional)
Select the name of an image from the
Banner image drop-down list and specify an alignment. The alignment icons align
the banner image relative to the whole report. A thumbnail of the
selected image displays.
Note: The images
in this list are provided by your system administrator. You cannot
alter the banner image in any way using SAS Web Report Studio.
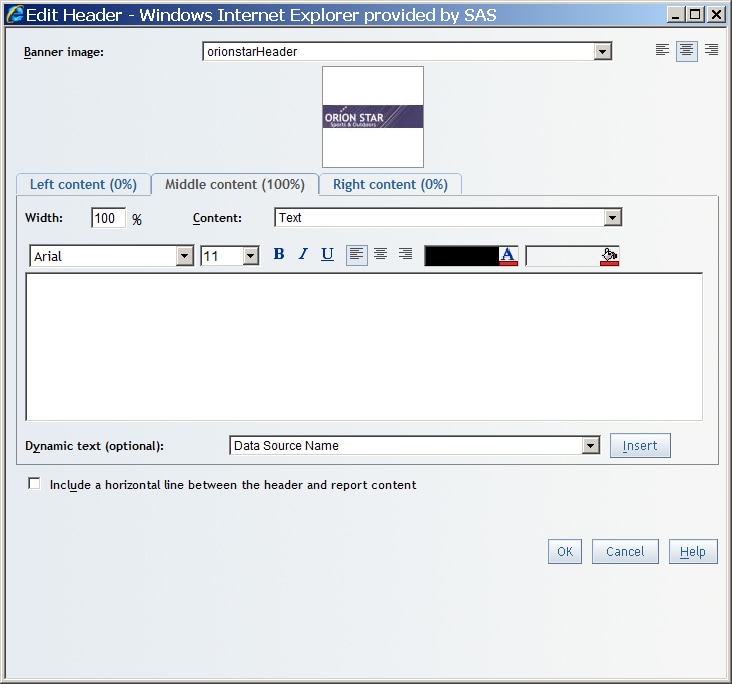
Edit Header Dialog Box with a Banner Image Selected
-
Select
the
Left content,
Middle content, or
Right content tab. These three tabs
control the content and width of each content area.
The
Middle content tab displays initially with a width of
100%, and the
Left content and
Right content tabs have no content and a width of 0%.
Fractional percentages are not allowed.
-
Use the
Width field to specify the percentage for the content
area. The
Left content,
Middle
content, or
Right content tab
automatically updates with the new width. The width for the content
areas are minimum, not maximum, values.
Note: Width values
are not validated until you click
OK. It
is possible to exceed 100% while you are working on each content area.
Note: The width value
does not change the size of images or distort them. Only a system
administrator can alter images for the footer.
-
Specify
the
Content using the drop-down list.
Text appears by default. You can also select
None or one of the available images.
-
Enter
text into the field. You can type static text, you can select from
the
Dynamic text (optional) drop-down list,
or you can use a combination of both methods.
Note: You cannot
enter text if you selected to display an image in the
Content drop-down list.
Tip
After inserting
a dynamic text item, type at least one character or space before inserting
another dynamic text item. For
more information about text formatting,
see Format Text in Reports.
-
Use the
formatting tools to change the font, font size, font style, background
color, foreground color, and alignment. For images, you can use the
alignment icons to set the horizontal alignment within the overall
width of the content area.
-
(Optional)
Perform one of these tasks:
-
For a header, select the
Include a horizontal line between the header and report content check box.
-
For a footer, select the
Include a horizontal line between the footer and report content check box.
-
Click
OK. A message displays if the widths of the content
areas do not add up to exactly 100%.
Edit mode
updates to show you a preview of the new header or footer. Any text
that you added appears without formatting and any paragraphs appear
left-justified. Only the first 80 characters appear. If there are
more than 80 characters, an ellipsis (...) is added.
If the
width of a content area is less than 100%, then the maximum number
of characters is reduced proportionally.
Note: To collapse
the
Header or
Footer section, click

. Collapsing the header, footer, or both in Edit mode
does not change how the header or footer displays in View mode.