Distributing Reports
About Distributing Reports
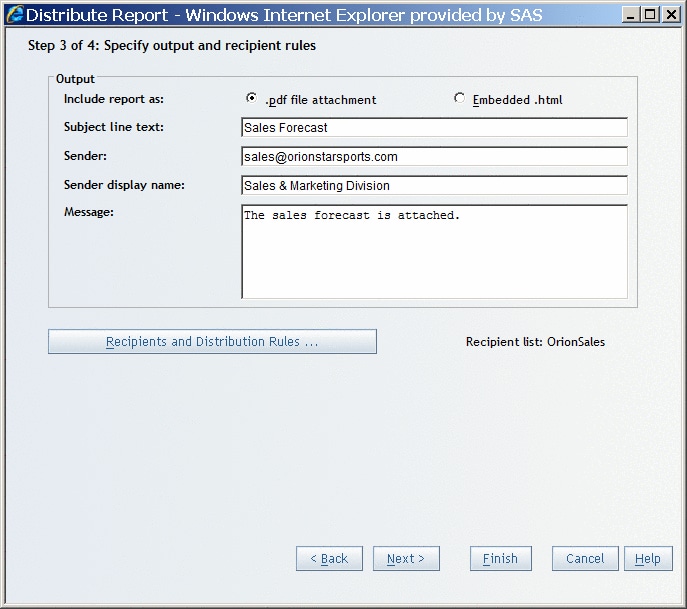
The Distribute
Report Wizard enables you to distribute reports by using e-mail as
a PDF attachment or embedded HTML. Reports with group breaks can be
distributed to targeted recipients based on the breaks. For example,
you have a sales report with group breaks on regions. Each sales manager
in the recipient list could receive information on his or her respective
region only.
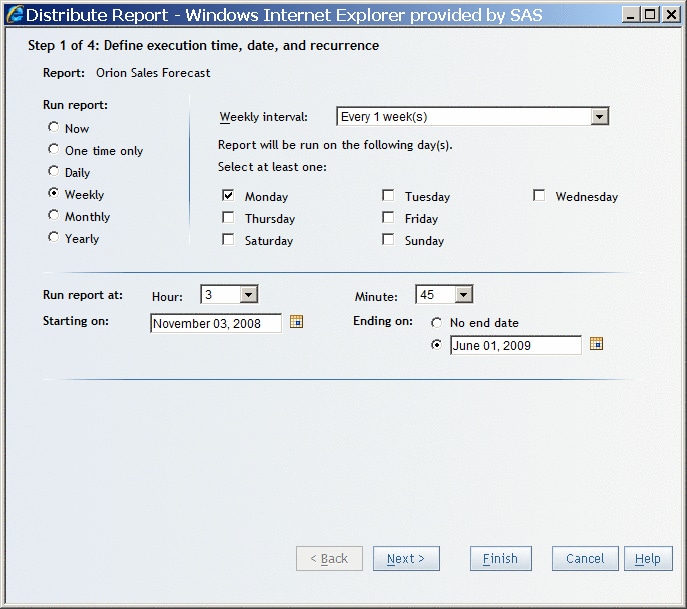
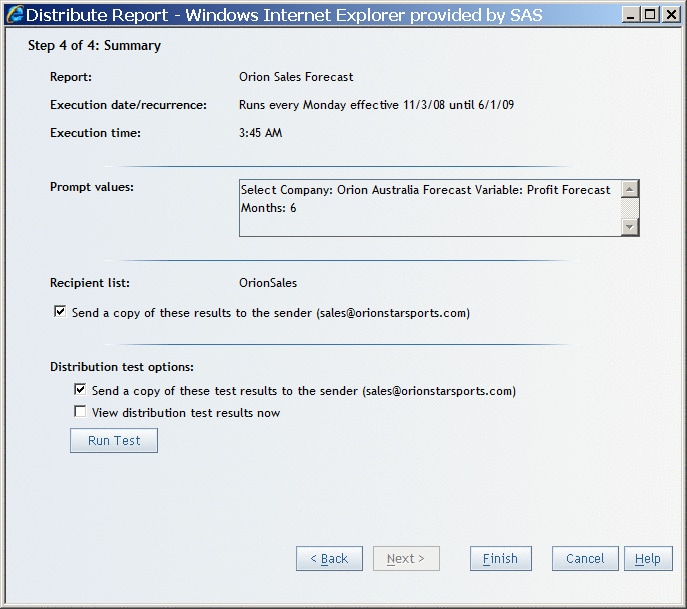
Distribute a Report
Note: You cannot
prepare for distribution and distribute a report during the same report
distribution process.
-
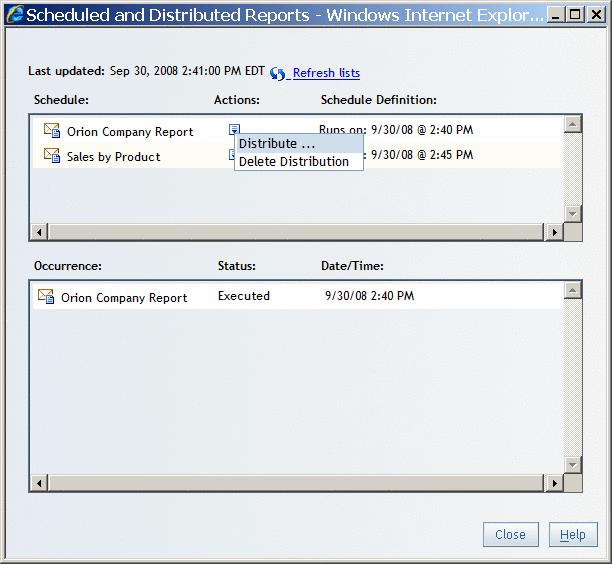
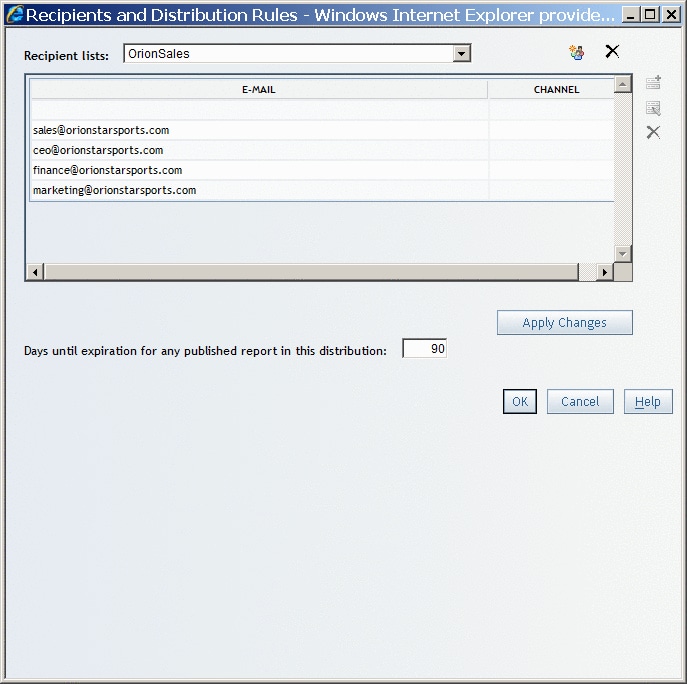
If you want to change a currently selected recipient list or the currently set group break division, click Recipients and Distribution Rules.Note: If there is a recipient list already selected, the list name appears next to the Recipients and Distribution Rules button.
-
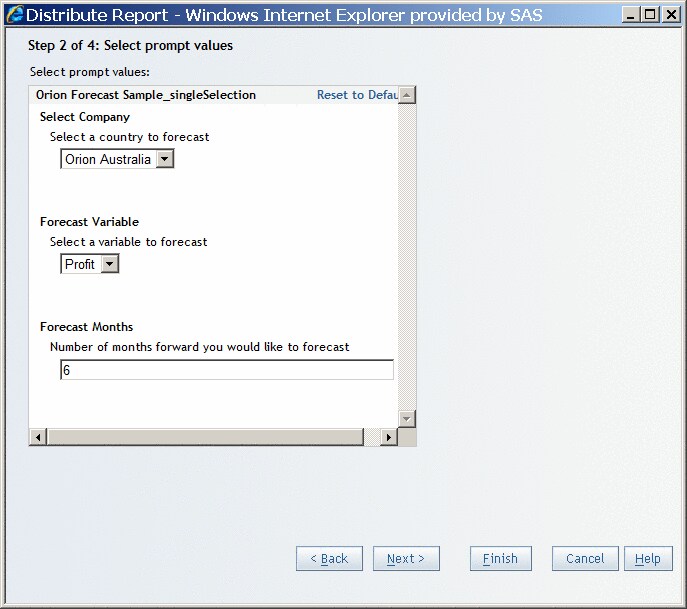
If you selected the Group break option, then assign each available group break to a column in the recipient list. The number of group breaks that are available depends on which group break level you selected in step 6c. For example, if you selected the third group break level in step 6c, then three group break levels are available to assign to columns. If you selected the first group break level, then only that level is available to assign to a column.

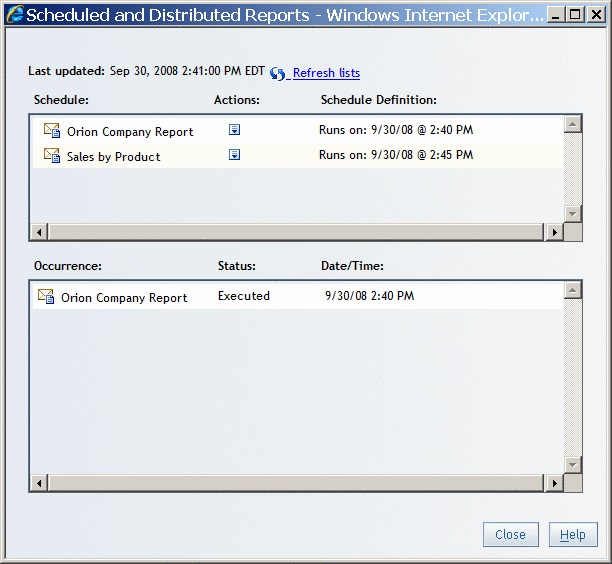
View a List of Distributed Reports
To view
a list of the reports that you have scheduled by using the Distribute
Report Wizard, complete these steps:
-
Open the List of Scheduled Reports dialog box. The name of the link that opens the dialog box depends on your role:The List of Scheduled Reports dialog box contains the following information:This field displays the status of the last three occurrences of each scheduled and distributed report, either Failed, Executed, or Running. The Date/Time column displays the date and time for each successful or failed execution. Each report can have up to three occurrences listed, not including occurrences with the status of Running.