Creating a Link to a Report or to a Web Page
Access the Report Linking Dialog Box for Images, Tables, or Graphs
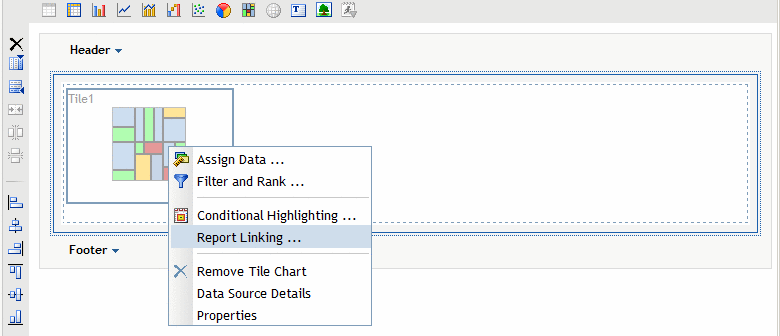
You create
report links by using the Report Linking dialog
box while in Edit mode. To create a report link for images, tables,
or graphs, complete these steps:
-
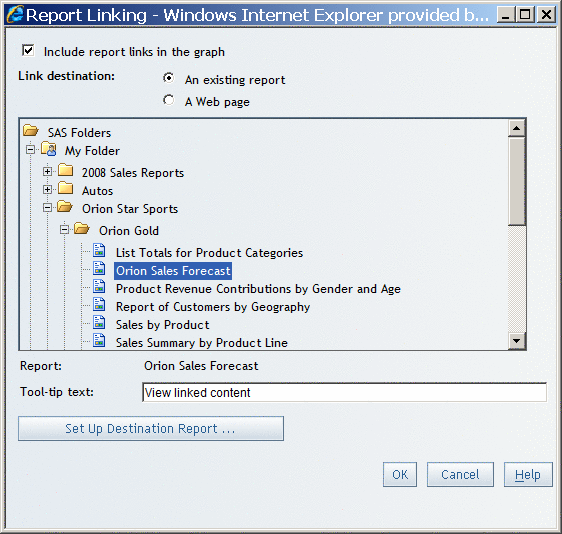
For a link to an existing report, continue with the steps described in Linking to an Existing Report or Stored Process. For a link to a Web page, continue with the steps described in Linking to a Web Page.
Access the Report Linking Dialog Box for Text Objects
You create
report links by using the Report Linking dialog
box while in Edit mode. To create a report link for text objects,
complete these steps:
-
Enter the complete text that you want to display. Then highlight the text that you want to link from. Do not select anything other than plain text (no formatting changes).TipIf you are using Internet Explorer, and you want to create a link from text that is already a Web address (such as
www.mycompany.com) or an e-mail address (such asmyname@mycompany.com), do this instead: First, type in a temporary name that is not a valid URL (for example, wwwXmycompany.com), and select it. Click and fill in the Text Linking dialog box as described in Linking to a Web Page. Then click OK. Finally, change the temporary name in the text to the desired text
(for example, change wwwXmycompany.com to wwwmycompany.com).
and fill in the Text Linking dialog box as described in Linking to a Web Page. Then click OK. Finally, change the temporary name in the text to the desired text
(for example, change wwwXmycompany.com to wwwmycompany.com).
-
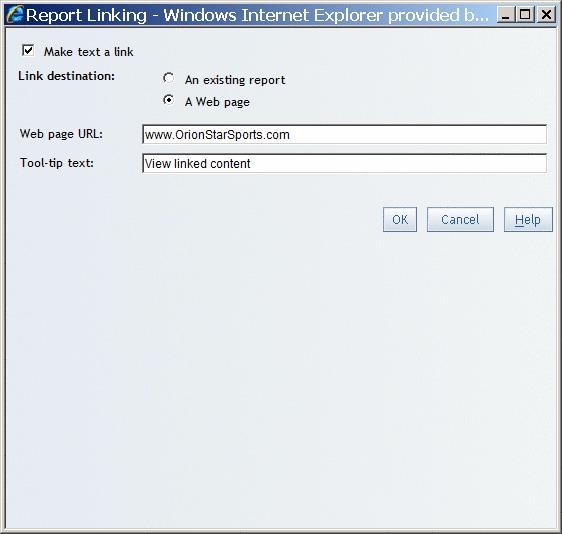
To link to a Web page, continue with the steps described in Linking to a Web Page.
Choosing a Link Destination
Linking to an Existing Report or Stored Process
-
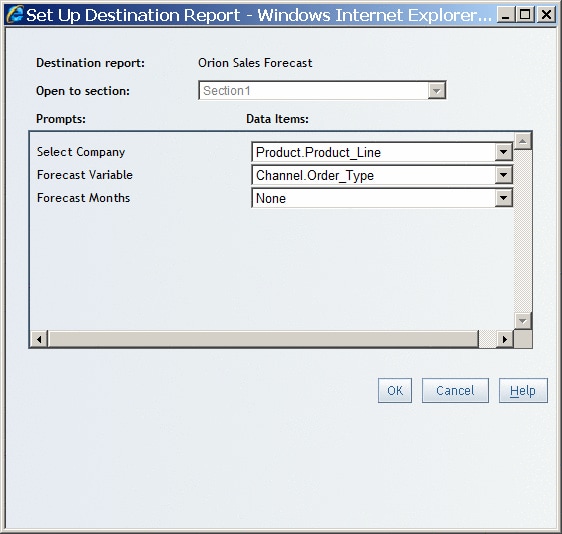
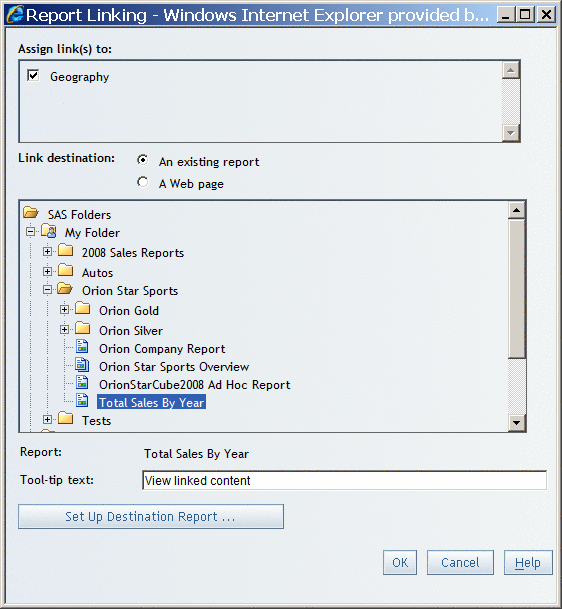
If the destination report contains multiple sections or prompts, then click Set Up Destination Report to open the Set Up Destination Report dialog box and assign group break levels in the current report to prompts in the target report. If there are multiple sections, select one. If there are prompts, then specify the values that you want a report viewer to see when they link to the report.If the destination report contains multiple sections, the Open to section drop-down list contains the names of the sections in the destination report. Select the section that you want for the initial section when a user clicks to follow a link.If the destination report contains any prompts or if the report object in your source report contains any visible categories or occurs within a group break, a drop-down list displays for each prompt in the destination report. If none of the available items in the drop-down list provides the intended value for a given prompt, then leave the drop-down list unchanged.
Creating a Link for a Group Break
-
For a link to an existing report, continue with the steps described in Linking to an Existing Report or Stored Process. For a link to a Web page, continue with the steps described in Linking to a Web Page.
Understanding the Run-Time Behavior of Links
When you
follow a Web link, a new browser window opens. The source report is
not closed, so there is no link to return you to it.
When you
follow a link to another report in SAS Web Report Studio, the target
report displays in the primary SAS Web Report Studio window. A Return to previous report link
is available. The return link also displays the name of the source
report that you will return to. Click the link to return to the source
report.