Setting Up a Recipient List for Report Distribution

About Recipient Lists

A recipient list contains the e-mail addresses that you want to use for distributing a report. Reports with group breaks can be distributed to targeted recipients based on the breaks. For example, you have a sales report with group breaks on regions. Each sales manager in the recipient list could receive information about his or her respective region only.
Before you create a recipient list, you need to verify the library for recipient lists.
There are two ways to create a recipient list:
  • Use the Distribute Report Wizard in SAS Web Report Studio.
  • Use Base SAS (for example, DATA step or PROC SQL). You might want to do this if you already have a list of e-mail addresses in a mail directory, and you want to import those addresses into the table. For a sample program, see Create a Recipient List Using PROC SQL.
The name of a recipient list must conform to SAS data set naming conventions. In order to create a recipient list by using the Distribute Report Wizard in SAS Web Report Studio, you must have the Advanced role and the Manage Distribution List capability assigned to you. Initially, this capability is not assigned to the Advanced role. You can create a new role, add this capability to that role, and assign users to this role and its capability. Alternatively, you can assign the Manage Distribution List capability to the Advanced role. For information about managing roles, see Predefined Roles and Capabilities for SAS Web Report Studio.

View the Library for Recipient Lists

In order to distribute reports, a recipient list must be defined. A library with tables for recipients lists was created during installation and configuration. To view the distribution library for recipient lists and assign SAS servers, follow these steps in the SAS Management Console:
  1. On the Plug-ins tab in SAS Management Console, navigate to Environment Managementthen selectData Library Managerthen selectLibraries.
  2. In the Libraries plug-in, select the distribution library (for example, SASApp - wrsdist). Right-click on it and select Properties. The SASApp-wrsdist Properties window is displayed. Note that in the Name field, the SAS library (also referred to as a libref) is displayed.
    (Optional) Supply a description of the distribution library.
  3. (Optional) Click the Assign Tab. Select one or more SAS servers. The library is assigned to the server or servers that you select from this list.
  4. Click Finish to save the settings or exit the window after viewing the distribution library.

Creating Recipient Lists

Considerations for Creating Recipient Lists

Here are some things to consider when you create recipient lists:
  • Although each recipient list is based on a report, a single recipient list can be used to distribute more than one report. When you use a recipient list for multiple reports, you reduce the overall number of recipient lists that must be created and maintained.
  • There is no limit to the number of group break levels that you can use in a distribution. Note, however, that each new level exponentially increases the number of recipient e-mails that you have to define.
    You can also have a recipient list with no group break column. This means that you will distribute the entire report to all recipients who are specified.
  • Users can select the proper recipient list when they create a distribution. For that reason, you should provide descriptive names for your recipient lists. SAS Web Report Studio does not validate the relationship between group break columns in a recipient list and group breaks in the corresponding report.
  • The initial rows of the distribution list, which is limited to approximately 200 rows, are displayed so users can verify that they have selected the intended recipient list. Users who have the Manage Distribution List capability see all rows.
  • SAS Web Report Studio stores all the lists in a single library that you defined during installation. Use a naming convention that makes sense for your organization and that prevents collisions in the event that multiple administrators create lists.

Create a Recipient List Using SAS Web Report Studio

To create a recipient list, you can use the Distribute Report Wizard to create an initial list that can include the group breaks in your report. While you create the recipient list, you can also add e-mail addresses and publication channels.
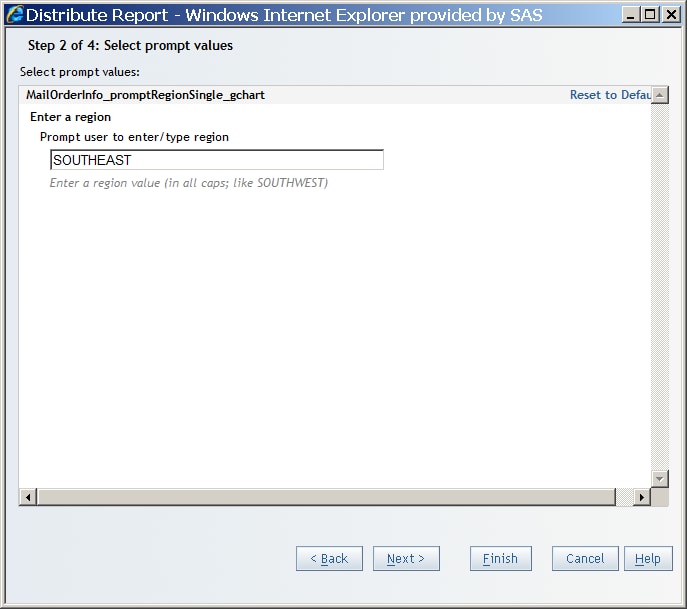
For detailed instructions and an explanation of each page in the Distribute Report wizard, see the SAS Web Report Studio User’s Guide.
To create a recipient list, follow these steps:
  1. Log on to SAS Web Report Studio.
  2. To launch the Distribute Report Wizard, perform one of these tasks:
    • When a report is displayed in View mode, select Filethen selectDistribute.
    • In the File Management window, next to the name of the report that you want to distribute, click the Actions menu and then select Distribute.
    The first page of the Distribute Report Wizard is displayed.
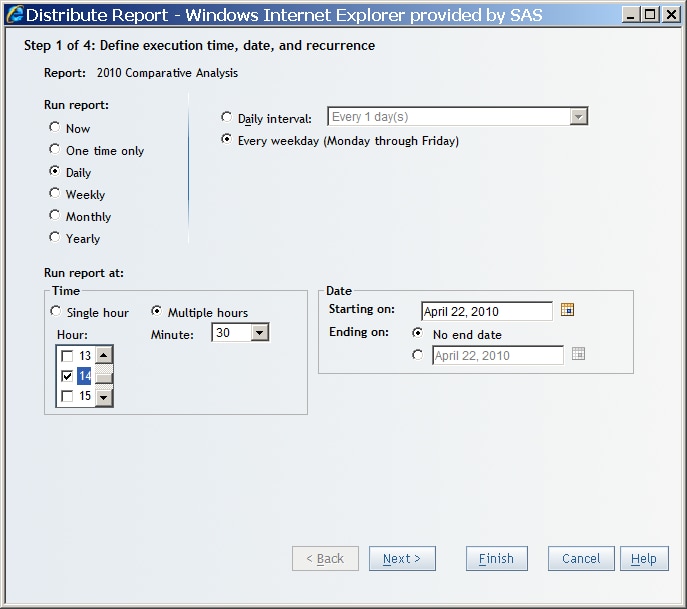
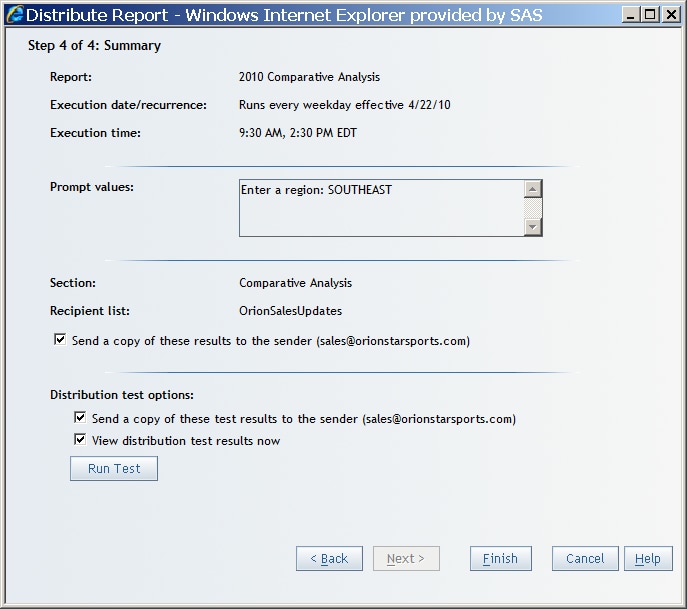
    Note: If the report does not have any distributions associated with it, then the first page of the Distribute Report Wizard lets you define the execution time, date, and recurrence. However, if one or more distributions are associated with a report, then the first page of the Distribute Report Wizard lets you choose or create a distribution.
  3. Specify when you want the report to run. If you want the report to run more than once in a day, select the Multiple hours option.
    Specifying When to Run a Report
    Click Next to go to the next wizard page.
  4. If the report has prompts, a wizard page displays those prompts. After you enter the require prompt values, click Next to go to the next wizard page.
    Selecting Prompt Values
  5. Specify whether you want to distribute the report as a PDF file attachment or as embedded HTML.
    Specifying a Report Format
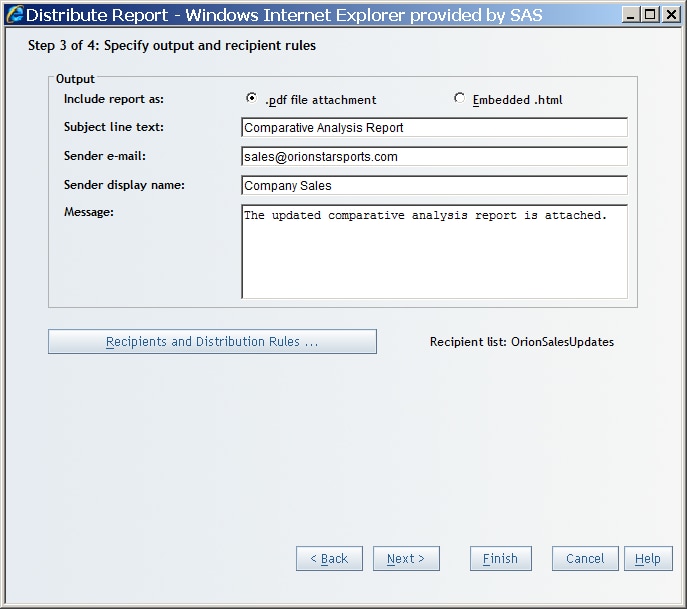
  6. Click Recipients and Distribution Rules. The Recipients and Distribution Rules dialog box is displayed.
    Recipients and Distribution Rules
    Note: The icons on the top right corner of the Recipients and Distribution Rules dialog box are displayed if you belong to a role including the Manage Distribution List capability. If you are not assigned to a role with this capability, then these icons are not displayed.
    The following table explains the purpose of each icon.
    Icons for Managing Recipient Lists
    Icon
    Purpose
    Open New Recipient list
    Opens the New Recipient list dialog box so that you can create a recipient list based on this report. For a report with group breaks, one row per group break value will be added to the resulting table. These rows enable you to specify different recipients for different group break values.
    Remove recipient list
    Removes the selected recipient list. If you remove a list, any distribution that references the list becomes nonfunctional. And, the list will no longer be available to select.
    Open Add Recipient dialog box
    Opens the Add Recipient dialog box so that you can add a new row to this recipient list table, and include group by values, an e-mail address, a publication channel, or both. If you do not add an e-mail address or a publication channel, that recipient is ignored during the distribution of the report. The addition of a row is needed only if the group by data changes to include a new value. The group by values can be changed.
    Open Edit Recipient dialog box
    Opens the Edit Recipient dialog box so that you can edit a selected recipient by specifying or modifying the recipient's e-mail address and publication channel.
    Delete selected recipient
    Deletes a selected recipient.
  7. To create a new recipient list, click Create a Recipient List. The New Recipient List dialog box is displayed.
    New Recipient List
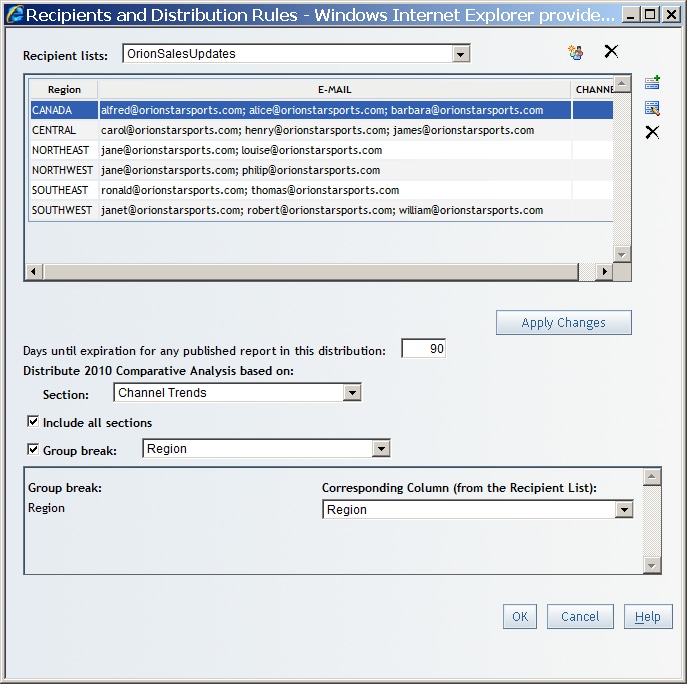
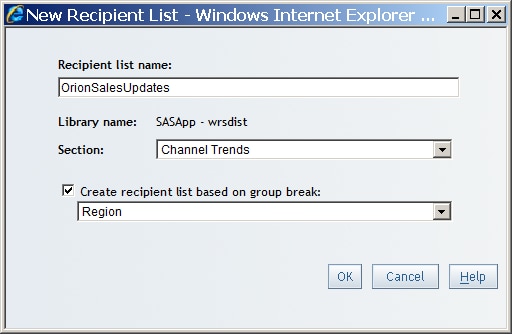
    This dialog box contains the following items:
    Recipient list name
    Specifies the list name. Recipient list names must conform to SAS data set naming conventions.
    Library name
    This read-only field specifies the name of the SAS library where the recipient list will be stored.
    Section
    Specifies the section that contains the group breaks on which you want to subset the report.
    Create recipient list based on group breaks
    Specifies the name of the group break that you want to subset the report. This check box and the drop-down list do not appear if there are no group breaks in the report.
  8. Enter the name of the recipient list, and specify whether you want to subset the report. If the report contains nested group breaks, you can specify the group break level upon which the report can be subdivided. For example, you can divide on country, or on both country and city. Click OK to return to the Recipients and Distribution Rules dialog box.
  9. Click Apply Changes in the Recipients and Distribution Rules dialog box to save the recipient list.
  10. Click Edit Rows in the Recipients and Distribution Rules dialog box to open the Edit Recipient dialog box.
  11. In the Edit Recipient dialog box, type the e-mail addresses (not the user names as they are stored in the metadata repository) of the recipients in the E-mail field. To send a report to a group of people, enter each of their e-mail addresses or the distribution list e-mail ID (if your mail system handles distribution lists). Select a publication channel in Channel drop-down list. If multiple publication channels are defined, then the channel names will appear in a drop-down list. If there are no publication channels defined, then the drop-down list does not appear.
    Note: You can select multiple publication channels. Your browser determines how you make multiple selections. For example, you might be able to use the CTRL key to make multiple selections or to deselect a publication channel.
  12. Click OK to close the Edit Recipients dialog box.
  13. Click Next or Finish in the wizard. If you click Next, then the Summary page is displayed:
    Summary in the Distribute Report Wizard
    (Optional) Perform one or more of these tasks:
    • Select the check box to distribute the report and send a copy of the results to yourself.
    • Select one or both check boxes for Distribute test options and click Run Test. Before actual distribution of a report, you perform this task to verify whether the distribution is satisfactory.
    Note: To make changes to your selections on previous wizard pages, click Back.
  14. Click Finish to save your settings and exit the wizard.

Create a Recipient List Using PROC SQL

As an alternative to creating the recipient list in SAS Web Report Studio, you can create a table manually in Base SAS. This example illustrates one way to create a table manually using PROC SQL. After you create the table, you must import the table into your metadata repository by using the Data Library Manager in SAS Management Console or other SAS code.
The following example uses a SAS library named wrsdist, a SAS table named Burst, and a group break variable named Year.
libname  wrsdist
“\\server\c$\DataSources\SAS\wrsdist”;proc
sql;create table wrsdist.Burst (Year num, EMAIL char(256),
CHANNEL char(256));insert into
wrsdist.Burstvalues (2008,
'email1@orionstarsports.com', 'channelname')values (2009,
'email2@orionstarsports.com', 'channelname')values (2010,
'email3@orionstarsports.com', 'channelname');
quit;
If you create a recipient list without the column for the group break, then you will distribute the entire report to all recipients who are specified in the EMAIL or CHANNEL columns.
You can leave the EMAIL or CHANNEL cells empty for some or all of the group breaks. When a row has empty cells, the corresponding group break report is not generated.