When you create an indicator
alert, you must specify the
trigger interval. The trigger interval relies on a range. Therefore, you can create
an indicator alert only for indicator types that include a range.
For more information,
see Indicator Types That Support Ranges.To create an indicator
alert, complete the following steps:
-
In the SAS BI Dashboard
designer, open an indicator for which you want to create an alert.
-
Click

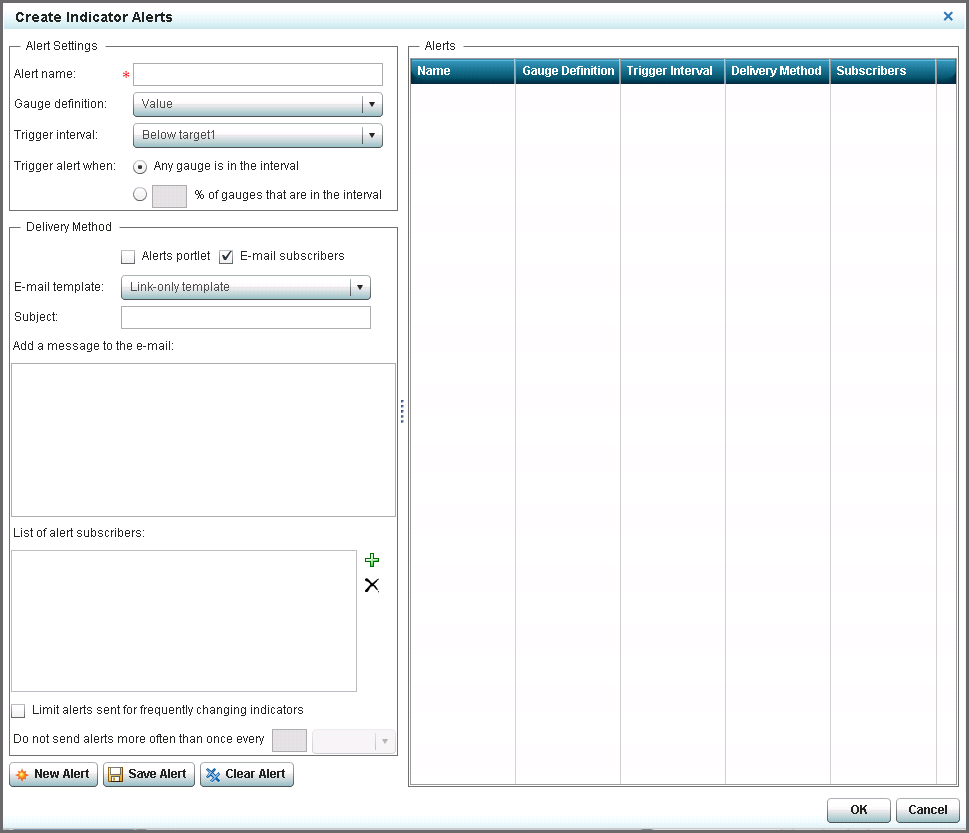
at the top of the Properties pane. The
Create Indicator Alerts window appears.
-
In the
Alert
name field, type the name of the alert.
-
From the
Gauge definition list, select the range to evaluate.
Note: Most indicators use only
one range and this setting defaults to that range. However, the following
indicators use two ranges. Therefore, you must select the range to
evaluate:
-
interactive summary and scatter
plot
-
-
From the
Trigger interval list, select the interval in which
the value must occur to trigger the alert.
-
Specify how many values
(that is, data points or gauges) must be in the selected interval
to trigger the alert:
-
Any gauge is in the
interval
-
% of gauges are in
the interval
Note: If you select this setting,
type a value in the field next to the check box.
-
Select the delivery
method for the alert:
Alerts portlet or
E-mail subscribers.
Note:
-
You can select both methods.
-
Alerts portlet presumes that the recipient has an Alerts portlet defined in the
SAS Information Delivery Portal. If there is not an Alerts portlet,
the alerts remain saved on the server. If a user adds an Alerts portlet
to the portal, all previous alerts appear in the Alerts portlet.
-
The business user's e-mail address
must be available from SAS metadata. For more information, see the
SAS Management Console: Guide to Users and Permissions.
-
(Optional) If you selected
E-mail subscribers, complete the following steps:
-
From the
E-mail template list, select the template to use for
e-mail notifications of alerts.
|
|
|
|
|
The e-mail includes
a link that opens the affected indicator in the SAS BI Dashboard viewer.
Note: All indicator types support
this template.
|
|
|
The e-mail includes
an image of the affected indicator and a link that opens the indicator
in the SAS BI Dashboard viewer.
Note: The following indicator types
support this template:
-
bar chart with reference lines
-
-
line chart with reference lines
-
-
-
|
-
In the
Subject field, type the subject. Type any additional message to include
in the e-mail in the
Add a message to the e-mail field.
-
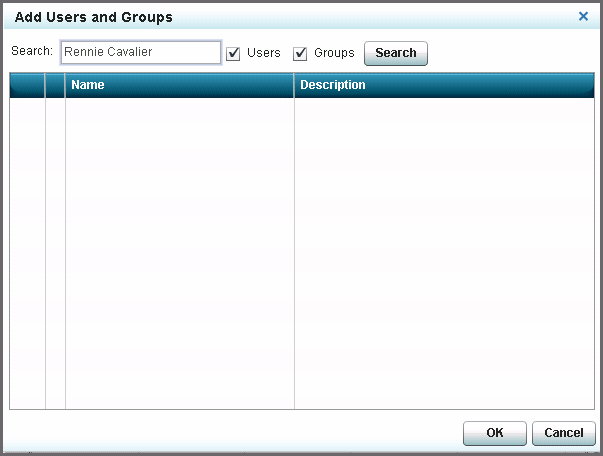
To select users and
user groups, click

next to the list of alert subscribers. The
Add Users and Groups window appears.
-
Type the text to search
for in the
Search field.
Note: Partial text is valid. The
wildcard value * is supported.
-
Select the category
(
Users,
Groups,
or both) to search.
-
Click
Search. A table appears with all entries that match the search criteria.
-
From the table, select
the check box next to each entry that you want to add.
Note: You can also drag an entry
from the table into the
List of alert subscribers.
-
To remove a subscriber,
select a user from the list and click

.
-
Click
OK to close the
Add Users and Groups window.
-
To limit the number
of alerts, select
Limit alerts sent for frequently changing
indicators, type a value in the field, and then select
a time interval from the list next to the field.
Tip
Depending on the size of your
window, you might have to scroll down the left pane to view this selection.
-
Click
Save
Alert. The alert appears in the
Alerts table.
-
If you want to create
another alert, click
New Alert. To exit the
Create Indicator Alerts window, click
OK.
-
In the indicator workspace,
click

to save the changes to the alert definition in the indicator.
Note: If the alert criteria
are met at the time that you create the alert, the alert is triggered
immediately. Afterwards, the alert is triggered only when the data
changes and the alert criteria are met.