DataFlux Data Management Studio 2.8: User Guide
Processing Address Update Data
You can process mailing lists against the lists of changed addresses on the United States Postal Service (USPS) National Change of Address (NCOA) DVDs. This processing runs the mailing lists through the Address Update Lookup node in a DataFlux Data Management Studio data job. The addresses go through, one at a time. When a person and address combination from a mailing list matches a person and address combination in the current NCOA DVD data, the new address is output as a changed address. Then, you can update your mailing list accordingly.
Perform the following tasks to process your change of address data:
It is assumed that you are familiar with DataFlux Data Management Studio data jobs, as described in Maintaining Data Jobs .
Create an Address Update Job
Perform the following steps:
- Create a new data job.
- Open the Data Inputs folder in the Nodes tree. Select the Fixed Width File Input node and drop it into the data flow.
- Double-click the Fixed Width File Input node to display its properties window.
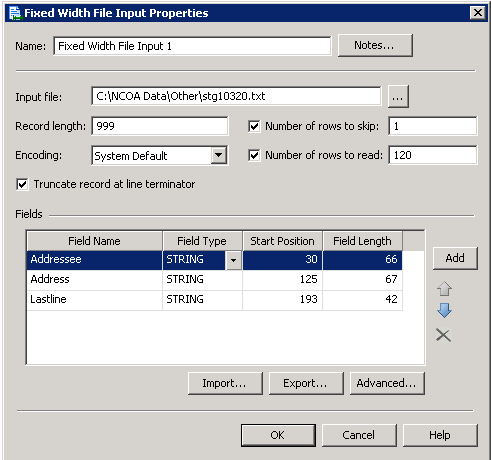
- Enter the path to the mailing list input file in the Input file field and specify appropriate parameters for the file. The input settings for a sample job are shown in the following display:
- Open the Enrichment folder in the Nodes tree. Select the Address Update Lookup node and drop it into the data flow. Then, connect the Fixed Width File Input node to the node.
- Review the settings for the Address Update Lookup node, as shown in the following display:
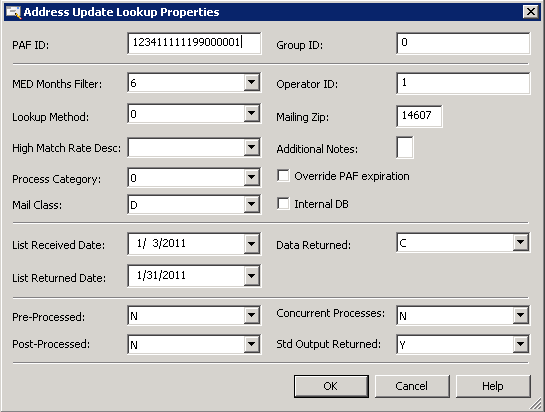 For information about these fields, see the Help for the Address Update Lookup node.
 - Open the Data Outputs folder in the Nodes tree. Select the HTML Report node and drop it into the data flow. Then, connect the Address Update Lookup node to the node.
- Review the settings for the HTML Report node, as shown in the following display:
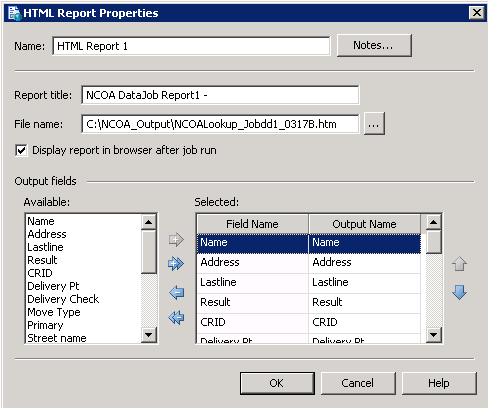 Note that the fields listed in the Selected field are displayed as columns in the HTML output of the job. Also note that the output will be displayed when job finishes. The following display shows the completed flow for a sample job:
Run the Job and Review the Output
Perform the following steps:
- Click the Run Data Job icon (green chevron) to run the job.
- Review the log to make sure that all of the nodes in the data job have completed successfully.
- Review the output to see the changed addresses that were located in the job, as shown in the following display:
 Note the two changed addresses shown in this excerpt from the HTML output from the sample job. Both rows display the return code A in the Result column. Each row receives a return code as it is processed through the Address Update Lookup node. For a list of NCOALINK return codes, see the User Technical Reference Guide on the NCOALINK documentation page on the USPS Web site.
Obtain and Store Daily Delete Files
You must obtain and store NCOA daily delete files from USPS/NCOA. These files list the address data that has been deleted from the NCOA database. Obtain the file, which must be named dailydel.dat, each day and store it in the root of the DVD 2 directory. Note that Address Update will process address data without this file. However, it must be present before its data will be used to filter change of address data, as required by NCOA.
|
Documentation Feedback: yourturn@sas.com
|
Doc ID: dfDMStd_T_NCOA_AddrUp.html |