Creating and Loading Master Data Projects
You can use the New Master Data Project wizard to create the folders and metadata for the master data project. Then, you can use the Add source mapping wizard to add the source table data to the master data project table structure. It is assumed that you have created a Master Data Projects repository.
Perform the following tasks:
Create a New Master Data Project
Perform the following steps:
- Right-click the Master Data Foundations folder in the Data riser.
- Click New Master Data Project in the pop-up menu.
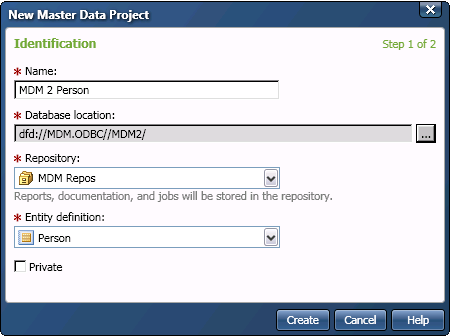
- Specify an appropriate name for the master data project, such as MDM 2 Person.
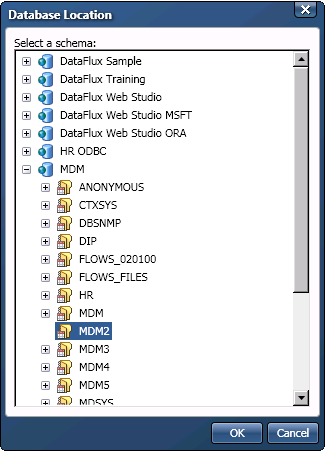
- Use the Database location field to navigate to the unique empty schema for the master data project. For example, you could select the MDM 2 schema.
- Use the Repository field to select the repository that you have created for your master data projects, such as MDM Repos. The following display shows the selection dialog for the repository:
- Use the Entity definition field to select the entity definition for the master data project, such as Person.
- Use the Private check box to specify whether the master data project will be private. The check box is left unselected, which designates this project as public and accessible to all users. If you select Private, the configuration file is written that is accessible only to you as the user who created the project. The following display shows the completed Identification page:
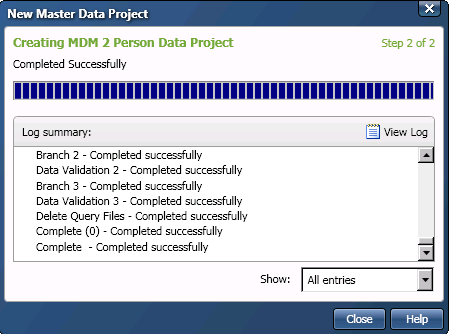
- Click Create to access the Creating Data Project page. The following display shows the log summary for the successfully completed master data project:
Add Source Tables to a Master Data Project
Perform the following steps:
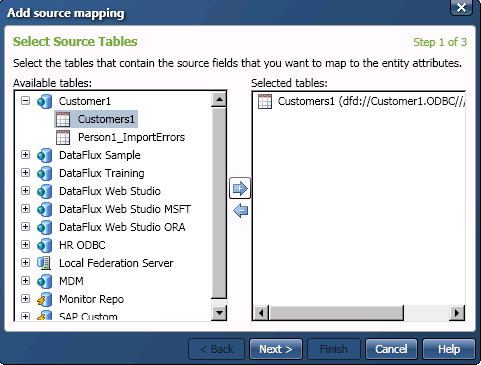
- Right-click the master data project. Then click Add Source Tables in the pop-up menu to access the Select Source Tables page.
- Move the tables that you want to add to project from the Available tables field to the Selected tables field, as shown in the following display:
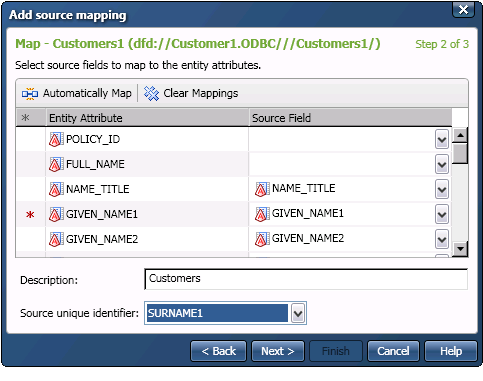
- Click Next to access the Map page. Review the automatic mappings and modify them as needed. Then, add a description of the table and specify a unique identifier in the appropriate fields. The description and the source unique identifier can be useful when you need to return to the source data, when it might be difficult to find a particular source in the middle of all of your data. The Select Source Tables page is shown in the following display:
 Note that you must perform this step separately for each source table that you add to the project.
 - Click Next to access the Summary page, where you can review the mappings, descriptions, and identifiers for the source tables, as shown in the following display:
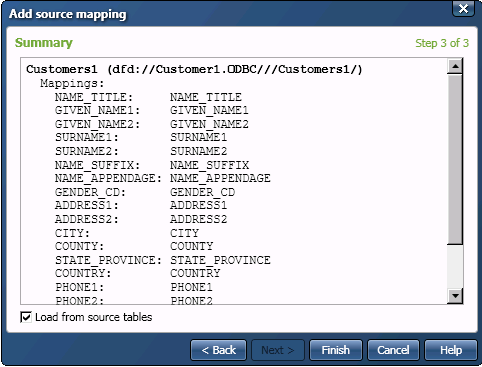
- Select the Load from source tables check box to specify that the data from the source tables will be loaded into the master data project.
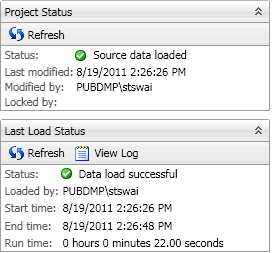
- Click Finish to run the load. You can see the status of the load in the Last Load Status section of the SAS Master Data Management Foundations pane, as shown in the following display: