DataFlux Data Management Studio 2.6: User Guide
Run the Process Summary Report
You can run a process summary report in the Address Update add-on to monitor your implementation. The report examines the results of a single batch. It displays a subset of the data included in the customer service log report, presented in a simple text format. Before you run this report, however, you need to prepare the EXECID input that is needed to run the report. This input is used to identify the summary results from a specific batch run. Each batch run has its summary results stored in the address update repository, with a unique ID for each batch (the EXECID).
To prepare this input, you must set up a variable (for example, EXECROWID) in the Address Update Lookup node in the address update data job. Then, you need to link the variable to the Process Summary node in a process job. The Process Summary node contains the EXECID input.
Perform the following tasks:
It is assumed that you are familiar with DataFlux Data Management Studio process jobs, as described in Maintaining Process Jobs.
Prepare the EXECID Input
You can configure a variable in the Address Update node in a data job to load the EXECID input needed to run the process summary report. The following steps represent one way to load this input:
- Create a new process job.
The next task is to add the data job that you use to process address updates to the process job. For example, you could add the data job that was described in Processing Address Update Data.
- Open the Data Job folder in the Nodes tree. Select the Data Job (reference) node and drop it into the process flow.
- Right-click the Data Job (reference) node and select properties.
- In the properties dialog, click the selection control in the Location field. A selection dialog displays.
- Use the selection dialog to select the data job that you use to process address updates to the process job.
- Click OK to save your selection. The Data Job (reference) node now points to the data job that you use to process address updates.
The next task is to add a variable to the Data Job (reference) node.
- Right-click the Data Job (reference) node and select Open. The flow for the data job displays.
- Right-click the Address Update Lookup node in the data job and select Advanced Properties.
- Enter a name, such as EXECROWID, in the Default Value field for the EXECROWID_VAR property, as shown in the following display:

- Close the Advanced Properties dialog.
- Click the Variables tab for the Address Update Lookup node.
- Add a new variable.
- Enter variable name (EXECROWID) in the Name field. Set the External Use to Output. The variable is shown in the following display:

- Return to the process flow editor in the process job.
The next task is to add the Address Update Process Summary node to the process job.
- Open the Enrichment folder in the Nodes tree. Select the Address Update Process Summary node and drop it into the process flow.
- Connect the Data Job (reference) node for the address update job to the Address Update Process Summary node, as shown in the following display:

- Click the Inputs tab for the Address Update Process Summary node.
- Click the row for the EXECID input and select Source Binding in the pop-up menu.
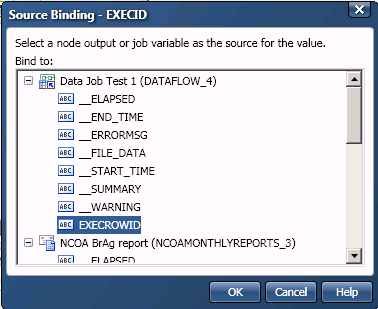
- Select the variable that you created for the Data Job node in the Source Binding dialog, as shown in the following display:

- Click OK to save the selection.
Run a Summary Report
When you run this process job, the Data Job (reference) node will run and populate the variable. Then, the Address Update Process Summary node will start and will pull its EXECROWID value from the address update job in the Data Job (reference) node. Perform the following steps:
- Select the Address Update Process Summary node and click the Inputs tab.
- Enter the appropriate input values for the report. For descriptions of these values, see the Help for the Address Update Process Summary Report Node. For example, you can enter the following input values:

- Run the report.
- Review the log to make sure that the job completed successfully.
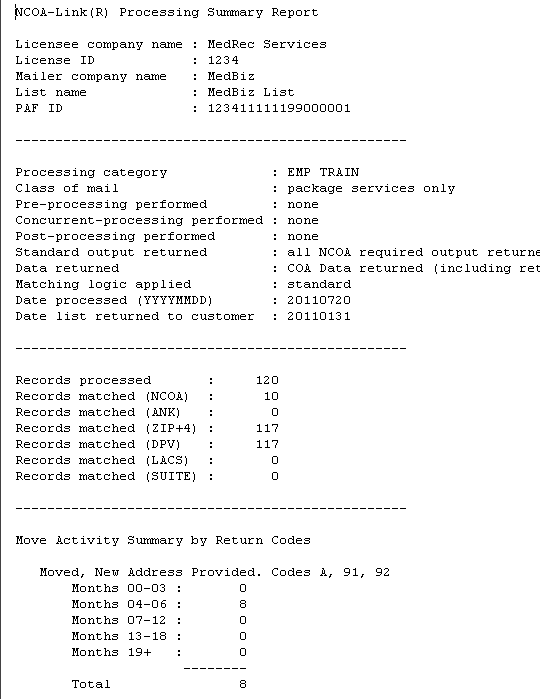
- Review the output, as shown in the following display:

|
Documentation Feedback: yourturn@sas.com
Note: Always include the Doc ID when providing documentation feedback.
|
Doc ID: dfDMStd_T_NCOA_ProcSum.html
|


