Example: Joins with a Junction Table
By default, the data builder considers the first table that you drop in the workspace as the fact table. As you add tables to the data query, the data builder attempts to join the tables with the first table, the fact table.
This strategy works well for straightforward fact table and dimension table arrangements. However, in many cases, you need to join additional tables to
a junction table. Junction tables are also known as bridge tables or link tables.
In the following figure,
the Bridge and Accounts_Dim tables are joined to the Fact table. The
Accounts_Dim table has a join on the Account_Key column. The Bridge
table is joined on the compound key (represented as two lines), which
consists of the Transaction_Key and Segment_ID columns.
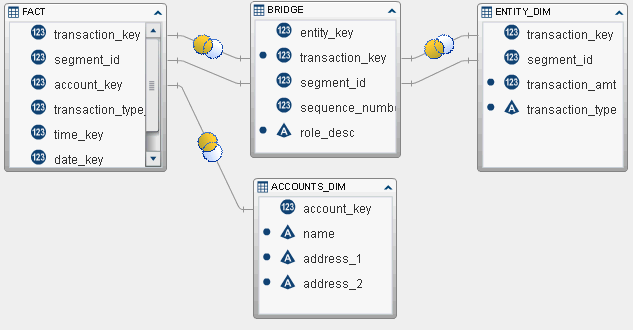
To retrieve the transaction amount and transaction type from the Entity_Dim table,
it must have a join that uses the Bridge table instead of the first table (fact table)
that was added to the workspace.
To create a join to
a junction (or bridge) table:
Copyright © SAS Institute Inc. All rights reserved.