Working with Data Sources in Reports
About Data Sources
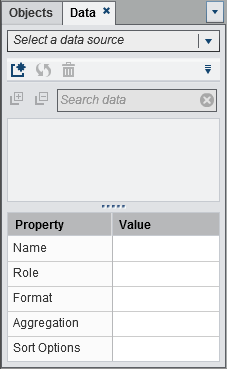
Data sources that are
available in the designer are prepared by a data administrator or
analyst so that you can easily define a report. Data administrators
load tables into memory using SAS Visual Analytics Administrator.
Analysts can use SAS Visual Data Builder (the builder) to design queries
that load tables into memory too. All data sources contain data items,
which can refer to calculations or columns in physical data (tables).
Reports can include query results from more than one data source.


Import a Data Source for a Report
If you have the Import
and Load Data capability, then you can import a data source into the
designer. Acceptable files are SAS data sets, Microsoft Excel spreadsheets,
and delimited text files, such as CSV files.
To import a data source
for a report:

Refresh a Data Source for a Report
You can refresh the
columns in a data source in the designer at any time. Be aware that
refreshing a data source means that all live report objects that are
connected to that data source will have their queries re-run.
Note: Refreshing a data source
adds any new columns that have been added to the table metadata. The
default formats and names of existing columns will be updated the
next time you open the report.
To refresh a data source
for a report, on the Data tab, select the
data source, and then click  . When you refresh a data source for a report, columns
that have been deleted from the table metadata will automatically
be removed if they do not impact any objects in the report. If deleted
columns do impact objects in the report, then the Repair
Report window is displayed so that you can repair the
objects that are impacted by the deleted columns.For more information,
see Repairing Reports.
. When you refresh a data source for a report, columns
that have been deleted from the table metadata will automatically
be removed if they do not impact any objects in the report. If deleted
columns do impact objects in the report, then the Repair
Report window is displayed so that you can repair the
objects that are impacted by the deleted columns.For more information,
see Repairing Reports.
Remove a Data Source from a Report

Change a Data Source in a Report
To change a data source
for a report:
-
If a data item with the same name does not exist in the replacement data source, then it is automatically removed from the replacement data source if there are no report objects that use the data item. If there are report objects that use the data item, then those report objects will not work. The Repair Report window is displayed so that you can repair the objects that use the data item. For more information about repairing reports, see Repairing Reports.
Showing or Hiding Items
To show or hide data
items:
Alternatively, you can
select a data item that you want to hide on the Data tab.
Right-click the data item, and select Hide Data Item.
You can also use a data
source filter to restrict the data that is displayed in a report. For more information,
see Working with Data Source Filters in a Report.
Sort Items
To sort data items on
the Data tab, click  , and then select one of the following:
The data items are sorted on the Data tab
within each grouping. The default sort is Ascending By
Name.
, and then select one of the following:
The data items are sorted on the Data tab
within each grouping. The default sort is Ascending By
Name.
, and then select one of the following:
The data items are sorted on the Data tab
within each grouping. The default sort is Ascending By
Name.
For information
about sorting data values in report objects, see Sorting Data in Reports.
Copyright © SAS Institute Inc. All rights reserved.