How to Set Up and Start Autoload
Introduction
Use these instructions
if you want to autoload data to the general-purpose LASR library,
Visual Analytics Public LASR. The Visual Analytics Public LASR library
is preconfigured for autoload, so there are only two additional setup
tasks:
-
Enable an account to schedule and run autoload. Autoload interacts with both your Windows file system and your SAS resources, so it must run as a Windows account that has a corresponding individual SAS identity.
-
Start autoload as a scheduled task. SAS provides a batch file that creates and starts a scheduled task for autoload. The task uses Windows Task Scheduler. After you start the task, it runs every 15 minutes (unless you customize the task interval).
Configure the Autoload Scheduler
|
1.
|
Identify the Windows
account that installed SAS Visual Analytics on your computer.
Note: These instructions reuse
the account that installed SAS Visual Analytics (the installer) for
the autoload scheduler because the account already exists and has
the necessary Read and Write access in Windows. If you do not know
the account’s user ID and password, you can use a different
account.
|
|
|
2.
|
Give the account the
necessary Windows privileges.
|
|
|
a.
|
On your SAS Visual Analytics
computer, navigate to Start
|
|
|
b.
|
Right-click Local
Security Policy, and select Open.
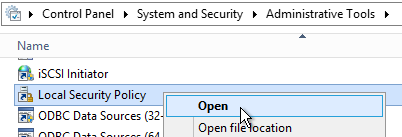 Note: If you cannot open Local
Security Policy, ask your Windows system administrator
for assistance.
|
|
|
c.
|
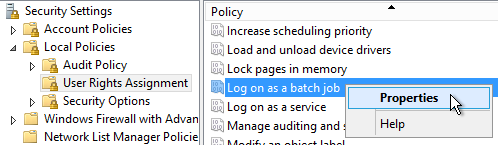
In the Local
Security Policy window, expand Local Policies,
and select User Rights Assignment. On the
right, right-click Log on as a batch job,
and select Properties.
 |
|
|
d.
|
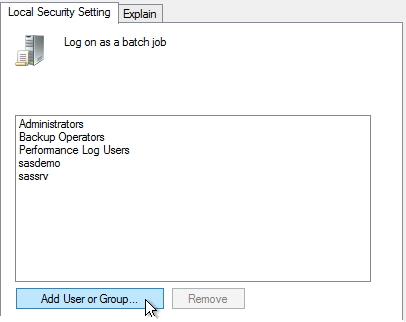
In the Log
on as a batch job Properties window, add the account
to the list of users and groups.
 |
|
|
e.
|
Make sure that the account
has Read and Write access to your equivalent of the following directories:
C:\SAS\Config\Lev1\......AppData\SASVisualAnalytics\VisualAnalyticsAdministrator\AutoLoad...AppData\SASVisualAnalytics\VisualAnalyticsAdministrator\sigfiles...Applications\SASVisualAnalytics\VisualAnalyticsAdministrator\...Applications\SASVisualAnalytics\VisualAnalyticsAdministrator\Monitoring...Applications\SASVisualAnalytics\VisualAnalyticsAdministrator\Monitoring\Logs...Applications\SASVisualAnalytics\VisualAnalyticsAdministrator\Monitoring\PIDs |
|
|
3.
|
Set up a corresponding
SAS identity for the account.
|
|
|
a.
|
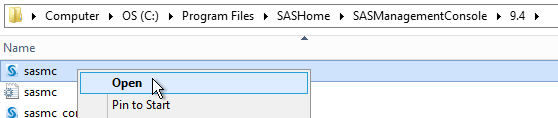
On your SAS Visual Analytics
computer, navigate to your equivalent of the following directory:
C:\Program
Files\SASHome\SASManagementConsole\9.4 |
|
|
b.
|
Right-click sasmc.exe,
and select Open.
 |
|
|
c.
|
Log on to SAS Management
Console as the SAS Administrator. Here is an example of the necessary
connection information:
 |
|
|
d.
|
On the Plug-ins tab,
right-click User Manager, and select New
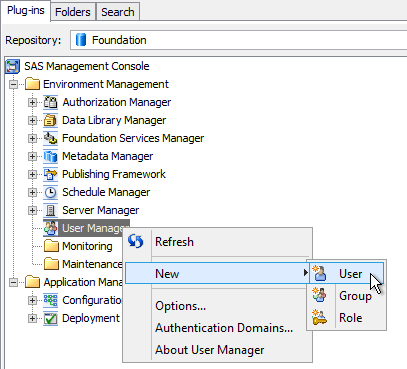 |
|
|
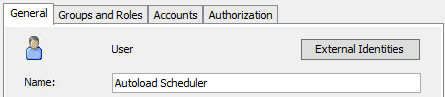
e.
|
On the General tab,
enter a name such as
Autoload Scheduler.
 |
|
|
f.
|
On the Groups
and Roles tab, move the Visual Analytics
Data Administrators group to the Member of list.
|
|
|
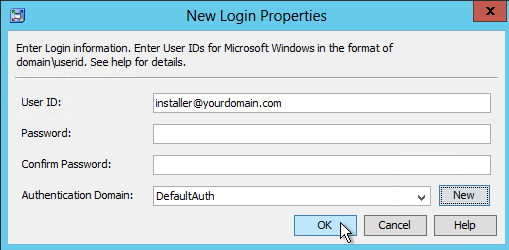
g.
|
On the Accounts tab,
click New to add a login.
 |
|
|
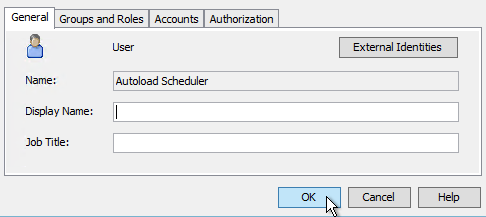
h.
|
In the New
User Properties window, click OK.
 |
|
Start the Scheduled Task
|
1.
|
Log on to your SAS Visual
Analytics computer as the autoload scheduler.
|
|
|
2.
|
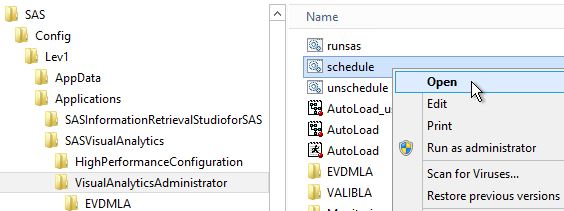
Navigate to your equivalent
of the following directory:
C:\SAS\Config\Lev1\Applications\SASVisualAnalytics\VisualAnalyticsAdministrator\ |
|
|
3.
|
Right-click schedule.bat,
and select Open.
 |
|
|
4.
|
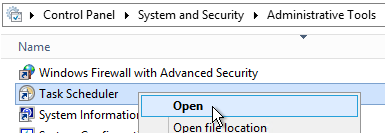
Verify that the scheduled
task is running.
|
|
|
a.
|
Select Start
|
|
|
b.
|
Right-click Task
Scheduler, and select Open.
 |
|
|
c.
|
In the Task
Scheduler window, select Task Scheduler Library.
Locate the task Visual Analyt Hi-Perf Cfg -
Auto Load Scheduler, and verify that its Status value
is Ready (or Running).
 |
|
|
5.
|
Verify that autoload
is working.
|
|
|
a.
|
Copy a spreadsheet,
delimited file, or SAS data set to your equivalent of the following
directory:
C:\SAS\Config\Lev1\AppData\SASVisualAnalytics\VisualAnalyticsAdministrator\AutoLoad |
|
|
b.
|
After 15 minutes, use
the LASR Tables tab to verify that the data
is loaded and available as a data source.
|
|
Copyright © SAS Institute Inc. All rights reserved.