Working with SAS Data Remediation Administration
Overview
The SAS Data Remediation Administration tab
provides a work area where the administrator configures settings,
sets access controls, and plans permissions within SAS Data Remediation
views. The administrator sets up each application that interacts with SAS Data Remediation
and includes the name of the application, subject areas, and issue
types.
Note: SAS Data Remediation Administration tab
is available only to users with administrator privileges, that is,
either the Data Remediation:Issue Administration role
or the Data Remediation View
Application and Issue Administration capabilities.
SAS Data Remediation Administration Tab
Overview
To open the SAS Data Remediation Administration tab,
click the Administration option under Data
Remediation from the SAS Data Management
Console. From here, you can add new client applications
for data remediation or view and edit existing applications.
SAS Data Remediation Administration

The toolbar at the top
of the tab contains an Actions menu
with the following options:
Add Client Application
adds a new client
application used to interact with SAS Data Remediation.
Open
opens the remediation
record for client application.
Delete
removes the client
application selected in the client application list.
Refresh
refreshes the list
of client applications.
About SAS Data Remediation
displays application
version information.
Adding and Editing Client Applications
When the SAS Data Remediation Administration tab
first opens, no applications are associated with the software. You
can configure any client applications that you want to use within SAS Data Remediation.
Alternatively, the first time an application uses the data remediation
service, an association is made for the application if it does not
already exist.
-
To add an application to SAS Data Remediation, click

-
(Optional) To edit an existing application, select the application in the application listSAS Data Remediation Administration

-
Click
 .
.
After you add or open
an application, a new tab opens with three sub-tabs: Properties, Subject
Areas, and Issue Types.
Application Sub-tabs

The toolbar at the top
of the tab contains an Actions menu
with the following options:
Save
saves changes to the
application information.
Refresh
refreshes information
about the tab.
The Properties tab
is displayed by default. The following sections describe the use of
these tabs for adding or editing applications.
Properties Tab
The Properties tab
displays the following fields:
ID [required]
a unique identifier.
Once this field is saved, you cannot make changes to the ID.
Display Name [required]
the name that is displayed
for the client application.
Description
the description of
the application.
Created
the date on which the
application was added to remediation.
Created by
the user name of the
person who created the link to the application for remediation.
Modified
the date on which the
application was last changed.
Modified by
the user name of the
person who last changed the application information.
URL to notify of issue status
the URL invoked when
issue status changes have been made. This does not apply to issues
that are in a transitional status in the workflow. To achieve similar
behavior from a workflow instance, the same user-supplied URL would
have to be called from a workflow web service policy when the workflow
status changes.
Allow dynamic creation of subject areas and issue
types
enables applications
to create subject areas and issue types through REST API web service
calls. When this is disabled, subject areas and issues types must
be defined first in this application before new issues can be created
from external applications that refer to them.
No user interface configured
enables users to manage
issues without a specific application selected. With this setting,
no corrective action can take place on the data that originally contained
the issue. Only issue tracking properties such as Importance or Assignee
are enabled.
Application provides custom plug-in user interface
(.swf)
specifies that an external
application provides a web-based user interface when a value is set
for the .swf file. You can fix issues in this interface.
One .swf for all issue types
selecting this option
enables you to specify the location of one .swf file for all Issue
Types that are defined for this application. The plug-in
.swf issue code field, on the Issue Types tab,
enables you to specify a form to present to the user if the same .swf
file contains several form types.
Note: For SAS MDM,
set the One .swf for all issue types field
to
/SASMDM/modules/sas.dm.mdm.remediation.flex/sas.dm.mdm.remediation.flex.swf.Leave the plug-in .swf issue code field, on the Issue Types tab, blank.
One .swf for each issue type
selecting this option
enables you to specify the location of one .swf file for each Issue
Type that is defined for this application. The plug-in
.swf field, on the Issue Types tab,
enables you to specify the full path for the .swf file associated
with the issue.
Use default remediation UI and retrieve or send
remediation item attributes and actions using HTTP
selecting this option
enables you to specify a server that supports external REST web services.
This option provides a simple edit form from which you can correct
issues if an external set of REST web services is available to read
and write data. When you choose to access an issue configured to use
this option, the REST call is used to GET the external data, which
is presented for editing. When you invoke the Save operation, the
PUT web service is called to send the data back to the external application.
URL to retrieve item attributes (GET)
the URL invoked when SAS Data Remediation
opens an issue to retrieve data from an external process. Design the
custom REST web service so that the HTTP call that uses the GET function
retrieves one data row.
URL to send item attributes (PUT)
the URL invoked when SAS Data Remediation
accepts the correction and sends the data back to an external process.
Design the custom REST web service so that the HTTP call that uses
the PUT function takes data elements from one row in data remediation
and sends it to the external process.
Use default remediation UI and retrieve/send remediation
item attributes and actions using Data Management Server
selecting this option
enables you to specify a Data Management Server.
Server address
the URL for SAS Data Remediation
to access the Data Management Server used to retrieve and send remediation
processes.
Real-time service to retrieve item attributes
the data service job
in Data Management Server invoked when SAS Data Remediation
opens an issue to retrieve data from an external process.
Real-time service to send item attributes
the data service job
in Data Management Server invoked when SAS Data Remediation
accepts the correction and sends data to remediation.
Note: If you encounter problems
with the hostname in your URL, please contact technical support.
Click  on the toolbar to refresh the Properties tab
view.
on the toolbar to refresh the Properties tab
view.
on the toolbar to refresh the Properties tab
view.
Subject Areas Tab
Overview
The Subject
Areas tab displays a list of subject areas that have
been defined on this tab or defined through a web service call made
by another application. A subject area is a way to categorize remediation
issues. You can specify that only certain users are given access to
a subject area. From this tab, you can also add subject areas to and
delete them from the application. The Subject Areas tab
is divided into three sections: a list of subject areas in the left
pane, a Properties tab, and a Task
Templates tab. The Properties tab
is displayed by default.
Subject Areas Tab
The toolbar at the top
of the tab contains an Actions menu
with the following options:
New Subject Area
creates a new subject
area in the subject areas list.
Delete
deletes a selected
subject area from the subject areas list. Removing an application
or subject area removes the associated packages and their contents.
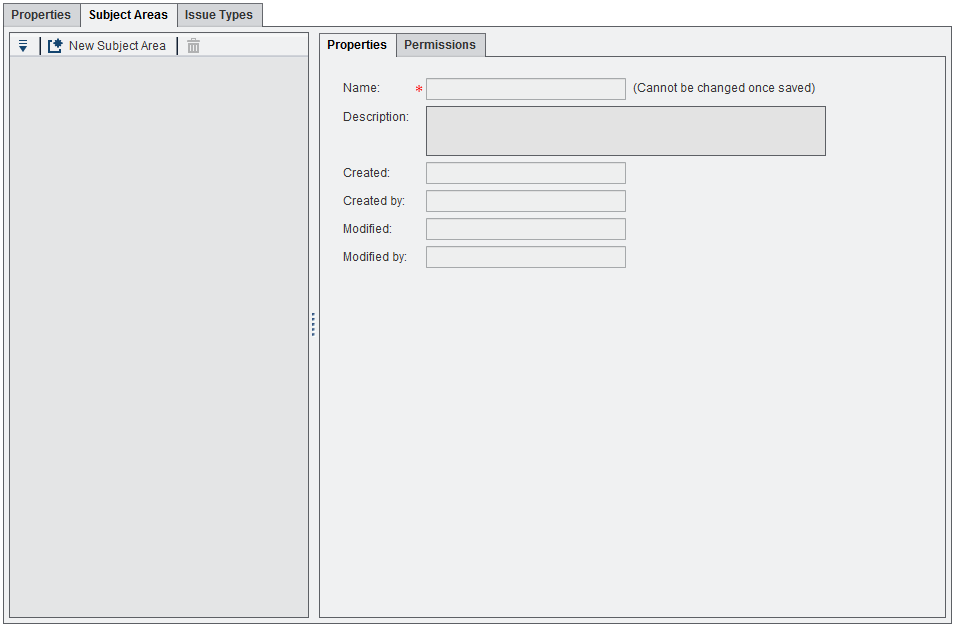
Properties Tab
The Properties tab
displays the following fields for the subject area selected in the
subject areas list:
Name [required]
the subject area name.
Once you save this name, you cannot change the field.
Description
the description of
the subject area.
Created
the date on which the
subject area was created.
Created by
the user name of the
person who created the subject area.
Modified
the date on which the
subject area was last changed.
Modified by
the user name of the
person who last changed the subject area.
Permissions Tab
On the Permissions tab,
you can set permissions for SAS Data Remediation
users. You can also add and remove users. The list of available users
here is the set of users added through SAS Management Console who
have been assigned roles that use capabilities defined for SAS Data Remediation.
Users defined in SAS Management Console who are not assigned a role
using SAS Data Remediation capabilities do not appear
in the list of users. Setting permissions grants or revokes access
for a set of users for a given Subject Area. For information about
SAS Management Console, see SAS Management Console: Guide
to Users and Permissions.
Subject Areas Permissions Tab
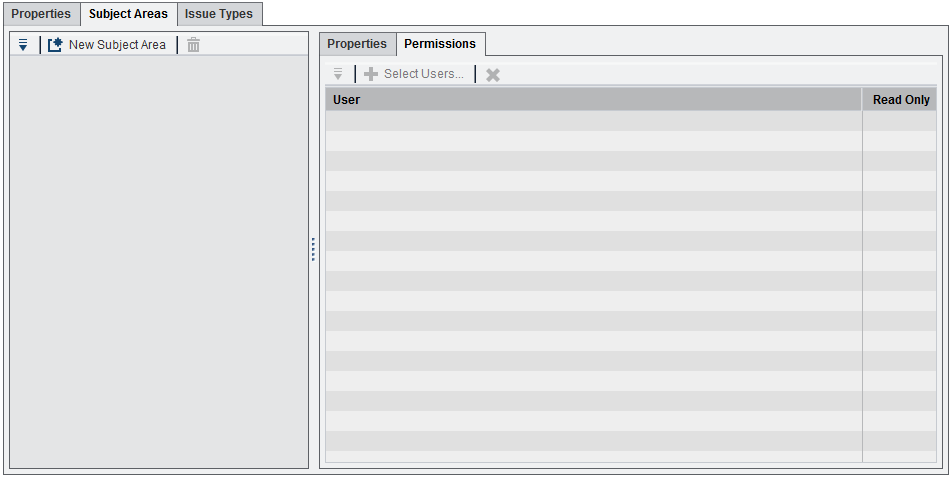
The toolbar at the top
of the tab contains an Actions menu
with the following options:
Select Users
opens a dialog box
that enables you to select users who have permissions on the selected
subject area.
Delete
deletes the selected
user from the list of users who have permissions on the selected subject
area. You can select multiple users for deletion.
To select users:
-
Click
 . The following dialog box appears:
Select Users
. The following dialog box appears:
Select Users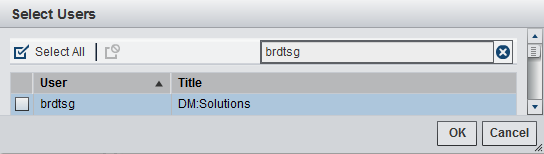
-
Enter characters into the search field. The list of users is filtered by the search criteria as you enter characters. Click
 to clear the search field and restore the full list
of users.
to clear the search field and restore the full list
of users.
-
Select or deselect users as follows:
-
To select individual user names, select the check box next to the applicable name or names.
-
To select all users, click
 .
.
-
To deselect all users, click
 .
.
-
-
Click OK.
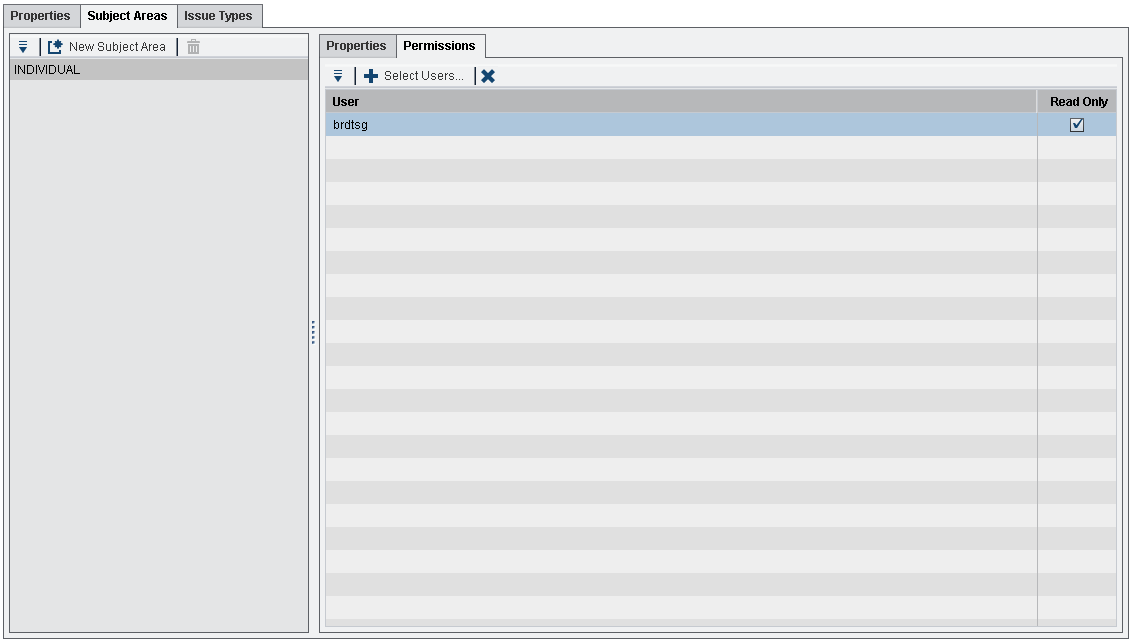
If no permissions are
set, all users of SAS Data Remediation can see all
data issues for a given Subject Area. If you choose to add users for
a particular subject area, you are disallowing access for all non-selected
users.
You can choose to assign
Read-Only access to some users. To enable this, select the check box
next to the user name once it has been added to the permissions table.
Subject Areas Permissions Tab
Issue Types Tab
Overview
The Issue
Types tab displays a list of issue types identified by
the application that you are currently viewing. Issue types are a
way to categorize issues, making it easy to sort and filter a set
of issues before working with them. Issue types can be associated
with Task Templates. These templates are user-defined workflows that
can be used to route issues to the right user or through the right
process. From this tab, you can add new issue types to the application,
edit existing issue types, or delete issue types. The Issue
Types tab is divided into three sections: a list of issue
types in the left pane, a Properties tab,
and a Task Templates tab. The Properties tab
is displayed by default.
Issue Types Tab
The toolbar at the top
of the tab contains an Actions menu
with the following options:
New Issue Type
creates a new issue
type in the issue types list.
Delete
deletes a selected
issue type from the issue types list. Issue types cannot be deleted
unless all issues that refer to that issue type have been deleted
from the system by using Delete Package functionality. The Delete
action is enabled only for issue types that meet this criterion.
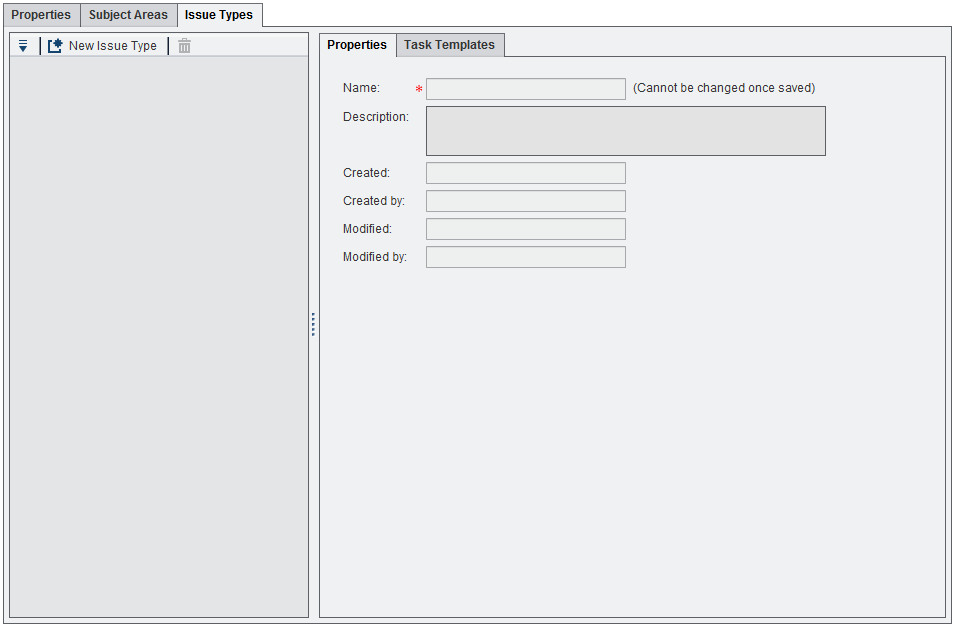
Properties Tab
The Properties tab
displays the following fields for the issue type selected in the issue
types list:
Name [required]
the issue type name.
Once you save this name, you cannot change the field.
Description
the description of
issue type
plug-in .swf issue code
this option is displayed
only if, on the main Properties tab, you
have selected both Application provides custom plug-in
user interface (.swf) and One .swf for all
issue types. The plug-in .swf issue code field
enables you to specify a form to present to the user if the same .swf
file supports several form types.
Note: For SAS MDM,
leave the plug-in .swf issue code field blank.
plug-in .swf
this option is displayed
only if, on the main Properties tab, you
have selected both Application provides custom plug-in
user interface (.swf) and One .swf for each
issue type. The plug-in .swf field
enables you to specify the full path for the .swf file associated
with the issue.
Created
the date on which the
issue type was created.
Created by
the user name of the
person who created the issue type.
Modified
the date on which the
issue type was last changed.
Modified by
the user name of the
person who last changed the issue type.
Task Templates Tab
On the Task
Templates tab, you can view the workflow templates that
have been uploaded through SAS Workflow Studio to the SAS Workflow
server and activated. You can associate one or more task templates
(workflow definitions) with the selected issue type. For more information
about SAS Workflow Studio, see SAS Workflow Studio 1.3:
User’s Guide.
Issue Types Task Templates Tab
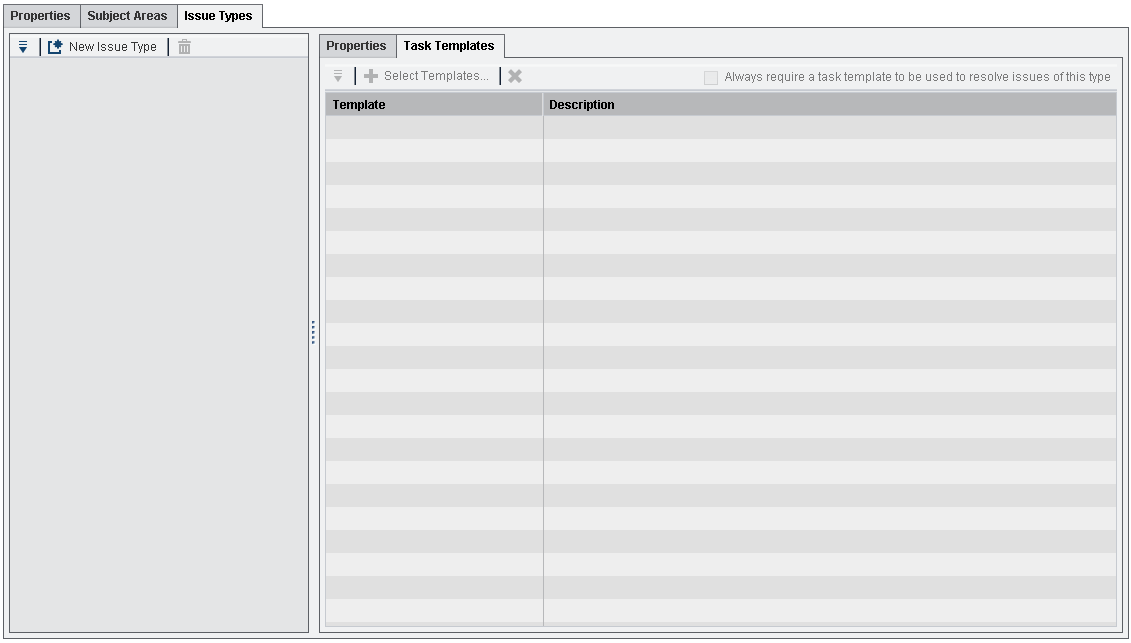
The toolbar at the top
of the tab contains an Actions menu
with the following options:
Select Templates
opens a dialog box
that enables you to select task templates (workflow templates) to
associate with the issue type selected in the issue types list.
Delete
deletes the selected
task templates associated with the issue. You can select multiple
task templates for deletion.
To select templates,
click  . The following dialog box appears:
. The following dialog box appears:
Select Templates
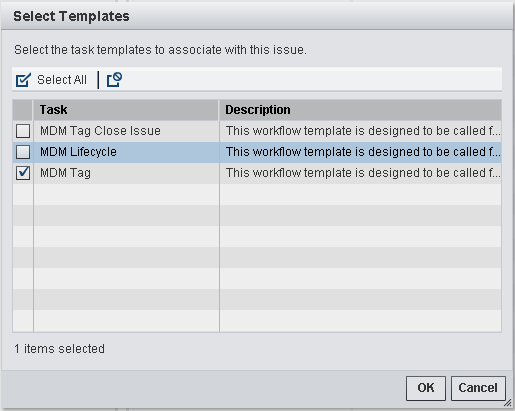
You can click the box
next to tasks to select them, click to select all tasks, or click to deselect all tasks.
to select all tasks, or click to deselect all tasks.
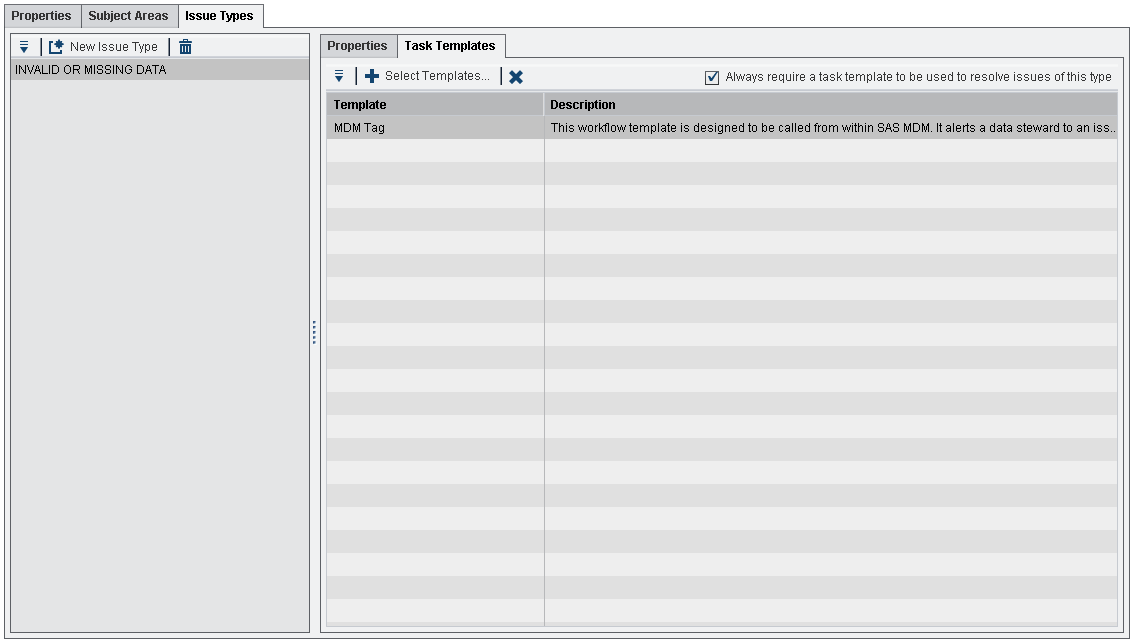
You can require a user
to address a remediation issue through a defined workflow. To enable
this, select the Always require a task template to be
used to resolve issues of this type check box. If this
option is selected, when an external system creates a new remediation
issue, it must provide the name of one of the approved workflow templates
for the selected issue type. If a workflow template is not provided
or is incorrectly specified, the issue is not created. Once the workflow
has started, the workflow design provides additional menu actions.
If this setting is applied
to an issue type after issues of that issue type have already been
created in the system, those existing issues are not affected by the
change. If this setting is disabled after issues have already been
created and workflows have been started for them, the existing issues
continue to use workflows while the new issue does not require them.
Issue Types Task Templates Tab
SAS Data Remediation Roles
SAS Data Remediation creates
three new roles in SAS Management Console. These roles are tied to
distinct capabilities in the data remediation application. Depending
on assigned role of the user, the experience in SAS Data Remediation
changes. Certain features are available to those assigned one role,
but the same features are not available to users in another role.
Here are the roles for SAS Data Remediation:
|
Role
|
Default Groups
|
Capability
|
|---|---|---|
|
Data Remediation: Issue
Administration
|
Data Management Administrators
|
|
|
Data Remediation: Issue
Management
|
Data Management Stewards
|
|
|
Data Remediation: Issue
View
|
Data Management Business
Users
|
|
Configuring Reports for SAS Visual Analytics (Optional)
SAS MDM provides
a remediation report that runs on SAS Visual Analytics using data
obtained from SAS Data Remediation. The remediation
report link must be properly configured for the report to work correctly.
The person performing these configuration steps must be a SAS administrator.
To update the remediation
report link:
-
Log on to the SAS Management Console with administrator permissions.
-
Click the Folders tab, and then navigate to SAS Folders
 ProductsSAS Data Remediation.
-
Edit the URL Link stored process and replace the reference to localhost with the fully qualified host name corresponding to the SAS Data Remediation application.
-
Log on to the SAS Visual Analytics Hub. You must have SAS Administrators permission.
-
From the main menu, select Design Report.
-
On the Design Report tab, select FileOpen.
-
In the Open dialog box, select SAS FoldersProductsSAS MDMReportsRemediationReport, and then click Open.
-
Click the Issue Details tab and edit Link to external URL: URL Link to replace the reference to localhost with the fully qualified host name corresponding to the SAS Data Remediation application
-
Save the report.
Logs
Logs for SAS Data Remediation
can be found on the application server that hosts it. They are typically
found in a location similar to the following:
SAS Data Remediation
..\Config\Lev1\Web\Logs\SASServer13_1\SASDataRemediation.logOther logs that might
be useful for troubleshooting might not be on the same system as SAS Data Remediation.
Examples are as follows:
SAS Workflow
..\Config\Lev1\Web\Logs\SASServer1_1\SASWorkflowServicesx.x.logSAS Metadata Server
..\Config\Lev1\SASMeta\MetadataServer\LogsCopyright © SAS Institute Inc. All Rights Reserved.
Last updated: March 24, 2017