Copy Data from Hadoop
Introduction
The Copy Data from Hadoop
directive enables you to copy data from Hadoop into database management
systems such as Oracle and Teradata.
Prerequisites
When you open the Copy
Data from Hadoop directive, the Source Tables task
shows the data sources that are on the Hadoop cluster. When you come
to the Target Tables task, you see the databases
that are defined in SAS Data Loader.
If you do not see the database to which you want to copy, you must
add a connection to that database. To create or update database tables,
the credentials that are specified in the database connection require
appropriate permission. For more information, see Databases Panel.
Example
Follow these steps to
copy data from Hadoop into a database:
-
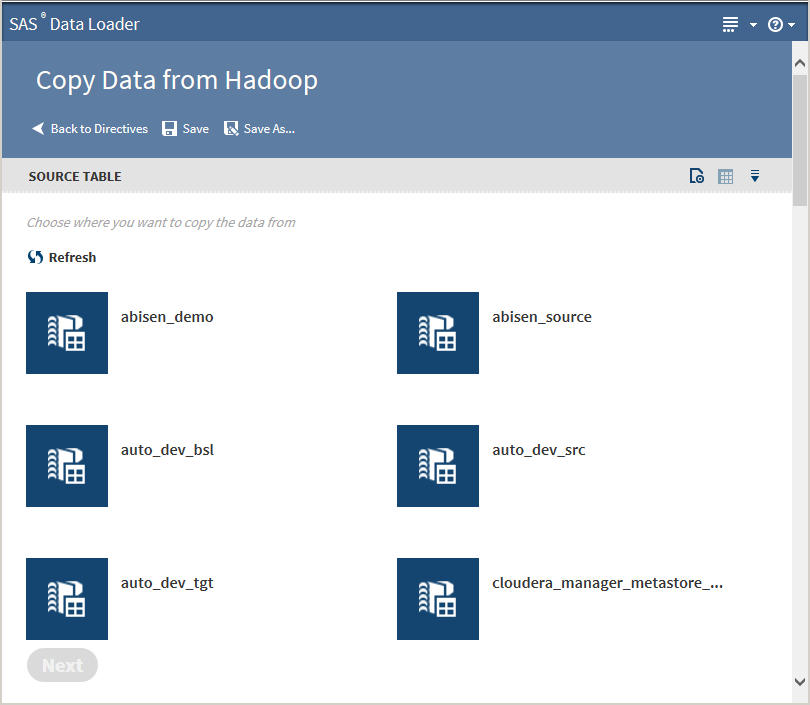
On the SAS Data Loader directives page, click the Copy Data from Hadoop directive. The Source Table task that lists available data sources is displayed:
-
Click a data source to display its tables:
-
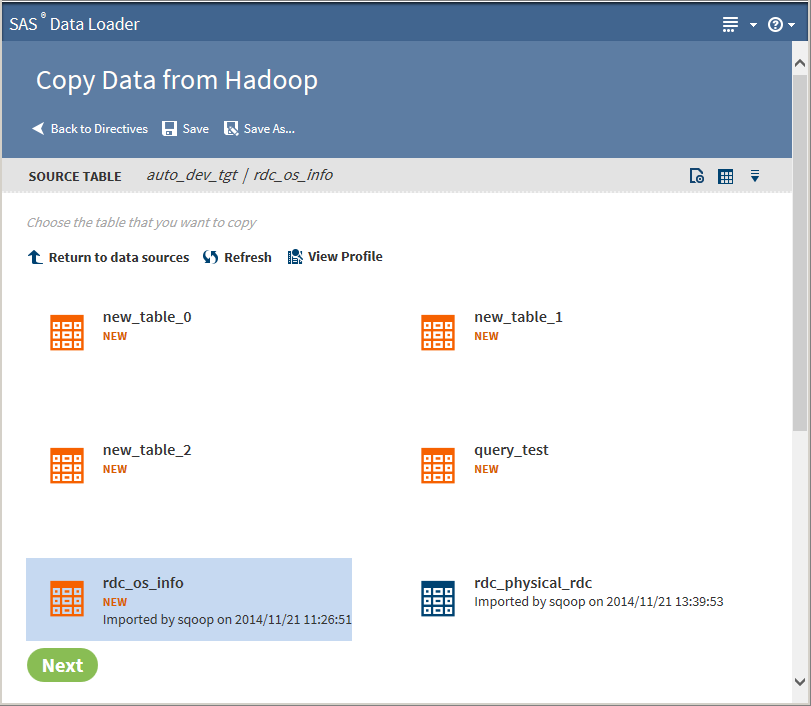
Select the table from which to copy data.Clicking the Action menu
 enables the following actions:
Openopens the current task.Table Viewerenables you to view sample data from a table. Select the table, and then click
enables the following actions:
Openopens the current task.Table Viewerenables you to view sample data from a table. Select the table, and then click to display SAS Table Viewer.
Advanced Optionsopens a dialog box that enables you to specify the maximum length for SAS columns. Entering a value here overrides the value specified in the Configuration options.Note: If the source table has String data types, the resulting SAS data set could be very large. The length of the target field in the SAS data set is determined by the value of this option.When table selection is complete, click Next. The Options task is displayed:
to display SAS Table Viewer.
Advanced Optionsopens a dialog box that enables you to specify the maximum length for SAS columns. Entering a value here overrides the value specified in the Configuration options.Note: If the source table has String data types, the resulting SAS data set could be very large. The length of the target field in the SAS data set is determined by the value of this option.When table selection is complete, click Next. The Options task is displayed: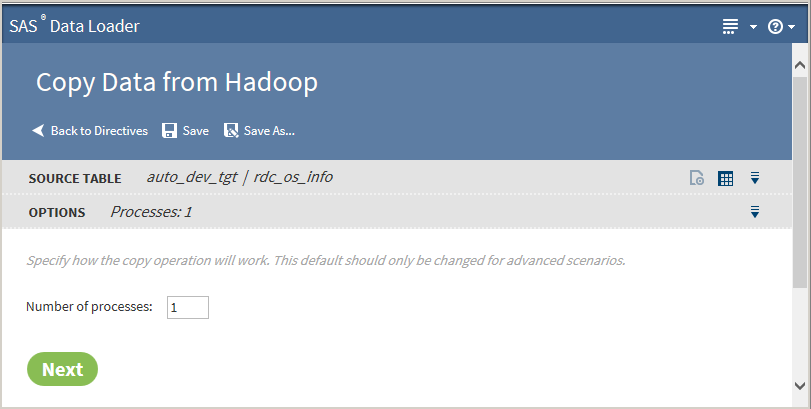
-
The value on the Options task should not be changed unless you have advanced knowledge of database operations.Note: Changing the number of processes to greater than one expands the number of processes and source data connections that are used to import data.Click Next. The Target Table task is displayed with target databases:
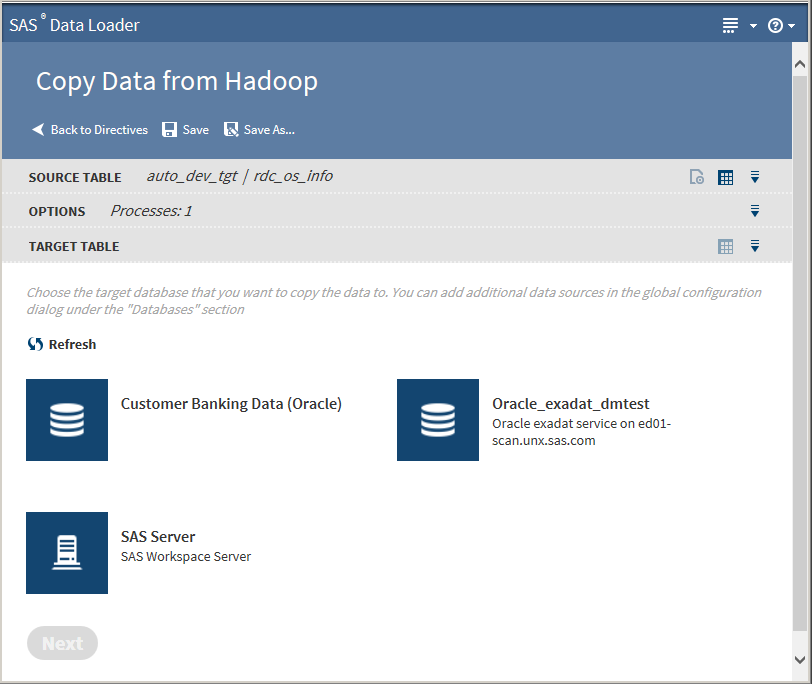
-
Click a database to display its data sources:
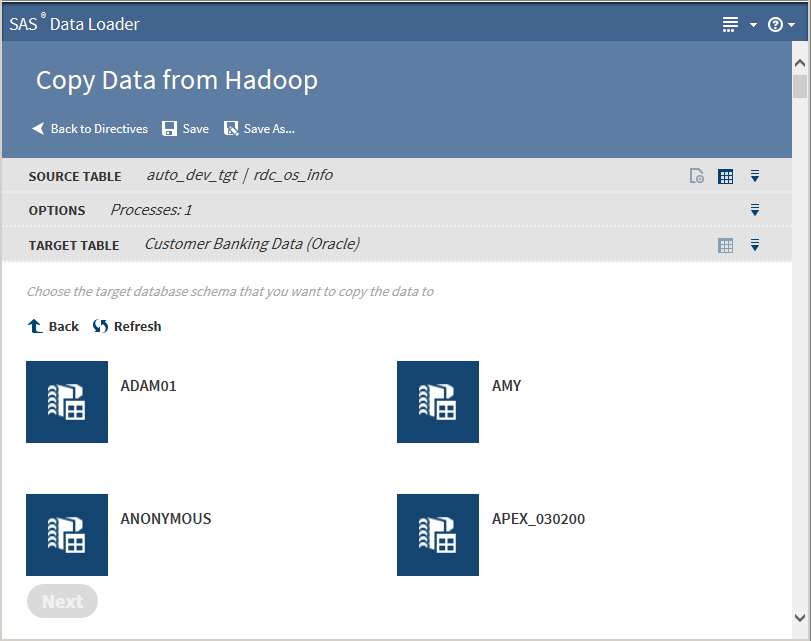
-
Click the target database schema to display its tables:
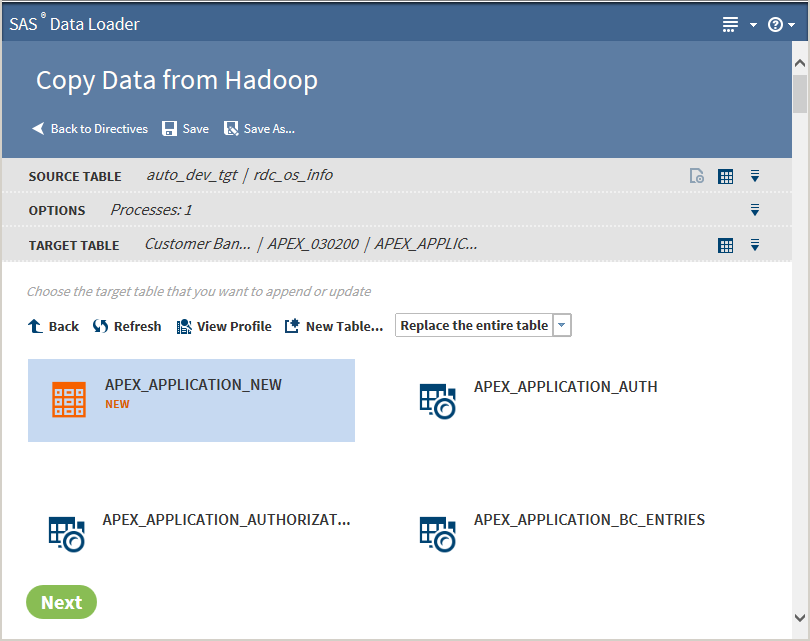
-
Choose how and where to copy the data. You have three options:
-
Select an existing table as the target of the directive. Use the Insert into the existing table option to append the data to the selected existing table.
-
Select an existing table as the target of the directive. Use the Replace the entire table option to update the data in the selected existing table.
-
Create a new table to use as the target of the directive. Click the
 icon. In the New Table dialog box, enter a name for
the new table and click OK.
Note: The Copy Data from Hadoop directive automatically creates the new table for you before it copies the data.
icon. In the New Table dialog box, enter a name for
the new table and click OK.
Note: The Copy Data from Hadoop directive automatically creates the new table for you before it copies the data.
TipIf a profile already exists for a table, PROFILED appears next to the table icon. You can view the existing profile by selecting the table and clicking View Profile.Click to enable the following actions:
Openopens the current task.Table Viewerenables you to view sample data from a table. Select the table, and then click to display SAS Table Viewer.
Click Next. The Code task is displayed: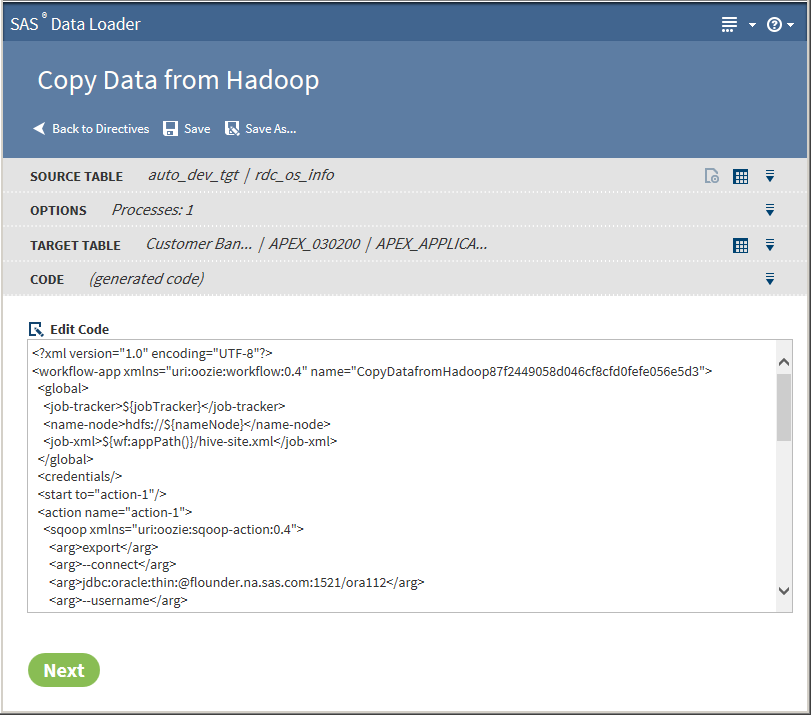
-
-
Click Edit Code to modify the generated code. To cancel your modifications, click Reset Code.CAUTION:Edit code only to implement advanced features.Under normal circumstances, code edits are not needed or required.
-
Click Next. The Result task is displayed:
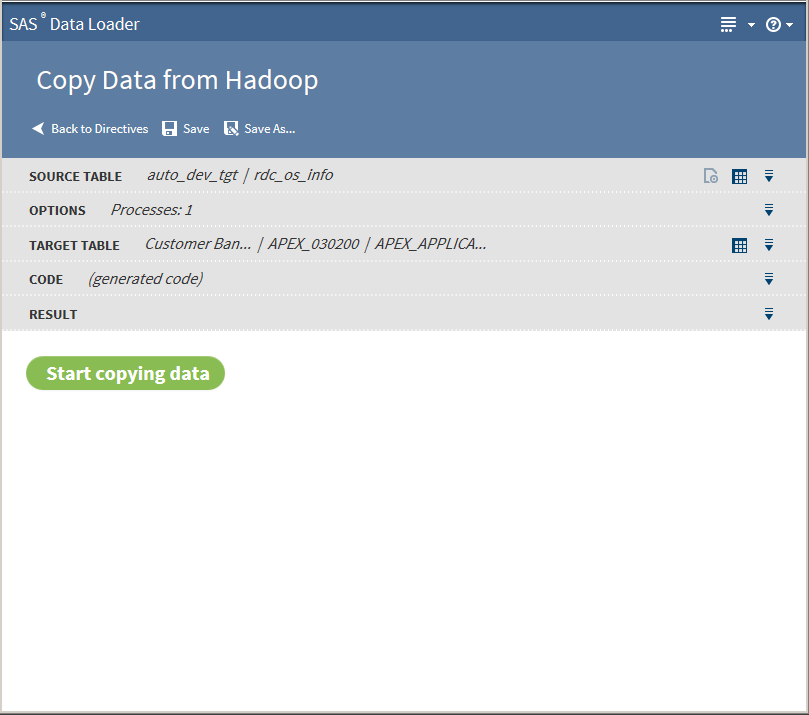
-
Click Start copying data. The Result task displays the results of the copy process:
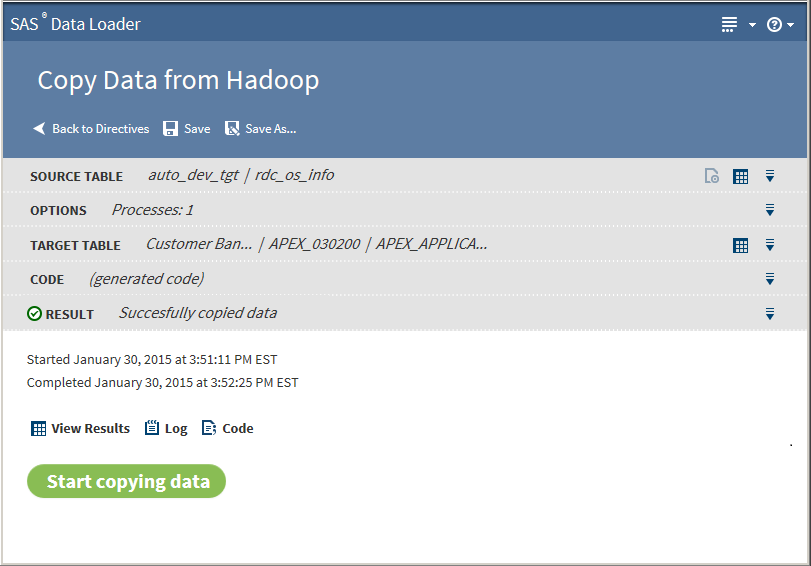 The following actions are available:View Resultsenables you to view the results of the copy process in the SAS Table Viewer.Logdisplays the SAS log that is generated during the copy process.Note: If your directive fails, and if the Error Log does not help you resolve the issue, ask your Hadoop administrator to consult the log files for Apache Sqoop.Codedisplays the SAS code that copies the data.
Usage Notes
-
The Copy From Hadoop directive does not preserve the case of an HDFS table name when the target database is DB2. In this case, use DB2 commands to create an empty target table with the appropriate table names. In SAS Data Loader, select the empty table as the target of the Copy From Hadoop directive. Choose the Insert method to update the target table.
-
By default, the Copy Data from Hadoop directive uses a VARCHAR length of 4000 when copying string data from an HDFS table. For some databases (such as DB2), this could be too long to fit into the default tablespace. If you encounter this error, use DBMS commands to create an empty target table with the appropriate attributes. In SAS Data Loader, select the empty table as the target of the Copy From Hadoop directive. Choose the Insert method to update the target table.
-
If necessary, you can change the maximum length of character columns for source tables for this directive. For more information, see Change the Maximum Length for SAS Character Columns.
-
Source tables with a large number of columns can cause Copy From Hadoop jobs to fail. The job runs until the target table reaches the maximum number of columns that are supported in the target database. To resolve the problem, reduce the number of columns that are selected for the target and run the job again.
-
If one or more VARCHAR or STRING columns from a source Hadoop table contains more string data than the target database column, the Copy Data from Hadoop request times out. For example, a source Hadoop table might contain a string column named myString and a target Oracle table might contain a varchar(4000) column also named myString. If data in the Hadoop myString column has a length greater than 4000, then the copy request fails.
-
When copying a Hadoop table to a database, a column name specified in the array of STRUCT in the Hadoop table is not copied to the database table. This happens because of how STRUCT is mapped to VARCHAR in Sqoop.
-
A copy from Hadoop is likely to fail if the name of a source column is also a reserved word in the target database.
-
When copying a Hadoop table to Oracle, a mixed-case schema name generates an error.
-
When copying a Hadoop table to Oracle, timestamp columns in Hadoop generate errors in Oracle. The Hive timestamp format differs from the Oracle timestamp format. To resolve this issue, change the column type in the Oracle target table from timestamp to varchar2.
-
To copy Hadoop tables to Teradata, when the source contains a double-byte character set (DBCS) such as Chinese, follow these steps:
-
Edit the default connection string to include the option
charset=utf8, as shown in this example:jdbc:teradata://TeradataHost/Database=TeradataDB,charset=utf8
To edit the configuration string, open the Configuration window , click Databases, and click
and edit the Teradata connection.
, click Databases, and click
and edit the Teradata connection.
-
Ensure that the default character type for the Teradata user is UNICODE.
-
In new Teradata tables, set , VARCHAR CHAR columns to CHARACTER SET UNICODE to accommodate wide characters.
-
Copyright © SAS Institute Inc. All Rights Reserved.