Using the Execute Business Rule Node
Overview
A business rule is a reusable object that specifies a SAS expression that filters table rows. For example, a rule might check for rows in which the value of Profits per Employee is less than Assets. Events can be triggered based on the results that are returned by the rule. A business rule can be used in one or more profiles or data jobs.
This topic describes how to use the Execute Business Rule node to apply a business rule to rows of data as they flow through a data job. This node bypasses the need to associate business rules to tasks and associate events to triggered rows.
Before you can use this node:
- Define your goals. For example, your goal might be to identify all records in a table where the profits per employee are less than the assets.
- Create a business rule that is appropriate for your goals, if one does not already exist. For an example of such a rule, see Creating a Rule that Compares Two Fields. The rule must be a row-based rule that is stored in the same repository as the current data job.
- Create a DSN connection for the source table, if one does not already exist. For more information, see Maintaining Data Connections.
The following example job is used for illustration:
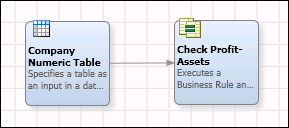
The goal of this job is to identify all records in the Company Numeric table where the profits per employee are less than the assets. The first node is a Data Source node that specifies a DSN connection to the Company Numeric table. It also specifies the fields that will be evaluated by the rule. The second node is an Execute Business Rule node that specifies a business rule that will identify all records in the Company Numeric table where the profits per employee are less than the assets.
Create and Run the Data Job
It is assumed that you know how to create and run data jobs.
- Create a data job that includes an Execute Business Rule node. The data job shown above is one example.
- Specify the data source. Begin by opening the properties dialog for the Data Source node.
- Specify a name for the node. Use any name that helps you understand the role of this node in the current job.
- Specify a DSN connection for a table that contains rows to be evaluated.
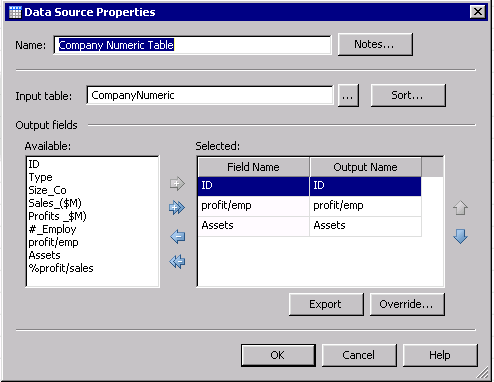
- Select the fields that you want to evaluate with the business rule. In the example job, you might select the fields shown in the next display.
- The next task is to configure the Execute Business Rule node. Begin by opening the properties dialog for the node.
- Specify a name for the node. Use any name that helps you understand the role of this node in the current job.
- Select a previously-defined business rule that is appropriate for your goals.
- Map fields from the source table to the input fields required by the selected business rule.
- Specify a Return Status Field if desired. When selected, the specified status field will contain the return value of the expression for the row. If this option is not checked, then any value that returns false will be filtered out.
- Review the configuration of the Execute Business Rule node. The next display shows one possible configuration for the example job.

- Click OK to save the configuration.
- Run the job as usual.
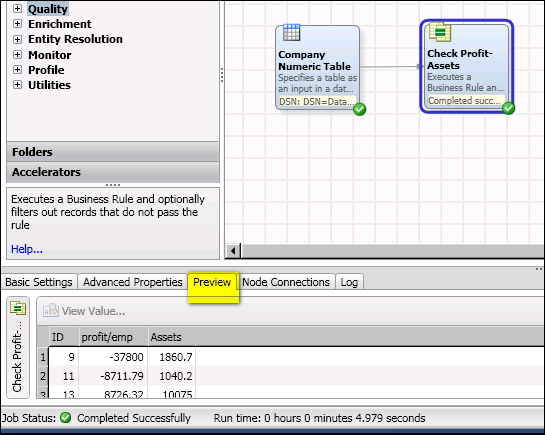
- If the job is successful, select the Execute Business Rule node, then click the Preview tab in the Details pane at the bottom of the job editor. The next display shows the rows in the Company Numeric table where the profits per employee are less than the assets.