DataFlux Data Management Studio 2.6: User Guide
You can create a data job that calls web services with a Web Service node or an HTTP Request node. For example, you can create a job that takes input from a Job Specific Data node, processes it in an HTTP Request node, and sends it to an XML Column Input node. Then, you can use the data in other DataFlux Data Management Studio processes. Perform the following tasks:
Note that you can build a similar job for the Web Service node. See also What Can I Do About Time-Out Errors in Data Jobs with the Web Service Node or the HTTP Request Node?
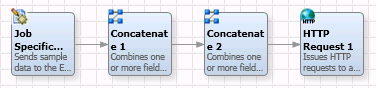
You can create a data job to create an HTTP request that processes data that you provide. The data flow for one of these jobs contains the following nodes:
The following display shows the data flow:
The Job Specific node enables you to specify the fields and values that you want to process in the job. The web service used in the job is the Google Distance Matrix, which calculates the distance between two addresses that you supply. This service requires required parameters that specify the origins and destinations expressed as latitude and longitude values that are separated with a pipe character. The two Concatenate nodes in the flow process the data from the Job Specific Data node to make it conform to this required format. The following display shows the first Concatenate node, which processes the origin data:

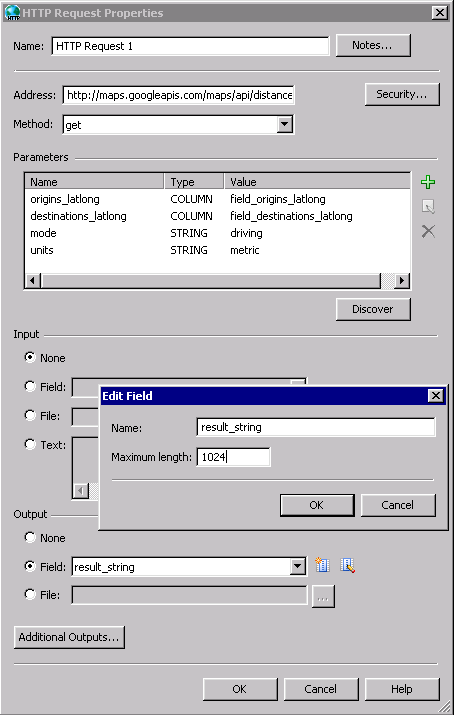
Finally, you need to configure the HTTP Request node, as shown in the following display:
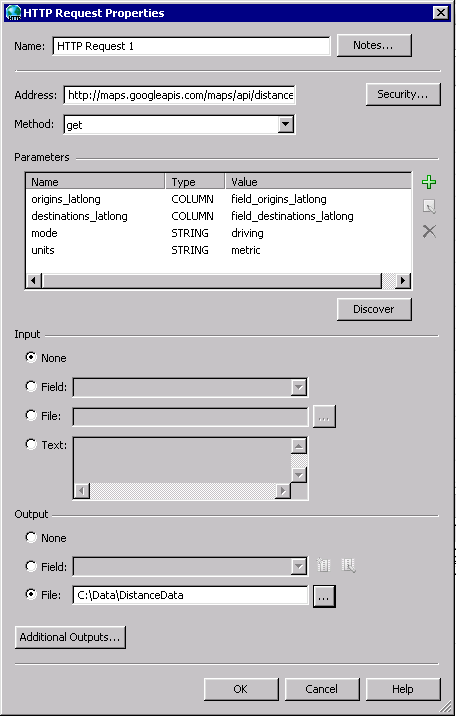
The Address field contains the URL needed to connect to the Google Address Matrix web service that is used for this job. Note that the URL contains all of the parameters needed to connect to and use the service. Follow this process to complete this field:
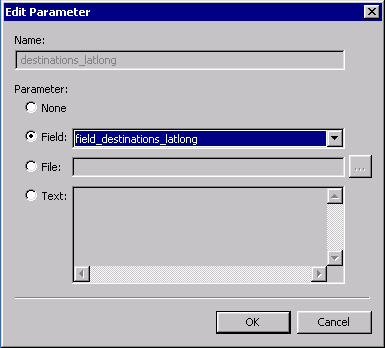
The parameter type is determined by your selection of a Field (COLUMN), a File (FILE), or Text (STRING) in the Parameter section of the dialog.
The following value is entered in the Address field for this job:
http://maps.googleapis.com/maps/api/distancematrix/xml?origins={origins_latlong}&destinations={destinations_latlong}&mode={mode}&units={units}&sensor=false
Note the following about the contents of the field:
Finally, you need to specify the text file that will contain the results of the HTTP request. The text file for this job is named DistanceData.
You must prepare the data in the file output from the HTTP Request node before you can use it in the XML Column Input node. The XML Column Input node in this job consumes the data in the form of an XML map, which you must generate from the SAS XML Mapper.
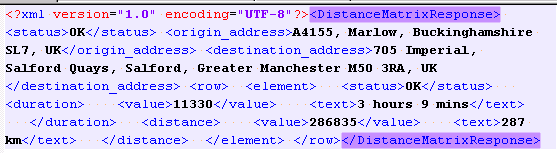
The following display shows the contents of the file output from the HTTP Request node:

Note that the lines are followed by linefeed characters. The SAS XML Mapper application cannot accept text with linefeed characters. Therefore, you need to perform the following steps:
The XML document is shown in the following display:
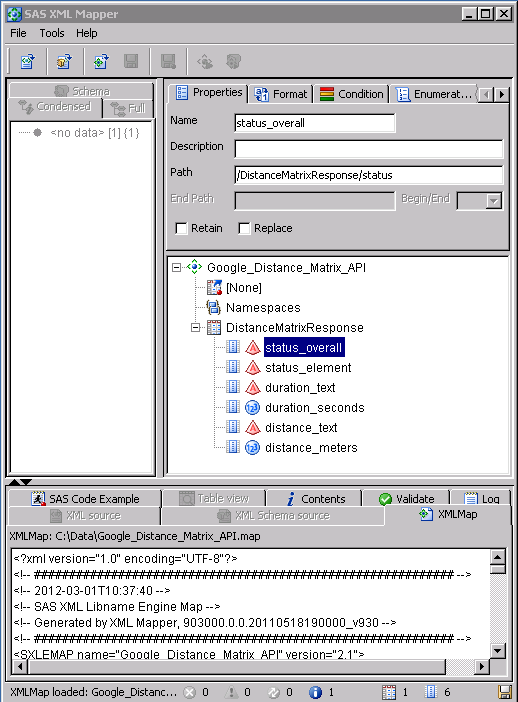
Now you can open the XML document in the SAS XML Mapper. Briefly stated, create the XML map in the XML Mapper by performing the following steps:
The following display shows a completed map in the SAS XML Mapper:
Now you can return to the data job and send the data to an XML Column Input node. First, you need to change the output from the HTTP Request node. To do this, open the HTTP Request node properties and specify request_string as the output field. Click Edit to make sure that Maximum length value is long enough to contain all of the data in a single field. This data job uses a value of 1024,.as shown in the following display:
The next step is add an XML Column Input node to the data flow after the HTTP Request node. The node should be configured as shown in the following display:
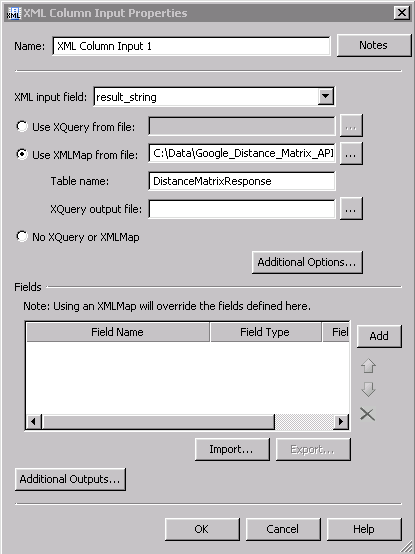
Note that you need to enter the result_string output field from the HTTP Request node into the XML Input field. You also need to add the XML map and table name from the SAS XML Mapper into the appropriate fields. Now you can preview the XML Column Input node to see the results, as shown in the following display:
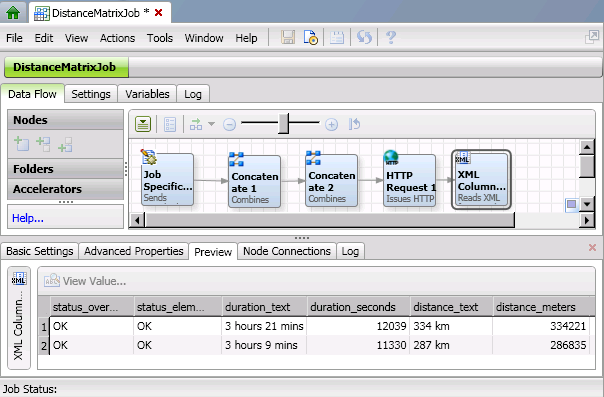
You can see that the fields that were added to the XML map are shown as columns in the Preview tab. They will be inserted into the XML Column Input node when you run and successfully complete the data job.
|
Documentation Feedback: yourturn@sas.com
|
Doc ID: dfDMStd_Task_HTTP_Req.html |