DataFlux Data Management Studio 2.5: User Guide
You can examine the entity resolution file generated in an entity resolution job. These files reflect the match code, clustering, survivor identification, and entity resolution output file settings made in the job.
![]() Note: Some entity resolution jobs use a text file as an input and add embedded field data to the Entity Resolution File Output node. When you view the entity resolution file created in such a job, select Embedded data in the Entity Resolution file in the Data sources section of the Properties tab of the entity resolution viewer.
Note: Some entity resolution jobs use a text file as an input and add embedded field data to the Entity Resolution File Output node. When you view the entity resolution file created in such a job, select Embedded data in the Entity Resolution file in the Data sources section of the Properties tab of the entity resolution viewer.
You can review the entity resolution file that is displayed at the end of an entity resolution job or you can also select a file from the Entity Resolution folder in the Folders tree. To examine the file, perform the following tasks:
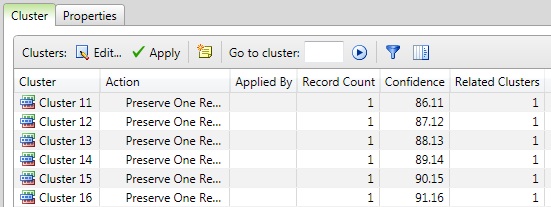
You can use the Cluster tab and the Cluster Analysis tab to examine the clusters. Perform the following steps:
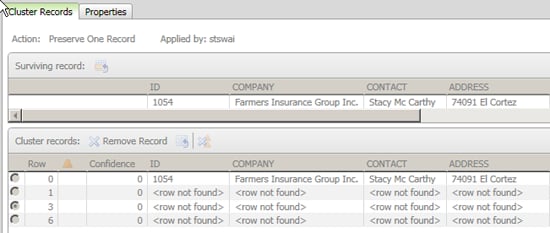
 You can double-click a resolved cluster to examine it in the Cluster Records tab.
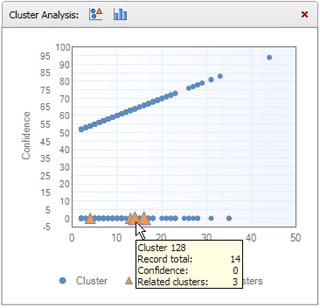
Some of the clusters in the clusters list might have related clusters. You must resolve these related records before you resolve the cluster in the list because you cannot apply changes to a cluster while it has active related records. Therefore, you must remove the related record from either the current cluster or from its related clusters before you can apply changes for the current cluster. Then, you must repeat this process for all of the related records in the current cluster.
Related clusters are created when you enable the generation of multiple match codes when you set the properties for the Match Codes node in the entity resolution job. Multiple match codes enable you to assign a source field to multiple clusters.
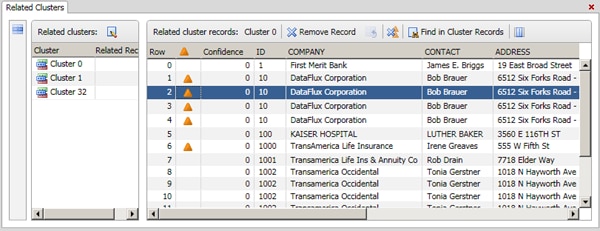
This function can be useful when the clustering algorithm cannot figure out the one best cluster to place a field. Instead, the job can generate multiple target records that can be distributed to multiple related record clusters. You can review related clusters from the Cluster tab. You can also use the Cluster Records tab in the entity resolution file to assign related records to the most appropriate clusters. Perform the following steps:
The following display shows a Related Clusters tab with a cluster selected and a record selected for resolution:
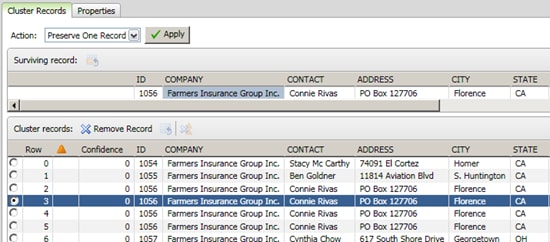
You can process cluster records on the Cluster Records tab. Perform the following steps:
|
Documentation Feedback: yourturn@sas.com
|
Doc ID: dfU_T_EntityResViewer.html |