
DataFlux Data Management Studio 2.5: User Guide
One of your first administrative tasks might be to add one or more people to the Users panel in the Business Data Administration window, so that these people can add or update terms. A default set of roles and term attributes are provided with Business Data Network software. You might want to examine these default roles and attributes, and then add or update these items as needed for your projects.
The person or persons who will maintain roles, users, and term attributes for Business Data Network must be added to the Business Data Administrators group on the Authentication Server. For more information about this group, see the DataFlux Web Studio Installation and Configuration Guide.
If you are a member of the Business Data Administrators group, and you want to maintain roles, users, or term attributes, you can begin by performing the following tasks:
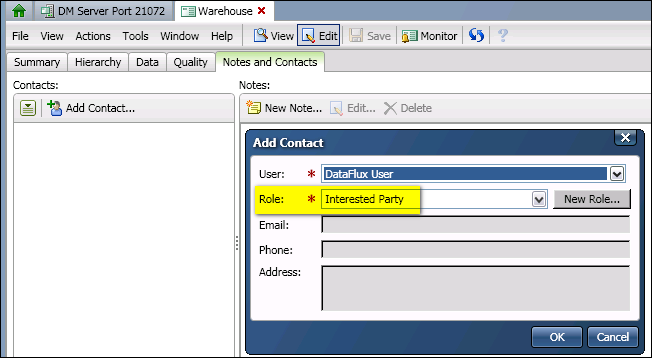
A role must be selected when a contact is added to a term. For example, in the next figure, the Interested Party role has been selected for the DataFlux User contact for the term Warehouse.
Roles help define a user's relationship to a term. A default set of roles are provided with Business Data Network. You might want to examine these default roles, and then add or update these roles as needed for your projects.
Perform the following steps to add a new role:
To edit or delete a role, right-click the role in the Roles tree on the left, and then select Edit or Delete.
In order to enable someone to add or update terms in a Business Data Network glossary, both in DataFlux Data Management Studio and DataFlux Web Studio:
If a person does not meet these criteria, they will at most have read-only access to a Business Data Network glossary.
Perform the following steps to add one or more users who should be given the ability to add and update terms in a Business Data Network glossary.
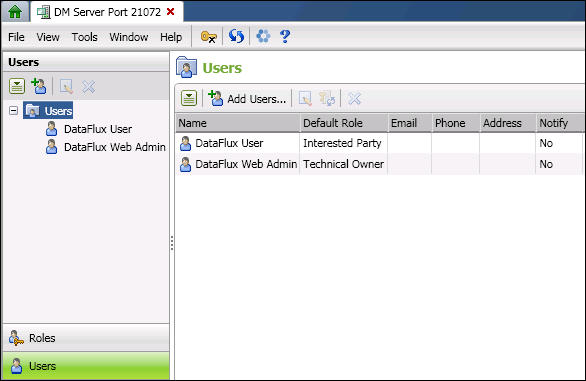
After user has been added, he or she can be selected as a contact on the Notes and Contacts tabs that are available on various windows in Business Data Network. However, the only way to add or update the email, telephone number, or postal address for a contact is to edit the user's record from the Users panel of the Business Data Administration window.
If you specify an email for a contact, he or she can be notified when email is sent to all contacts for a term from the Notes and Contacts tabs. The email must be a valid email address that is recognized by the email server on your site. Note that if there is even a single invalid user name, then none of the emails will be sent. This requirement that all user names must be valid before any emails can be sent is a property of the job.
The attributes that are defined on the Term Attributes riser are global fields that are displayed for all terms in a Business Data Network glossary. For example, the next figure shows the properties dialog for the term Warehouse.
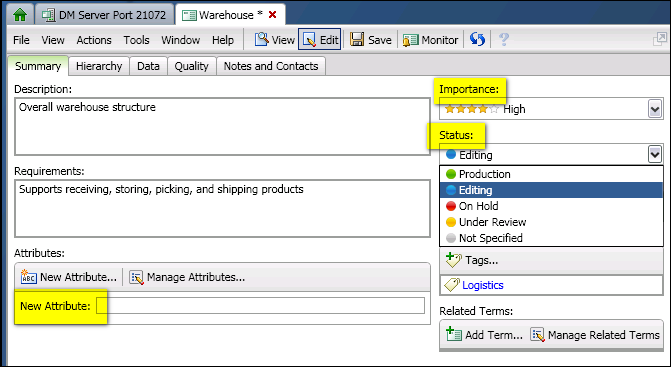
Note the default attributes Importance and Status at upper right. Note also the user-defined attribute New Attribute at lower left. All of these attributes will display for all terms in the glossary.
The Term Attributes riser contains two kinds of attributes: Standard Attributes and Common Attributes, as shown in the next figure.
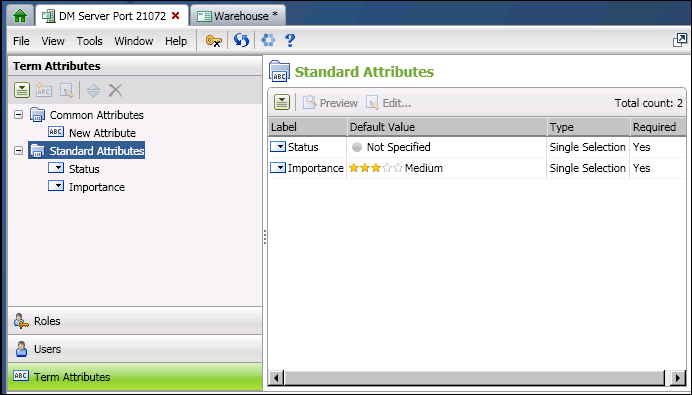
The Standard Attributes folder contains the default attributes Status and Importance. The properties of these attributes can be edited to fit your needs. You cannot add an attribute to the Standard Attributes folder, however, and you cannot delete the Status and Importance attributes.
The Common Attributes folder contains user-defined attributes, such as New Attribute in the previous figure. You might want to examine the default attributes in the Standard Attributes folder, and then add your own custom attributes in the Common Attributes folder as needed for your projects.
Perform the following steps to add a new global attribute:
To edit or delete an attribute, right-click the attribute in the Term Attributes tree on the left, and then select Edit or Delete. You can also reorder terms in the Common Attributes folder. Right-click the Common Attributes folder, and then select Reorder. Use the dialog that is displayed to reorder the attributes.
|
Documentation Feedback: yourturn@sas.com
|
Doc ID: dfDMStd_T_BDN_Role_User.html |