New SAP BW Wizard Example: Uploading External File Data to SAP Using InfoPackage Metadata
Overview
This example describes
how to use the New SAP BW wizard to complete
a type of roundtrip process for data. You do this by taking source
data from SAP BW, manipulating it in SAS, and returning it to SAP.
Here are the high-level steps.
-
Extract SAP BW metadata to SAS data sets, as described in Extract SAP BW Metadata Using the Extract from BW Wizard .
-
Use the SAP BW Register Tables wizard to select the data sources that you want to use in SAS Data Integration Studio and write metadata about those data sources to your metadata repository.
-
Return the data to SAP BW using InfoPackage metadata, as described in this procedure.
Preparation
Here are the assumptions
for this example.
-
You plan to use the New SAP BW wizard.
-
You want to add metadata for a target table to be created when a SAS Data Integration Studio job is executed.
-
The descriptive name of the new job is Order Data 1.
-
The target table that the Order Data 1 job creates has the same columns as a table that was extracted from the SAP system and registered in a current metadata repository. It is an ODS source table called /BIC/AZ_OR_ODS_00-Z_OR_ODS. This table contains factual information about customer orders.
-
Order Data 1 is to be stored in a SAS library called ORD Orders. The metadata for this library is available in a current metadata repository.
-
ODS Orders Target Lib has been assigned to the configured SAP server SAP BW SIB. (SAP BW SIB is used to execute the LIBNAME statement for the library.)
-
You log in using a user ID that gives you access to SAP BW SIB.
-
The InfoSource ZEMEA_APPLICATION_COMPONENT is available on SAP BW SIB. ZEMEA_APPLICATION_COMPONENT contains the ZPACK_3XG2B1OG4CKX0EJ4LHJ23CLZ4 InfoPackage.
-
You can access a specific external file, which is orion_orders.csv in this example. The external file destination in the InfoPackage data is the SAP application server. The scheduling data in the InfoPackage data is Immediate Update.
New SAP BW Selection Wizard
To select the wizard
so that you can enter metadata for a SAS target, from the menu bar
on the SAS Data Integration Studio desktop, select New SAP BW.
The New SAP BW wizard opens to the SAP
Server page.
SAP BW.
The New SAP BW wizard opens to the SAP
Server page.
SAP Server Page
Use this page to review
and configure settings for the SAP server and SAS library that is
used in the wizard.
SAP Server Page

Follow these steps
to configure SAP server settings.
-
Select a server from the Configured SAP Server drop-down list box.
-
Select a library from the SAP Metadata Location drop-down list box.
-
Select Next. The InfoPackage Browser page is displayed, as shown here.
InfoPackage Browser Page
Use this page to find
and select the InfoPackage to use in the wizard.
InfoPackage Browser Page
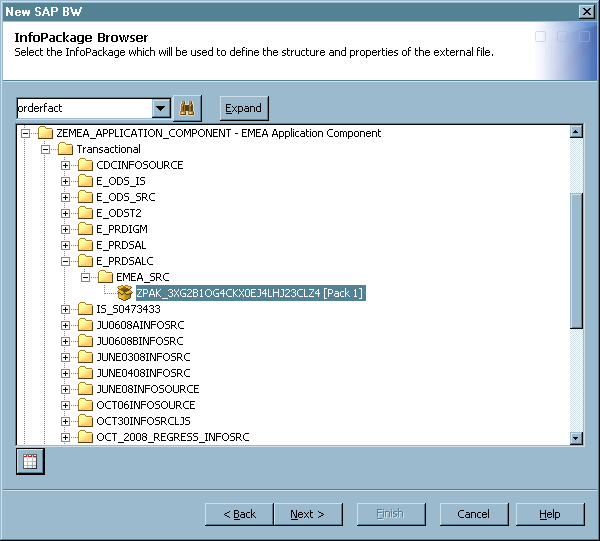
Follow these steps
to select the InfoPackage:
-
Enter a search term for the InfoPackage in the Find Text field and click Find Text.
-
Drill down in the InfoPackage tree to find and select the InfoPackage that you want..You can select the Display InfoPackage Details button or right-click and select Display InfoPackage Details to review detailed information about the InfoPackage.
-
Select Next. The External File Location page is displayed, as shown here.
General Information - External File Page
Use this page to specify
a name and folder for storing metadata about the external file.
General Information - External File Page
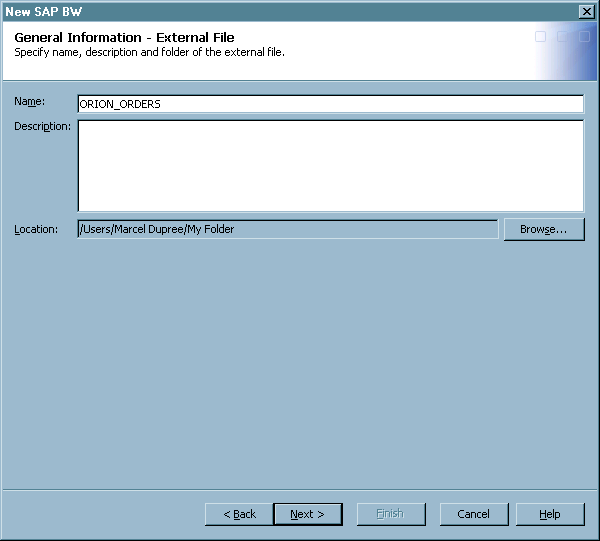
Follow these steps.
-
Specify a metadata name for the external file in the Name field.
-
Select Next.The External File Location page is displayed, as shown here.
External File Location Page
Use this page to specify
the location for the external file that you created with the wizard. For more information, see External File Location Page.
External File Location Page

Follow these steps
to specify the external file location.
-
Enter the path to the storage location for the external file that the InfoPackage metadata provided in the Filename field. The value that is in the Filename field should match the value that you defined in the InfoPackage.
-
Select Next.The General Information - Job page is displayed, as shown here.
General Information - Job Page
Use this page to specify
the name and metadata folder location for the job that you created
with the wizard.
General Information - Job Page
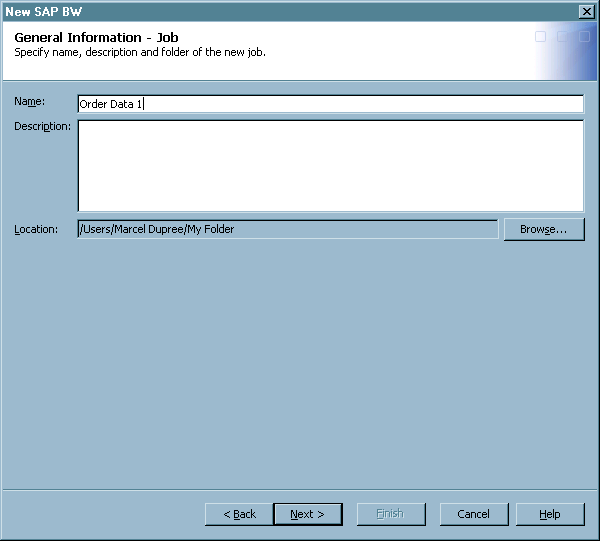
Follow these steps
to specify job settings.
-
Enter a name for the job in the Job Name field. Click Browse to change the default metadata folder location.
-
Select Next.The Wizard Finish page is displayed, as shown here.
Wizard Finish Page
Use the last page to
review the metadata that you have entered.
Wizard Finish Page
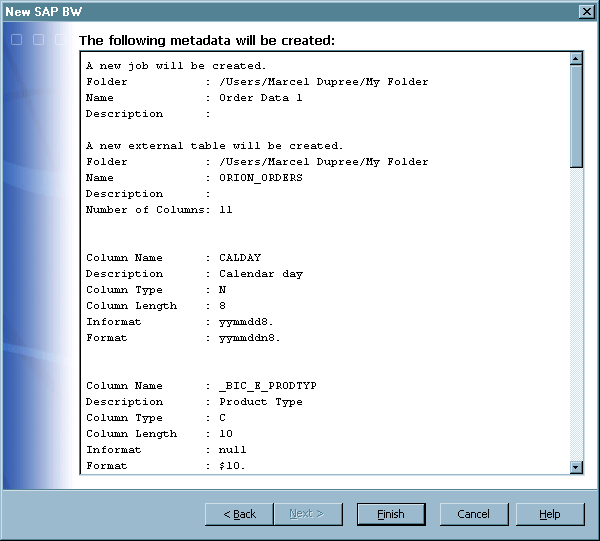
Review the text in the
metadata pane in the page. When you are satisfied that the metadata
is correct, click Finish.
Review the Job
Navigate to the job
and open it to review it in the Job Editor.
Initial Job Diagram
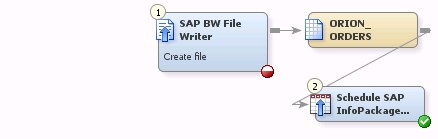
The process flow diagram
for the job that you created in the New SAP BW wizard
is displayed. The Schedule SAP InfoPackage transformation
is part of the job. The external file destination in the InfoPackage
is the SAP Application Server and the scheduling data in the InfoPackage
is Immediate Update.
Navigate to the ODS
order data source table, and place it on the diagram and connect it
to the SAP BW File Writer transform, as shown here.
Populated Job Diagram
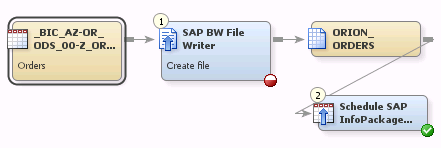
The source table was
added to the process flow diagram. Notice the red and white warning
icon in the bottom right of the SAP BW File Writer transformation.
You now need to create and verify mappings and settings before you
run the job.
Verify Mappings and Settings
Verify the mappings
between the source and target tables by right-clicking the SAP
BW File Writer transformation and selecting Properties.
Then select the Mappings tab in the Properties window,
as shown here.
SAP BW File Writer Transformation Mapping Tab
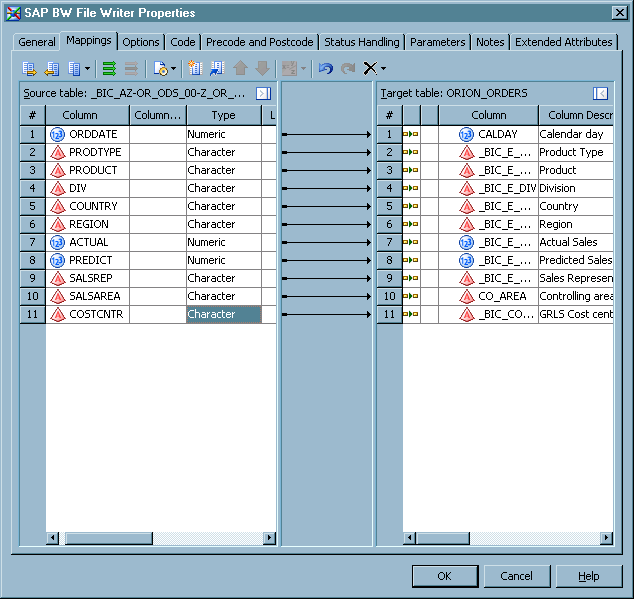
Make sure that each
column in the source table is mapped to the corresponding column in
the target table. When you have finished, click OK.
The icon in the bottom right of the SAP BW File Writer transformation
icon becomes a green check mark. Then right-click the Schedule
SAP InfoPackage transformation and select Properties.
Last, select the Options tab in the Properties window,
as shown here.
Schedule SAP InfoPackage Transformation Options Tab
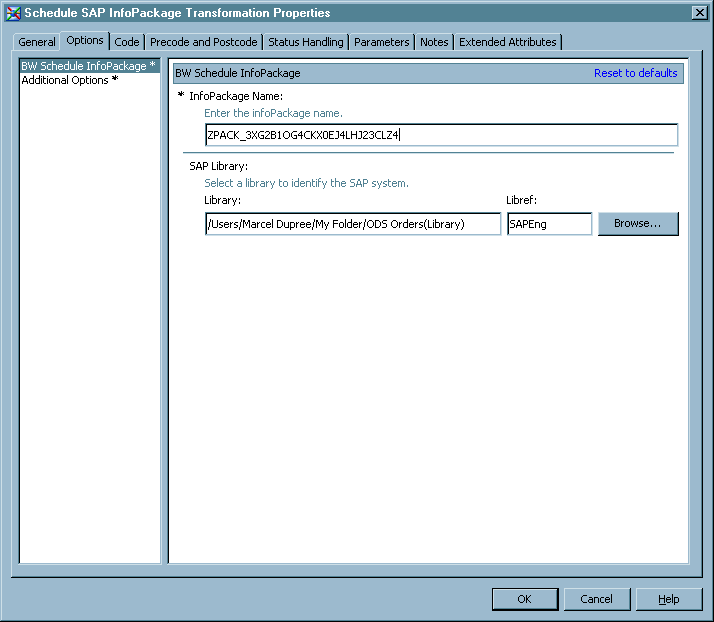
Make sure that the appropriate
values for the job are populated into the InfoPackage
Name field and the SAP Library fields. When you are satisfied
with these values, click OK. You are now
ready to run the job.
Run the Job
From the SAS
Data Integration Studio toolbar, click  . SAS Data Integration Studio generates code for the
job and submits it to the SAS Application Server for execution. Once
the job runs successfully, check the data and examine the log.
. SAS Data Integration Studio generates code for the
job and submits it to the SAS Application Server for execution. Once
the job runs successfully, check the data and examine the log.
. SAS Data Integration Studio generates code for the
job and submits it to the SAS Application Server for execution. Once
the job runs successfully, check the data and examine the log.
Examine the Data and the Log
It is a good practice
to right-click the .csv target table and select Open to
review the output of the job. You should also examine the log that
the job generated. If you scheduled such a job with the Schedule SAP
InfoPackage transformation, the next to last entry in the log should
confirm that a REQUESTID was generated for the load. Also, the final
entry in the log indicates that you should check the status of the
data load by passing the REQUESTID to an SAP administrator. Of course,
other scenarios generate different log messages.
Copyright © SAS Institute Inc. All Rights Reserved.