Create a Decision Tree
From the toolbar, click the  icon to create a decision tree. From the Data pane, drag and drop the Age at Death variable into
the Response field in the right pane. In
the Data pane, select Diastolic, Weight, Height, Cholesterol, Age
CHD Diagnosed, Sex, and Cause
of Death. Drag and drop these items into the model pane. The decision tree automatically updates.
icon to create a decision tree. From the Data pane, drag and drop the Age at Death variable into
the Response field in the right pane. In
the Data pane, select Diastolic, Weight, Height, Cholesterol, Age
CHD Diagnosed, Sex, and Cause
of Death. Drag and drop these items into the model pane. The decision tree automatically updates.

Click the  icon in the upper right of the model pane. In the details table, select
the Node Rules tab. Notice that the only predictors used were Age CHD Diagnosed and Cause
of Death. You can adjust the decision tree properties to include more predictors in the model.
icon in the upper right of the model pane. In the details table, select
the Node Rules tab. Notice that the only predictors used were Age CHD Diagnosed and Cause
of Death. You can adjust the decision tree properties to include more predictors in the model.
icon in the upper right of the model pane. In the details table, select
the Node Rules tab. Notice that the only predictors used were Age CHD Diagnosed and Cause
of Death. You can adjust the decision tree properties to include more predictors in the model.
Click the Properties tab
in the right pane. The most obvious property to change is Reuse
predictors. When you deselect this property, each predictor variable is used in at most one split. However, assume that reusing predictors creates the
best split in each node for this example. This might not always be the case for your data.
Instead, set the value
of Maximum levels to
10. The decision tree now has a maximum depth of 10 levels, instead of the default 6.
On the Node Rules tab of the details table, every predictor is used at least once.
Set the value of Maximum
branches to
4. This allows each non-leaf node to split into at most four new nodes.
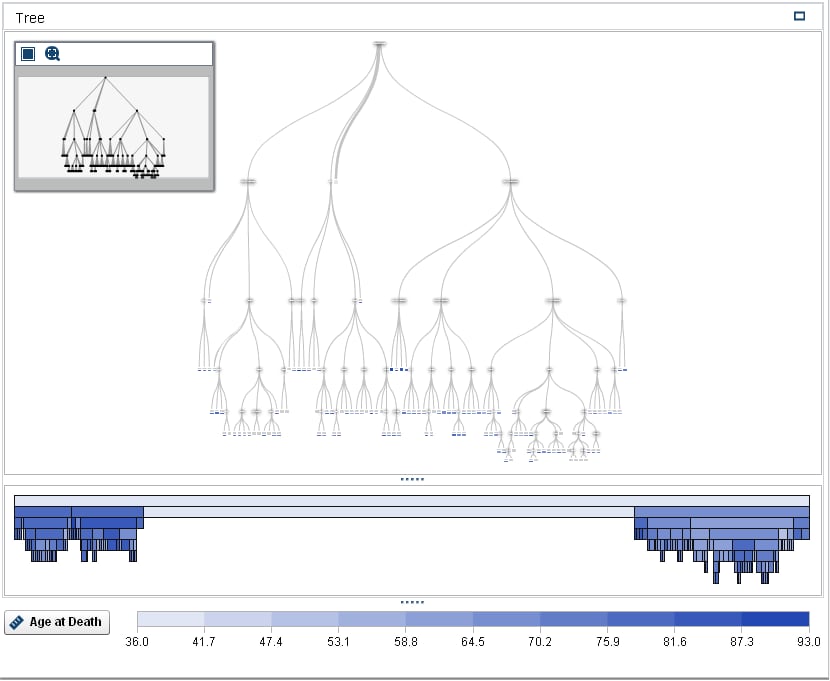
To view the Tree
Overview window, click the  icon in the upper right corner of the exploration workspace. In the Tree Overview window, click
the
icon in the upper right corner of the exploration workspace. In the Tree Overview window, click
the  icon to fit the entire decision tree into the Tree
Overview window.
icon to fit the entire decision tree into the Tree
Overview window.
icon in the upper right corner of the exploration workspace. In the Tree Overview window, click
the icon to fit the entire decision tree into the Tree
Overview window.
In the Tree
Overview window, right-click, and select Derive
a Leaf ID Variable. The default name for this variable
is Leaf ID (1). In the New Calculated
Item window, click OK. The Leaf
ID (1) variable appears in the Data pane.
Save the project.
Copyright © SAS Institute Inc. All rights reserved.