Creating Events
Why Use Events?
Events
specify conditions that must be met before a step in the flow can
take place. You can use SAS Visual Data Builder to create
two types of events.
-
Time events are evaluated based on a specified time being reached.Note: You can specify multiple time events. However, the Operating System Services Scheduler (the default scheduler) can use only one of the time events.
-
File events are evaluated based on the state of a specified file.
You can create file
events if your deployment includes a scheduling server that supports
them, and the flow is deployed to that scheduling server. Time and
file events can be used as triggers (conditions that must be met in
order to run a flow on the scheduling server).
Create a Time Event
You can create a time
event and use it as a trigger.
To create a time event:
-
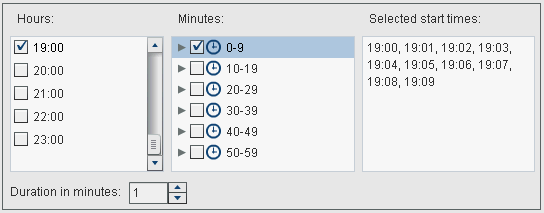
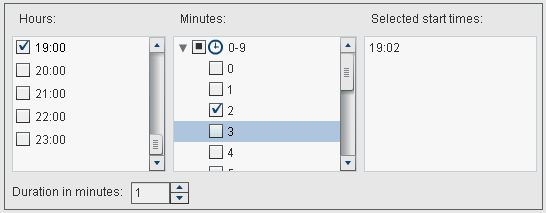
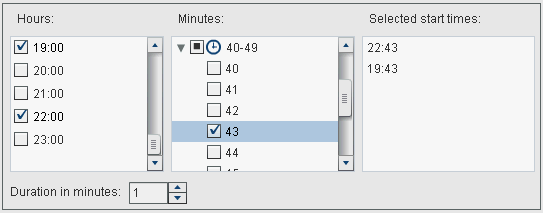
Specify the details of when the time event should repeat. The specific fields that are available depend on the recurrence interval that you select.If you select Hourly, then the time is calculated from hour zero on a 24-hour clock. For example, if you leave Interval hour set to 1, then the data query runs at hour zero (midnight), and runs each hour. If you set Interval hour to 2, then the data query runs every other hour, and the Offset hour specifies whether to run on the even hours (when set to 0) or on the odd hours (when set to 1). In this case, the Offset hour specifies the offset from hour zero (midnight).If the recurrence interval requires you to select start times, then use the Hours and Minutes check boxes to select the times. The Minutes area contains groupings of 10-minute intervals. Selecting a check box for a minute grouping selects all of the minutes in that grouping.TipThe following display is available after selecting More than once and then Daily on the New Time Event window.To select individual minutes, expand the grouping.If you select multiple values for Hours, then all of the selections for Minutes apply to all of the selected values. For example, if you select 19:00 (07:00 PM) and 22:00 (10:00 PM) for Hours, and 43 for Minutes, then the time event is scheduled for 19:43 and 22:43.
-
The Duration in minutes field is used to specify the maximum number of minutes after the specified time has been reached that the dependency is kept in an open state. This value is used when a job has multiple dependencies. It specifies a window of time in which the time event remains open so that other events can also be met.For example, a query is specified to run only if a file event and a time event are both met. The time event has a value for Duration in minutes of 10. When the time specified for the time event is reached, the query runs if the file event is met at any time up to 10 minutes later.
Create a File Event
You can create a file
event and use it as a trigger. The file event can check for various
file conditions, such as its existence, size, or age.
Note: Not all scheduling servers
support file events. Platform Suite for SAS servers do support file
events. The New File Event button that is
used to create a file event is available only when the scheduling
server supports file events.
To create a file event:
Copyright © SAS Institute Inc. All rights reserved.