Data Input, Collection, and Analysis
Block Data Storage
Eight blocks can accumulate data and store it as a data model object: the Bucket, Dataset Writer, Number Holder, Probe, Queue Stats Collector, Resource Stats Collector, Server Stats Collector, and Stats Collector blocks. For more information about the functionality of these blocks and the types of information they can collect, see Appendix A: Templates. A data model from a particular data collection block can be accessed by other blocks via the OutData or OutCollected port. For example, you can connect a plot or table block to the OutData port of a Queue Stats Collector block to visually display the queue statistics (such as average waiting time) while the simulation model is running.
At the end of a run, you can save the contents of a data model from any data collection block as a SAS data set or as a JMP
table. Furthermore, dedicated Boolean ports enable you to collect event-driven data. For example, you can save the contents
of a data model object at any point during a simulation run by connecting to the InData port on a Dataset Writer block. The
data saving operation is triggered by a Boolean signal that is sent to the InSaveNow port on a Dataset Writer block from another
block in the model. See the section Using the Dataset Writer Block to Save Data during a Run in Appendix E: Examples of Simulation Studio Models, for an example that uses the Dataset Writer block to save data during a run. Some of the data collection blocks, such as
the Number Holder, Bucket, Probe, and Stats Collector, also have a data clearing port. When a true Boolean signal is received at the data clearing port, all data collected by the block up to that time during the simulation
run are cleared. The data clearing port facilitates collecting and saving data that correspond to specific periods during
the simulation run.
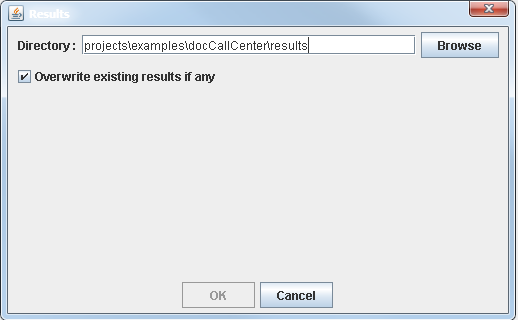
Simulation Studio saves the data that are collected by blocks on a project basis and uses a hierarchical approach to data storage. For each project, you can specify the root directory name for any data collection results by selecting Results from the project pop-up menu in the Project Explorer window. Selecting Results opens the Results dialog box, where you enter the name of the root directory to be used for storing model execution results. See Figure 12.2.
Figure 12.2: Results Dialog Box
You can supply the filename associated with an individual block’s data storage by using the individual block’s Block Properties
dialog box. If you do not provide a filename, a default filename is generated automatically. To store any results, Simulation
Studio creates a hierarchical directory structure that is based on the hierarchical structure of the model. This structure
reflects any nesting of blocks due to the use of compound blocks.
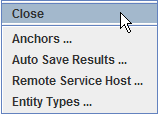
You can also collect data by selecting Auto Save Results in the model pop-up menu in the Project Explorer window. (See Figure 12.3.)
Figure 12.3: Model Menu
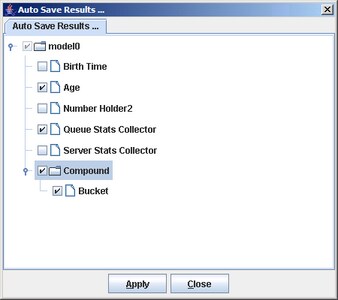
All blocks that are capable of collecting and saving data provide an option to automatically save any collected data at the end of each simulation run. This option is usually set in the Block Properties dialog box for each individual block. If you have many blocks that are collecting data in your model or the collection blocks are nested in compound blocks, it might take a considerable amount of effort to open all the individual dialog boxes and make the appropriate selections. Using a hierarchical format, the Auto Save Results dialog box displays all the blocks in the model that have data collection capabilities. (See Figure 12.4.) In the Auto Save Results dialog box, you can set the automatic save option for any of these blocks by selecting its corresponding check box without having to open the individual block dialog boxes.
Figure 12.4: Auto Save Results Dialog Box