Blocks
Block Ranking
Some blocks in Simulation Studio schedule events in the application’s event queue. For example, an Entity Generator block schedules when to generate its next entity, and a Server block schedules when service will be completed for an entity that it is holding. Events are placed in the event queue based on the time the event is scheduled to occur. It is possible for different blocks to schedule events that occur at exactly the same simulation time, resulting in an event scheduling tie.
If an event that is put in the event queue has the same scheduled time as an event already in the event queue, the relative order in which those events actually occur is unpredictable, although reproducible. To address this potential event timing issue, some blocks provide a RankValue property or factor. The RankValue property of a block is an integer value that can be used to resolve ties for events that are scheduled in the application’s event queue. For events that are scheduled to occur at the same simulation time, the event that has a higher rank value has precedence over an event that has a lower rank value. You can set the RankValue property of a specific block in your model at run time by including it as a factor in an Experiment window and assigning the desired value in the Experiment window. For information about experiments and factors, see Chapter 5: Experiments.
The rankable blocks, which support a RankValue property, include Delay, Entity Generator, Queue, Server, Stopper, and Resource Scheduler. Most blocks have a default rank value of 0. However, the Resource Scheduler block has a default rank value equal to the Java programming language value Integer.MAX_VALUE so that it has the highest priority available.
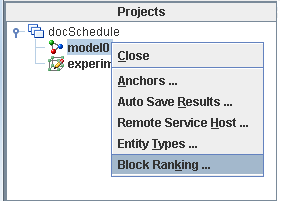
You can also use the Block Ranking dialog box to set the rank value for a block. You open the Block Ranking dialog box for a model by right-clicking the model name in the project tree and selecting Block Ranking, as shown in Figure 6.5.
Figure 6.5: Block Ranking Option on the Model Menu
The left side of the Block Ranking dialog box (shown in Figure 6.6) displays a hierarchical check-box tree that includes blocks that have an adjustable rank value in the current model. For each block in the model that has an adjustable rank value, there is a horizontal bar that represents the current relative rank value. Initially, all blocks in the model have the same rank value, unless there is a Resource Scheduler block. By default, a Resource Scheduler block has a higher rank value than any other block in the model. The horizontal bars in the Block Ranking dialog box do not show the exact value of the rank for each block, but rather they show the rank value of a block relative to the other blocks in the model.
To change the rank value of a single block, you can drag the end of the bar representing the rank value to the right (to increase the rank) or to the left (to decrease the rank). If you select the check box next to the block name in the check-box tree, the bar representing the rank value is highlighted. You can still drag the bar to set the rank. Also, you can right-click in either the project tree or the area with the horizontal bars to access a pop-up menu with options for the selected block. If you select Set Rank Value from the pop-up menu, then the Set Rank Value dialog box is displayed. You can use the Rank Value field in the Set Rank Value dialog box to change the current absolute rank value of the selected block. Note that the Rank Value field in the Set Rank Value dialog box corresponds to the RankValue factor for the block. If you set the RankValue factor in the Experiment window for the project, then that value overrides the value in the Rank Value field in the Set Rank Value dialog box at run time.
The pop-up menu for a selected block also includes options to lock or unlock the rank value for the selected block. If you select the Lock option, then the rank value for the selected block is locked and cannot be adjusted. The color of the horizontal bar for the block changes from blue to red. You use the Unlock option to enable editing of the rank value for the selected block. You can select multiple blocks in the check-box tree and lock or unlock the rank value for all selected blocks simultaneously. The Unlocked and Locked sections at the top of the Block Ranking dialog box display tick marks for the rank values of all selected blocks. You can also use the Set Rank Value option to set the rank value for all selected blocks simultaneously.
Figure 6.6 shows the Block Ranking dialog box for the docSchedule project in the examples directory under your Simulation Studio installation directory (see the section Extending the Banking System Model for a description of the docSchedule example). In this example, three blocks are selected. The Unlocked and Locked sections show the rank values of the selected blocks. The blocks that are labeled Arriving Customers and Create Teller have
their rank values locked. The Resource Scheduler block has the highest rank value; the other blocks have the same rank value.
Figure 6.6: Block Ranking Dialog Box
