Experiments
You can run an experiment with only one design point and only the default execution control parameters. In fact, this is often the case when you are first building, debugging, and validating your model. However, after you have confidence in your simulation model and you want to use it for investigating the process you are trying to model, automating the manipulation of block parameters and running the corresponding simulations becomes very important and useful.
After you have determined what factors and responses you want to include in your experiment, the next step is to determine how many design points you need in your experiment and what values are assigned to the individual cells in your design matrix. The factors you are manipulating, the number of levels in each of the factors, the goals of the experiment, and so on, all contribute in determining the number of design points and the contents of the individual cells in your design matrix. Options are available in the Experiment window pop-up menu to add (and delete) design points to the design matrix. You can manually create new rows in the matrix and then edit the individual cells to enter the desired parameter or factor values.
If you are interested in an automated approach to designing your experiment and possibly developing a metamodel for your simulation model, Simulation Studio provides a link to the JMP design of experiments capabilities. To access this functionality, select Make Design from the Experiment window pop-up menu. The details about using JMP software to populate your design matrix and create a metamodel for your simulation model are discussed in Appendix C: Design of Experiments.
If your experiment contains a large number of factors or responses, then you might need to scroll and possibly expand the collapsed columns in the Experiment window to see the desired factor or response value. As an alternative, the Experiment window provides a design point view that organizes the factors and responses in rows rather than columns, thereby making it easier to access factor and response values.
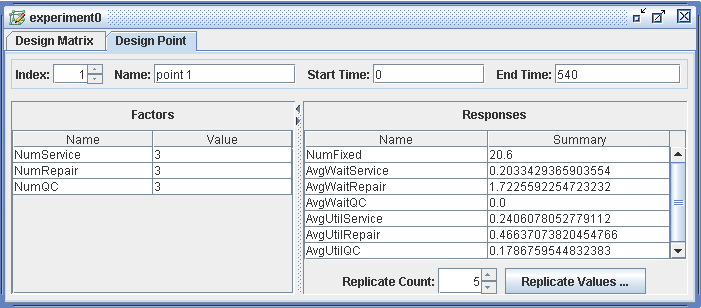
To view a design point, select Design Point View from the Experiment window pop-up menu. A sample design point view is shown in Figure 5.14. This view enables you to edit the parameters for one design point at a time. You can switch the displayed design point by using the Index field. You can use the Value column in the Factors area of the dialog box to change factor values. After a design point is run, the summary is displayed for each response (by default, the mean) over all replications in the Responses area. You can view individual replicate responses by clicking Replicate Values.