Specifying Dependencies
Overview of Dependencies
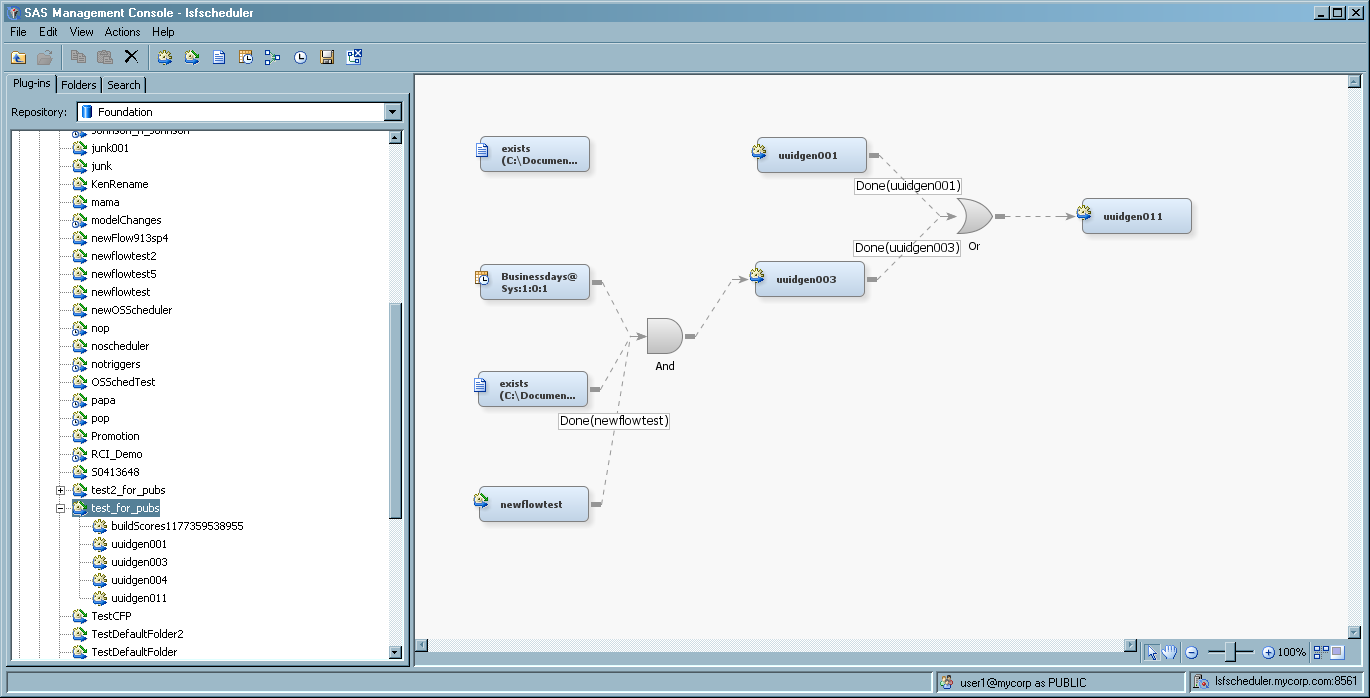
Using the Visual Flow Editor
After you have selected the
jobs to be included in a flow, you can use the visual editor to graphically
display the flow. The visual editor displays the dependencies and
relationships between the jobs, enabling you to better understand
the structure of complex flows. You can also add jobs and gate nodes
to the flow.
-
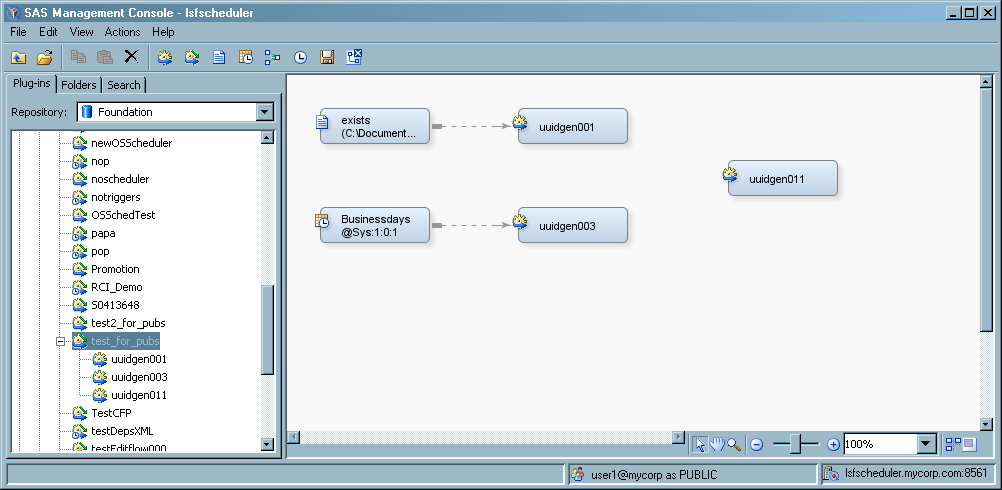
In the navigation area, select a defined flow and select Actions
 Edit Flow. The flow is displayed
graphically in the display area.
The dashed lines identify the relationship between a job and a dependency. You can select and move any element in the window. To connect elements in the window, move the cursor to an open end of the element and drag the line to another element. Inputs are on the left side of an element and outputs are on the right side.
Edit Flow. The flow is displayed
graphically in the display area.
The dashed lines identify the relationship between a job and a dependency. You can select and move any element in the window. To connect elements in the window, move the cursor to an open end of the element and drag the line to another element. Inputs are on the left side of an element and outputs are on the right side. -
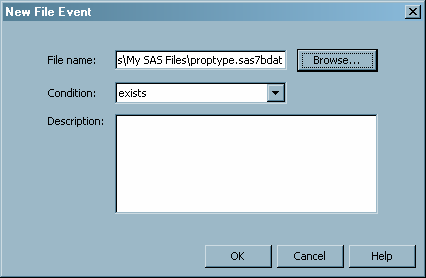
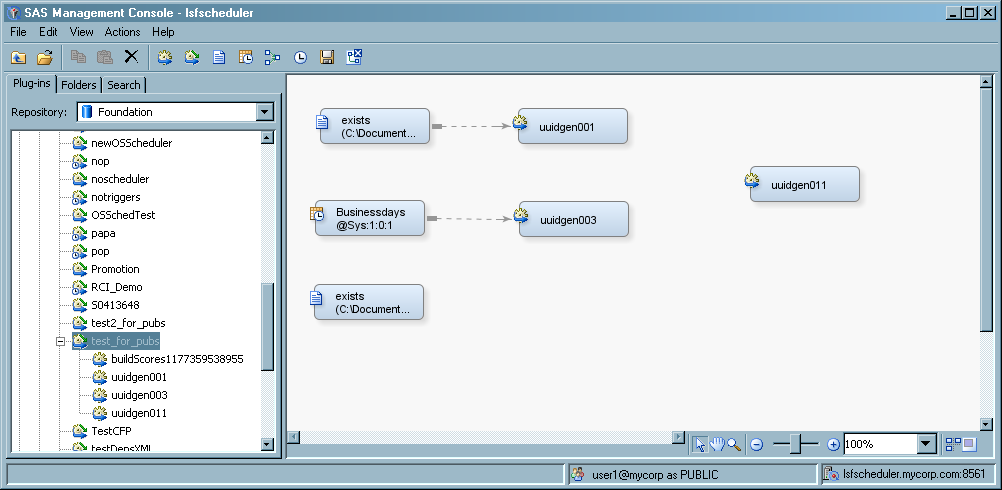
Add a file event, a time event, a deployed job, or a subflow to the flow by selecting the appropriate choice from the Actions menu, the toolbar, or the context menu. When file events and time events are added, they are not associated as a dependency with any job. You must incorporate the event into the flow in order for the event to function.
-
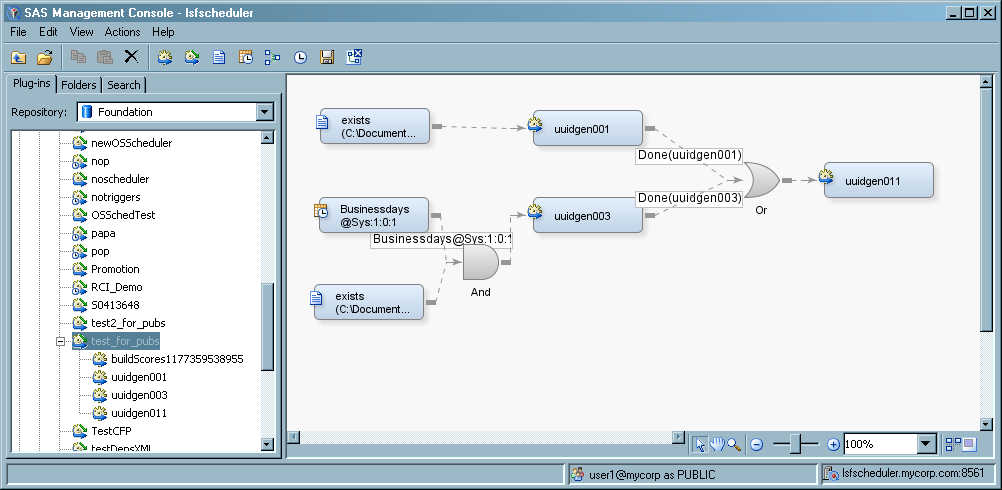
Add a gate node to the flow by selecting ActionsAdd Gate. The Add
a Gate Node dialog box appears. A gate node specifies
a condition where a job runs when either one or more specified conditions
occur or all specified conditions occur. Select the type of gate that
you want to use and click OK. The node appears
in the editor, but is not identified with any jobs.
-
To specify the input for a gate, move the cursor to the open end of a job or event and drag the dashed line to the input for the gate. When you connect a job to a gate, the New Job Event dialog box appears, where you can specify the condition for the event.
-
Add a subflow by selecting ActionsAdd Subflow. The Add Subflow dialog
box appears. Select a flow that you want to include as a subflow in
your flow and click OK. The subflow appears in the editor as a job
event. You can specify the subflow as a job event dependency for a
job in the flow or add it as an input for a gate node.