The ISHIKAWA Procedure
Tutorial
Note: See Airline Data in the SAS/QC Sample Library.
The following example is used throughout the ISHIKAWA chapters. Later examples illustrate how to add to and modify this diagram. If you are not familiar with the ISHIKAWA procedure, you may want to complete this tutorial before proceeding to Details of the ISHIKAWA Environment. In this tutorial you will learn to create and save a simple Ishikawa diagram.
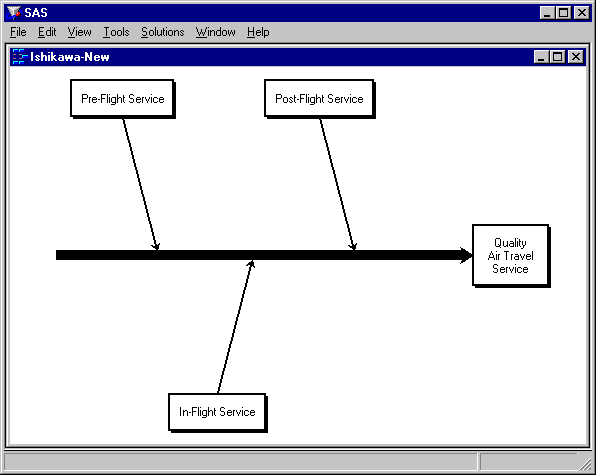
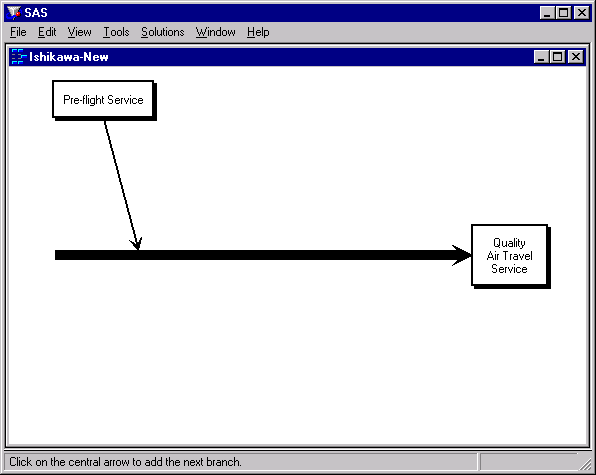
A task force is studying ways to improve the quality of passenger service for a major airline. After a preliminary discussion, the team concludes that three major areas should be considered: pre-flight service, in-flight service, and post-flight service. This result is to be displayed with the following preliminary Ishikawa diagram:
Figure 8.3: Preliminary Ishikawa Diagram
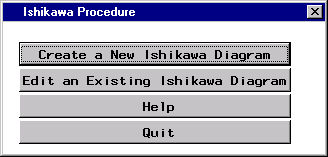
1. To begin using the ISHIKAWA environment, submit the following SAS statements:
proc ishikawa;
run;
An initial menu appears on your display, as follows:
Figure 8.4: Initial Menu
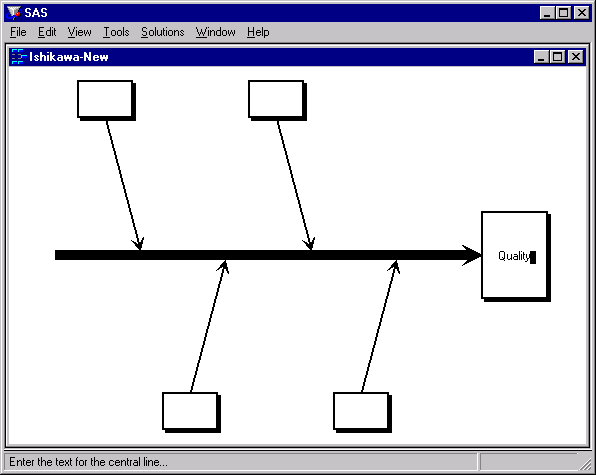
2. Select to open a window containing a template for a new Ishikawa diagram.
Figure 8.5: Starting a New Ishikawa Diagram

The ISHIKAWA environment guides you through the first steps of the diagramming process by prompting you to enter the text for the central line and then the upper left branch. During each step, a message indicating the action required is displayed in the message area for this window. Once you have completed these preliminary steps, you can proceed in any order you want.
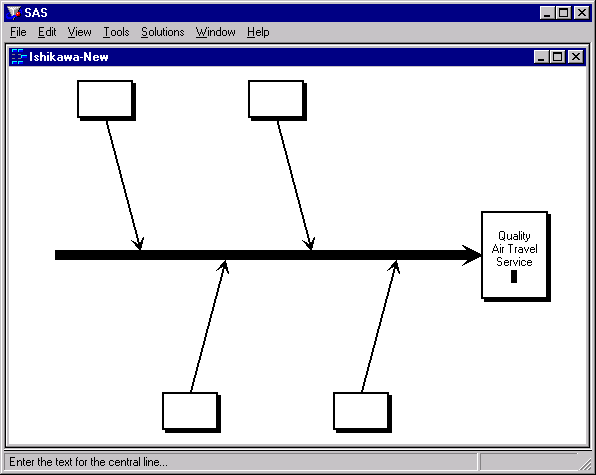
3. Initially, the text cursor is positioned inside the box for the trunk. A message is displayed directing you to enter the first line of text for the trunk. Type the word Quality.[19]
Figure 8.6: Labeling the Trunk
Note that the text is placed relative to the text cursor. You can correct mistakes by using any of the keyboard editing keys
or cursor navigation keys (for instance, Back space and  ).
).
4. Advance to the next line by pressing Return. Now complete the label by entering Air Travel and Service on separate lines.
Figure 8.7: Labeling the Trunk (continued)
5. To terminate text entry, press Return a second time. The ISHIKAWA environment automatically moves the cursor to the upper left branch. If you made a mistake labeling the trunk, continue with the example. You cannot return to the trunk until you have finished the branch.
Figure 8.8: Labeling the First Branch

6. Enter the label Pre-Flight Service. Press Return twice to terminate text entry for this branch.[20] Your window should now look like this:
Figure 8.9: Completed Branch Label
Note that when you finish entering text for the upper left branch, the other branches are deleted. These were temporarily displayed as visual cues, and now it is up to you to decide where to add the remaining branches.
7. To add the branch labeled In-Flight Service to the lower half of the diagram, position the cursor slightly below the point where you want the branch to attach to the trunk and click the mouse button. The branch appears with the text cursor centered inside the box. Enter the first line of text.
Figure 8.10: Adding a New Branch
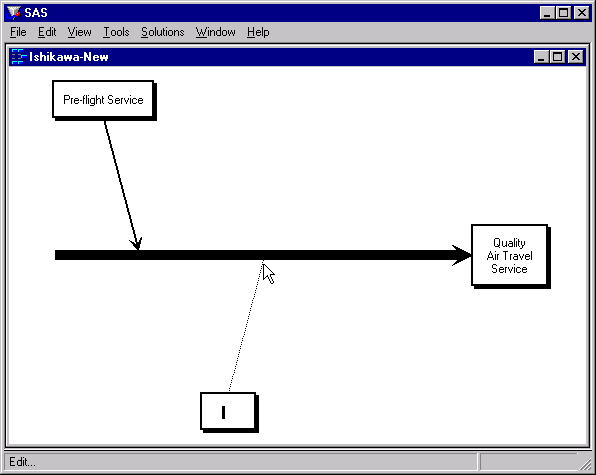
If your branch is not positioned where you want it, move the cursor to the appropriate position along the trunk and click. Each time you click, the branch is moved to the new location.
If, on the other hand, the branch is not drawn at all, the cursor was probably too far away from the trunk to be recognized. Move the cursor closer to the trunk and try again.
Enter the label In-Flight Service and press Return twice to terminate text entry.
8. Next add the branch Post-Flight Service to the upper half of the diagram. Position the cursor so that it is just above the point where you want the branch to attach to the trunk and click.
Figure 8.11: Adding the Last Branch
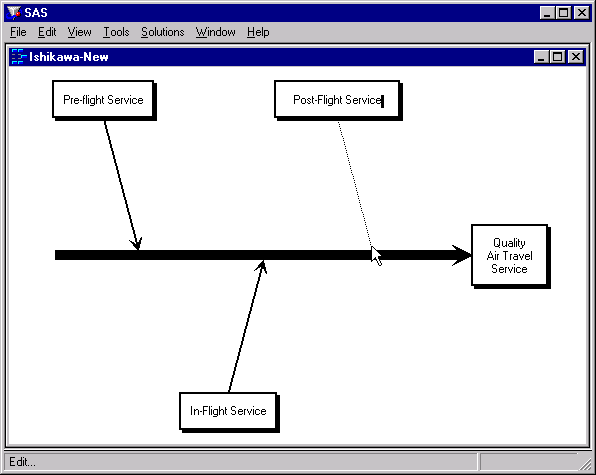
9. Press Return twice to terminate text entry.
Congratulations. You have just completed your first Ishikawa diagram using the ISHIKAWA procedure. In the process you learned to add branches to a diagram using context-sensitive mouse clicks. Future examples will illustrate other context sensitive areas, tools, and popup menus.
The examples that follow will, for the most part, expand on this diagram. To save the diagram, select →→ from the command bar. Use SASUSER for the library name and AIRLINE for the data set name. Then select .
To leave the ISHIKAWA environment and return to the SAS Display Manager, select → from the command bar.