An Ishikawa diagram is said to be balanced if the sub-arrows attached to each arrow are equally spaced.
To balance the immediate descendants of an arrow and all its descendants, proceed as follows:
-
Move the cursor over the arrow head.
-
Activate the popup menu using the right mouse button.
-
Select .
To balance only the immediate descendants of an arrow, select from the popup menu for the arrow tail.
You can restore the arrows to their original positions by doing the following:
-
Activate the background popup menu using the right mouse button.
-
Select .
The ISHIKAWA environment provides three alternative methods for balancing arrows. Select one of the following choices from the →→→menu:
-
maintains the order and directions of the sub-arrows but repositions them so they are evenly spaced.
-
maintains the ordering of the arrows but repositions adjacent arrows so that they appear on opposite sides. This is the default.
-
maintains the side on which the sub-arrows are attached then spaces each side of the arrow independently.
Consider the following unbalanced diagram:

To balance only the stems of the branch labeled Branch A, move the cursor over the arrow head and press the right mouse button.
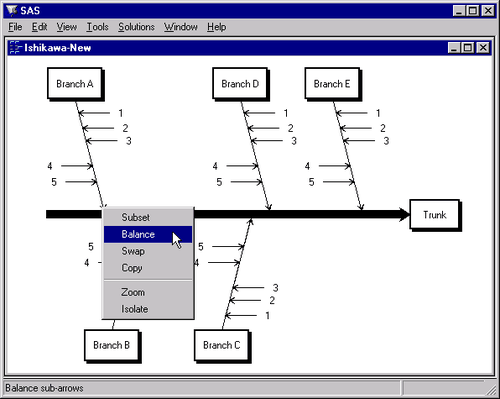
Select from the arrow head popup menu.

Note that since the stems are without leaves, selecting either the head or the tail has the same result.
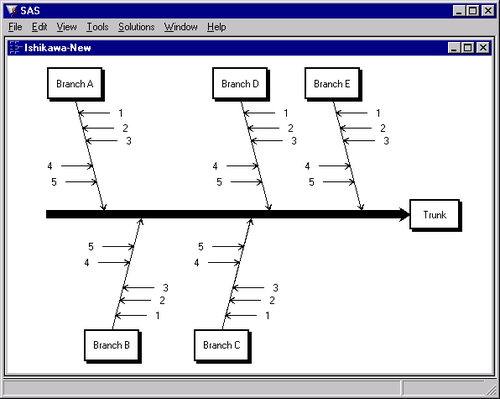
To balance only the five major branches in the preceding diagram without affecting their stems, move the cursor to the tail end of the trunk and select from the popup menu.
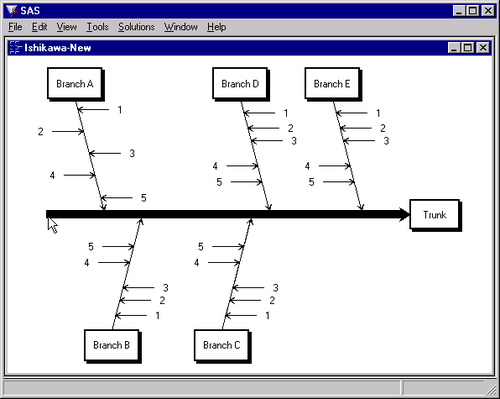
To balance the entire diagram (from head to tail, so to speak), move the cursor to the head of the trunk and select from the popup menu.
Note that the balancing method used here not only changes the spacing of the stems but reflects them as needed to achieve a balanced appearance. You can control this by specifying a balancing method, as illustrated by the next example.
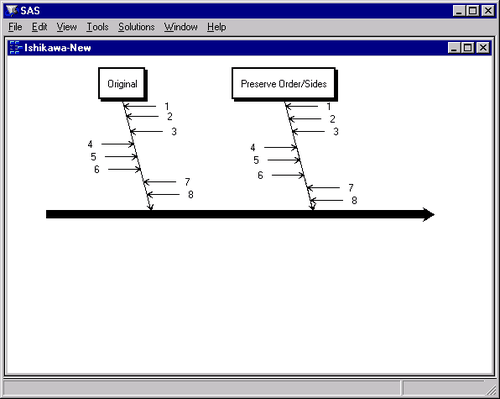
The following diagram displays an unbalanced branch and a copy of that branch after it was balanced using the balancing method:
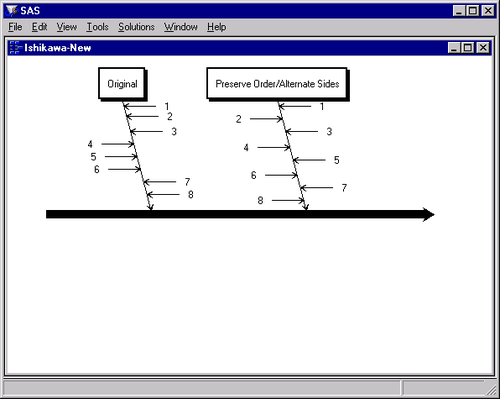
Note that the stems remain in order (1-8) from tail to head, but they now alternate evenly across both sides of the branch. This is the default method used for balancing arrows.
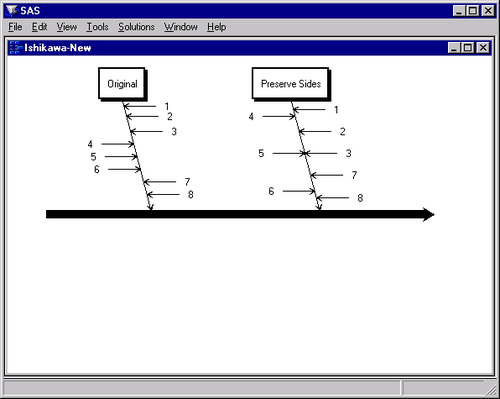
The following diagram displays an unbalanced branch and a copy of that branch after it was balanced using the method:
Note that stems 4-6 remain on the left, stems 1-3 and 7-8 remain on the right, and the order from tail to head is still 1-8. However, the stems are now spaced uniformly.
The following diagram displays an unbalanced branch and a copy of that branch after it was balanced using the balancing method:
Note that the stems on the left (4-6) are spaced uniformly, and the stems on the right (1-3 and 7-8) are spaced uniformly. The two sides are spaced independently of each other.